


Procedure to run a .NET application made of two services, watch them in the Aspire dashboard with logs, traces and metrics, and add a cache in a container by changing two lines. Everything runs on the computer: no cloud account needed.
Required: .NET 10 on the computer, a browser, and Docker Desktop (or Podman) from step nine onwards. Duration: about fifteen minutes. Cost: none.
The dashboard is translated into twelve languages and follows the browser's. The screenshots here are in English: command names are reported as they appear on screen.
Prepare the application
1. Install the command-line interface
dotnet tool install --global aspire.cliIf it is already installed, dotnet tool update --global aspire.cli. Check the version:
aspire --version13.6.4+c89352703f78ae46de90fbf751ed8b52b77b89bf2. Create the application
aspire new aspire-starter --name HelloAspire --suppress-agent-initThe command asks Use *.dev.localhost URLs [y/N]:; pressing Enter answers no, and the services stay on localhost with one port each, as in the screenshots below.
Searching for available project template versions...
🧊 Getting templates...
📦 Using project templates version: 13.6.4
🚀 Creating new Aspire project...
✅ Project created successfully in D:\_guide-aspire\HelloAspire.
Without --suppress-agent-init the command looks for the coding assistants installed on the machine and writes a telemetry hook into their configuration, saying so in a single line: Installed Aspire agent telemetry hooks for: GitHub Copilot CLI, Claude Code. The hook stays there even after the project is deleted, and has to be removed by hand from the assistant's configuration file.
Written with no arguments, aspire new offers a list of templates: ASP.NET Core with Blazor, ASP.NET Core with React, Express with React, FastAPI with React, or an empty AppHost.
The template creates four projects:
HelloAspire.AppHost: describes the application, that is which parts it is made of and how they connect;HelloAspire.ServiceDefaults: telemetry, health checks and retries, shared by the other projects;HelloAspire.ApiService: an API returning five weather forecasts;HelloAspire.Web: a Blazor site calling the API.
3. Read the AppHost
HelloAspire.AppHost/AppHost.cs is the file describing the application, and it is eleven lines long:
var builder = DistributedApplication.CreateBuilder(args);

var apiService = builder.AddProject<Projects.HelloAspire_ApiService>("apiservice")
    .WithHttpHealthCheck("/health");

builder.AddProject<Projects.HelloAspire_Web>("webfrontend")
    .WithExternalHttpEndpoints()
    .WithHttpHealthCheck("/health")
    .WithReference(apiService)
    .WaitFor(apiService);

builder.Build().Run();
AddProject registers a project as a resource and gives it a name. WithReference(apiService) passes the API address to the site, WaitFor(apiService) starts the site only afterwards. The API address does not appear in the site's code: the name does.
client.BaseAddress = new("https+http://apiservice");4. Run it
From the HelloAspire folder:
aspire runBuilding AppHost... HelloAspire.AppHost\HelloAspire.AppHost.csproj
Connecting to AppHost...
Starting dashboard...
AppHost: HelloAspire.AppHost\HelloAspire.AppHost.csproj
Dashboard: https://localhost:17058/login?t=918beb4a438b514c63a14f799859fe68
Logs: C:\Users\lauri\.aspire\logs\cli_20261106T073344_de6c3600.log
Press CTRL+C to stop the AppHost and exit.The dashboard address ends with a code: without it the dashboard does not open, and the code changes at every start. Opening it shows the two resources.
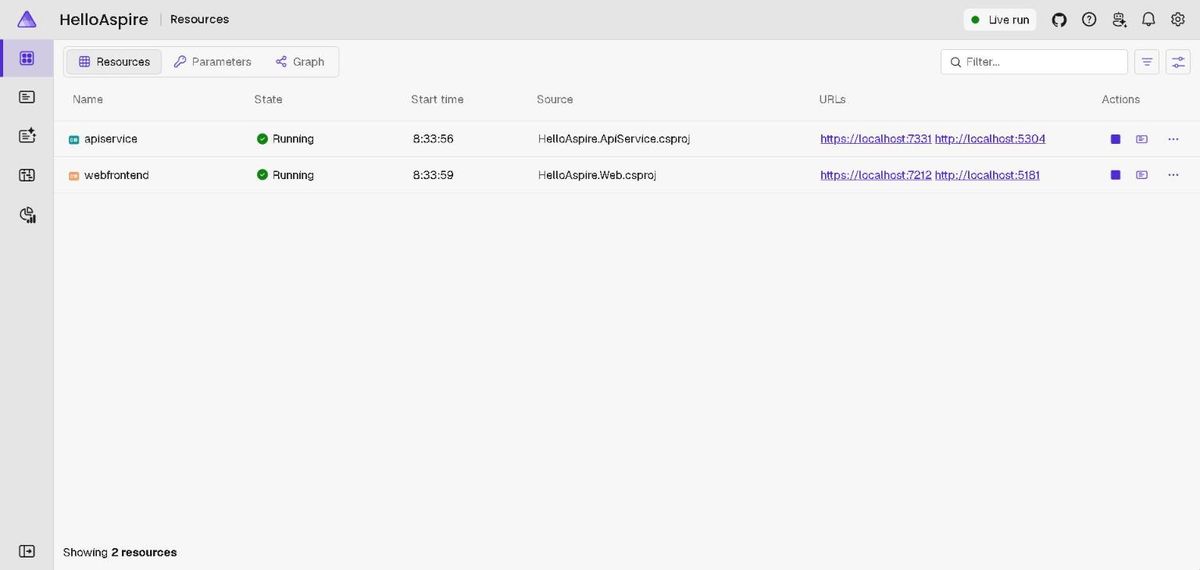
Each resource comes with its state, start time, source project and addresses: two per service, one over HTTPS and one over HTTP.
5. Open the application
Press the webfrontend address, https://localhost:7212, and pick Weather in the menu on the left.
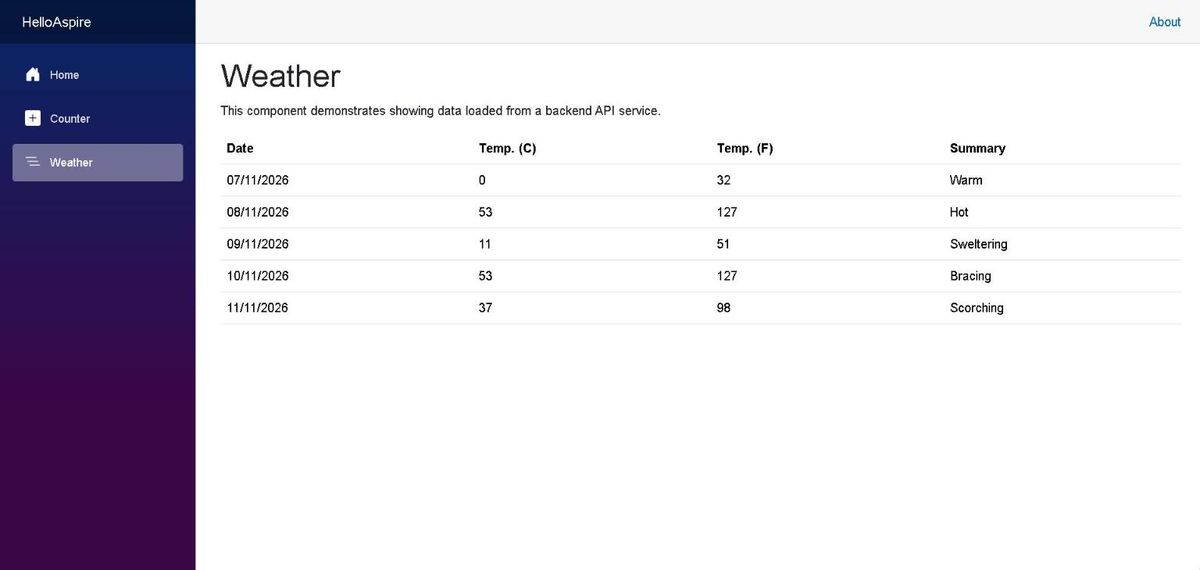
The table is not in the site: it is the API's answer, asked for at https+http://apiservice.
6. Read the logs
In the dashboard, second icon in the left column: Console logs.
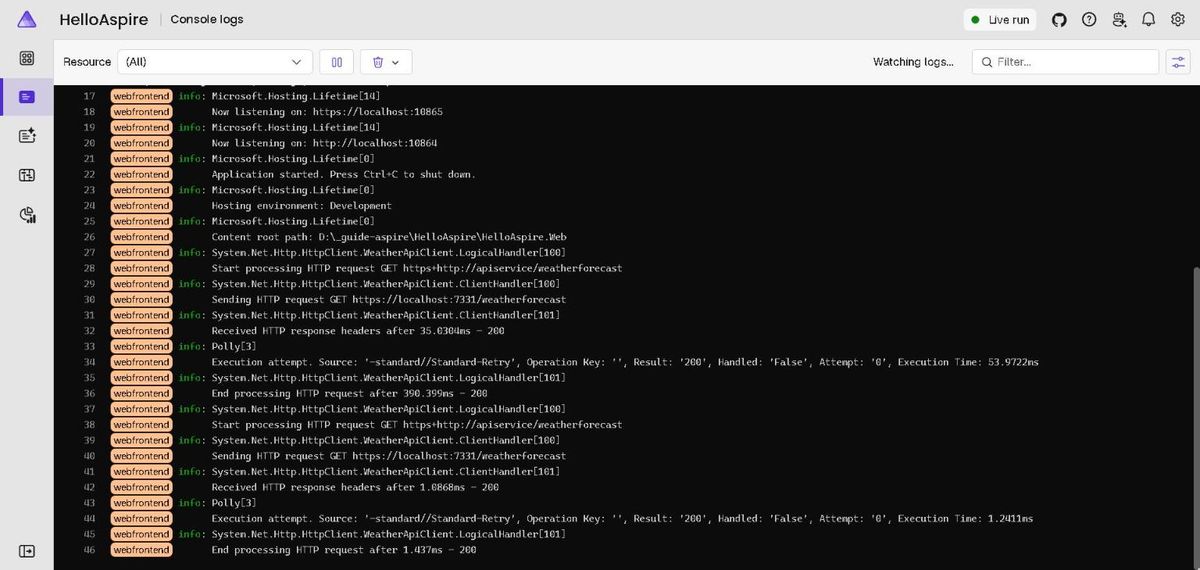
Every line carries the label of the resource that wrote it. Among the webfrontend ones the call just made shows up, first with the name and then with the real address:
Start processing HTTP request GET https+http://apiservice/weatherforecast
Sending HTTP request GET https://localhost:7331/weatherforecast
Received HTTP response headers after 35.0304ms - 200
7. Read the traces
Fourth icon: Traces.
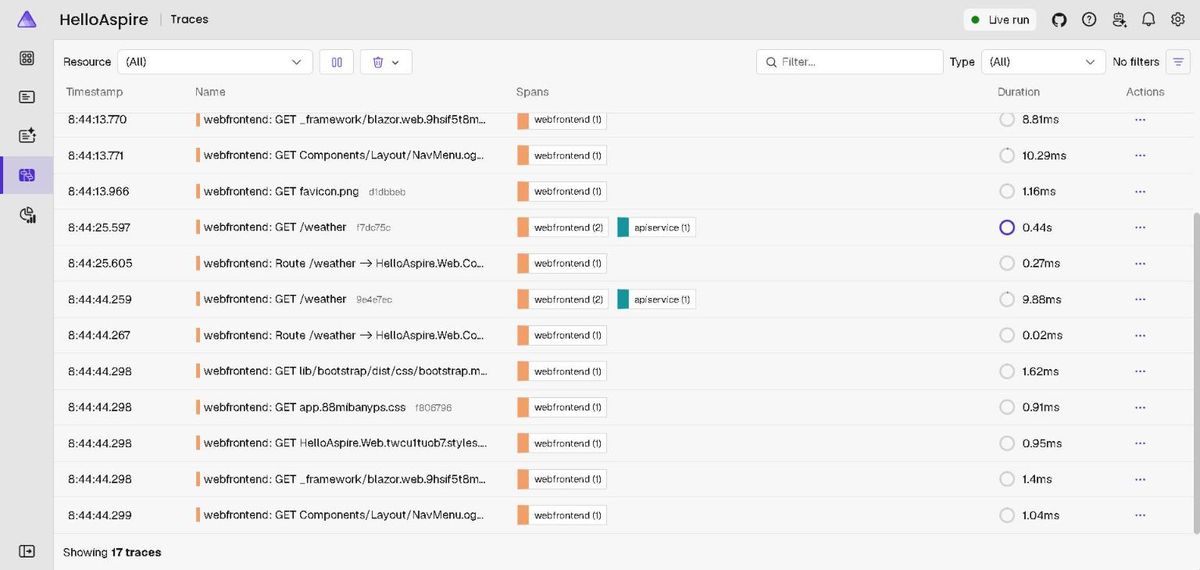
The webfrontend: GET /weather row is the only one with two colours: webfrontend (2) and apiservice (1). Press it.
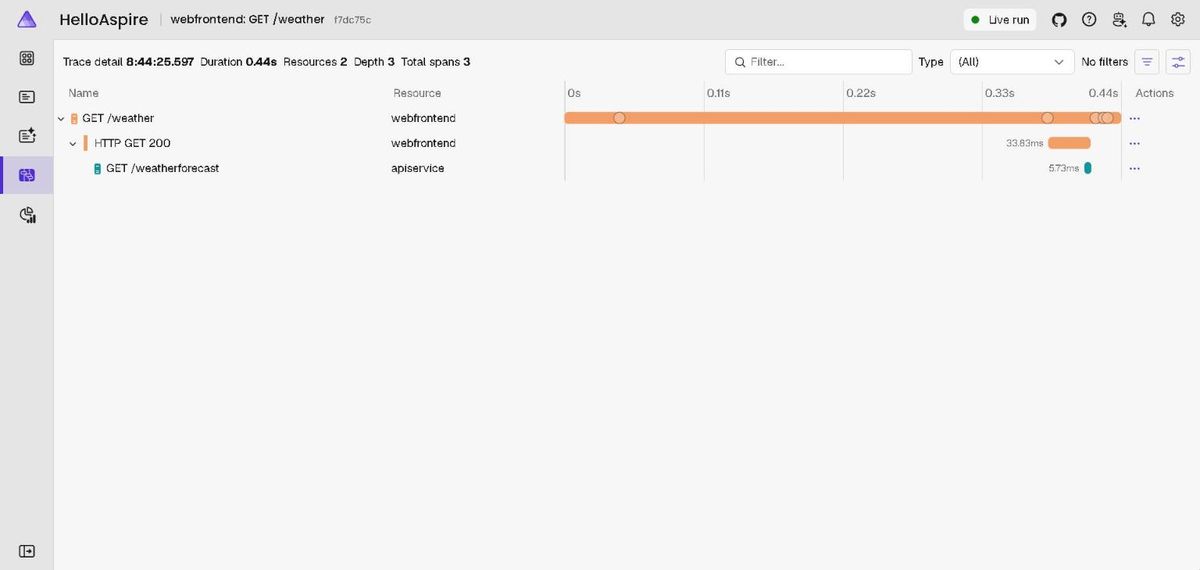
The request went through two resources and three spans: the site's page, the HTTP call to the API (33.83 ms) and the API's own work (5.73 ms). Not a line of code was written to get this: the telemetry comes from ServiceDefaults, which every project calls.
8. Read the metrics
Fifth icon: Metrics. Under Resource pick apiservice, then http.server.request.duration.
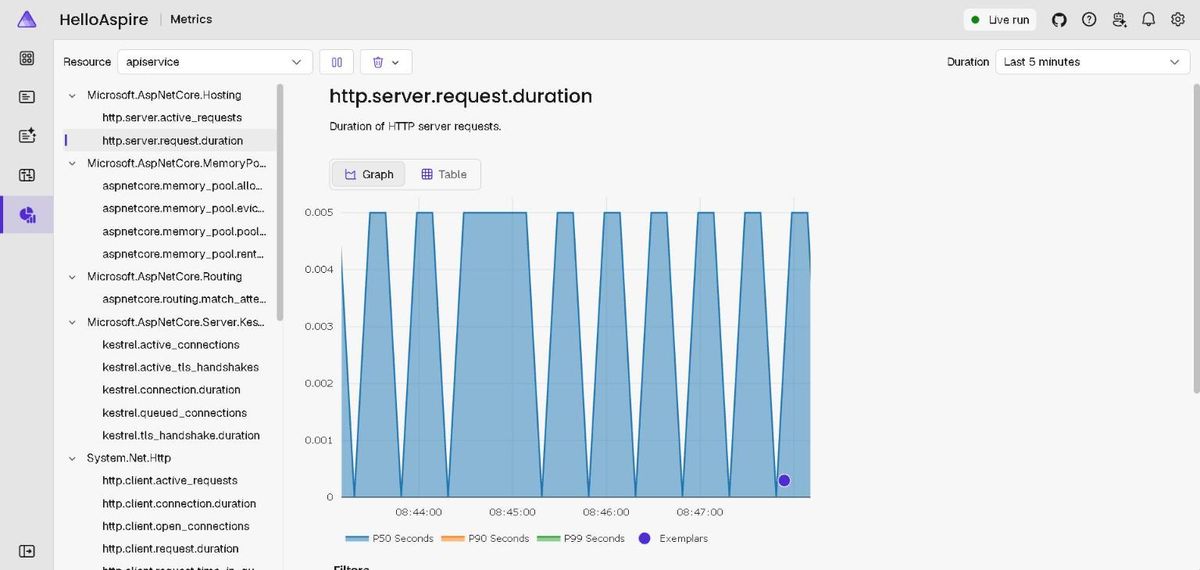
The chart reports the median, the ninetieth and the ninety-ninth percentile, plus the points of the individual sampled requests.
Add a cache
9. Add Redis to the AppHost
Stop the application with Ctrl+C and, from the HelloAspire folder:
aspire add redisSearching for Aspire integrations...
Adding Aspire hosting integration...
✅ The package Aspire.Hosting.Redis::13.6.4 was added successfully.In AppHost.cs add the cache line and pass it to the site:
var cache = builder.AddRedis("cache");

var apiService = builder.AddProject<Projects.HelloAspire_ApiService>("apiservice")
    .WithHttpHealthCheck("/health");

builder.AddProject<Projects.HelloAspire_Web>("webfrontend")
    .WithExternalHttpEndpoints()
    .WithHttpHealthCheck("/health")
    .WithReference(cache)
    .WaitFor(cache)
    .WithReference(apiService)
    .WaitFor(apiService);
10. Use the cache in the site
cd HelloAspire.Web
dotnet add package Aspire.StackExchange.Redis.OutputCaching
cd ..
HelloAspire.Web/Program.cs holds a cache kept in memory:
builder.Services.AddOutputCache();Replace it with the cache on Redis:
builder.AddRedisOutputCache("cache");Nothing else changes: app.UseOutputCache() is already in the file, and the Weather page already carries the @attribute [OutputCache(Duration = 5)] attribute. Neither the Redis address nor its password appear in the site's code: they come from the cache name.
11. Restart and check
aspire run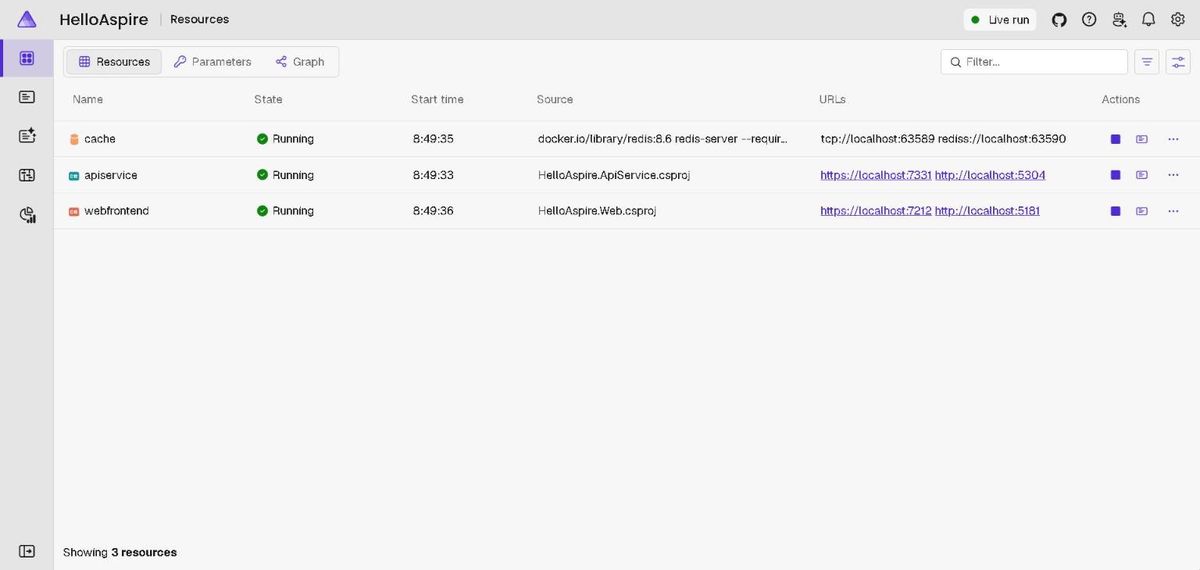
There are three resources now. cache is not a project: it is the docker.io/library/redis:8.6 container, started with a password generated on the spot. If the image is missing, it is downloaded on first start.
The Graph button at the top shows which resource talks to which.
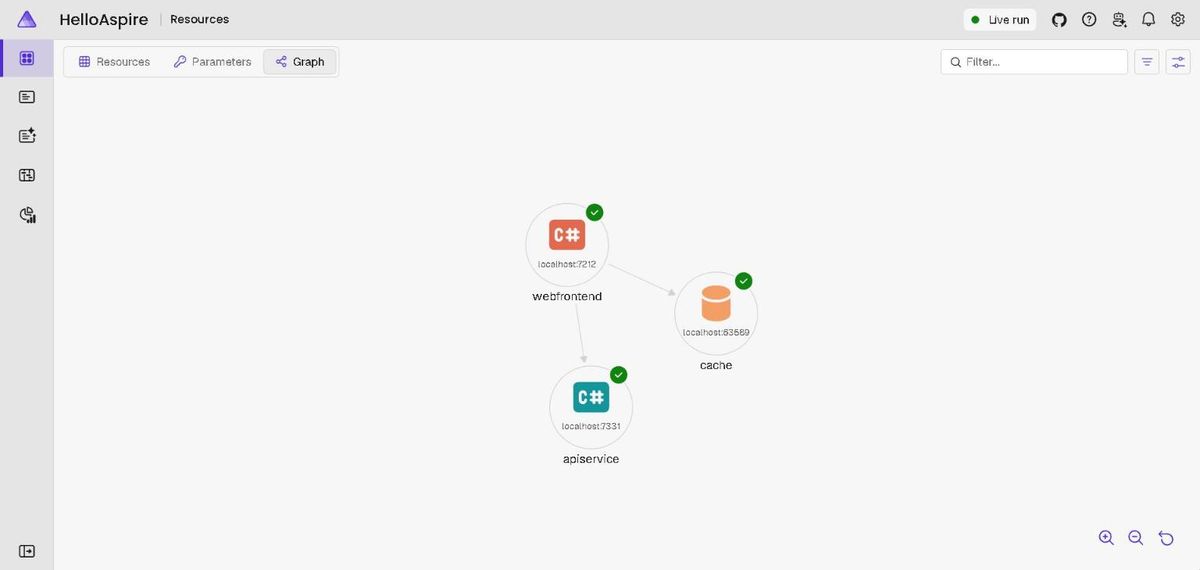
To see the cache at work, open https://localhost:7212/weather twice less than five seconds apart, then go back to Traces and type GET /weather in the filter.
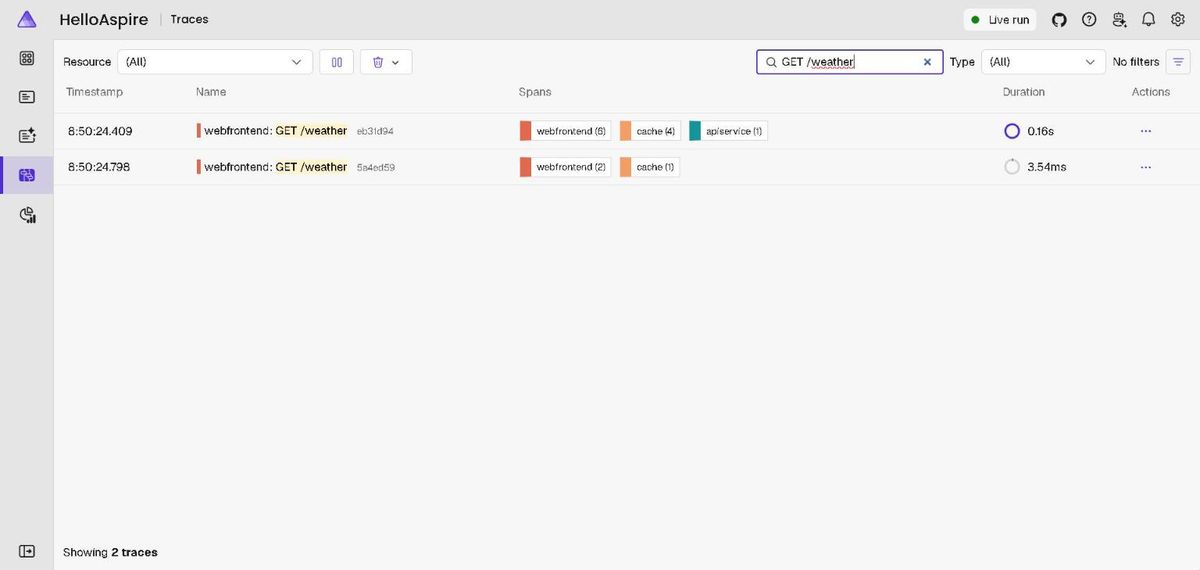
The first request took 0.16 seconds and went through apiservice. The second one 3.54 milliseconds, with no apiservice: the answer came out of the cache.
Clean up
12. Stop everything
Ctrl+C in the terminal running aspire run: the two projects stop and the container is removed on its own, to the point that docker ps -a no longer finds it.
Stopping the application from another terminal with aspire stop closes the projects but leaves the container running. In that case it has to be removed by hand:
docker ps --filter name=cache- --format "{{.Names}}"
docker rm -f <container name>
Commands, screenshots and timings recorded on 6 November 2026 on Windows 11 with .NET 10.0.401, the Aspire command-line interface 13.6.4 and Docker 29.7.2.