


Procedure to see a device sending data to an IoT hub and a .NET program reading it, without owning a device. In place of the Raspberry Pi it uses the simulator Microsoft publishes on the web: it is a page, nothing to install.
Required: an Azure account with an active subscription, .NET 10 on the computer, a browser. Duration: about twenty-five minutes. Cost: the free F1 tier costs 0 USD a month and accepts 8000 messages a day. Only one free hub per subscription is allowed.
The portal in the screenshots is in English: command names are reported as they appear on screen.
Prepare the hub
1. Create the IoT hub
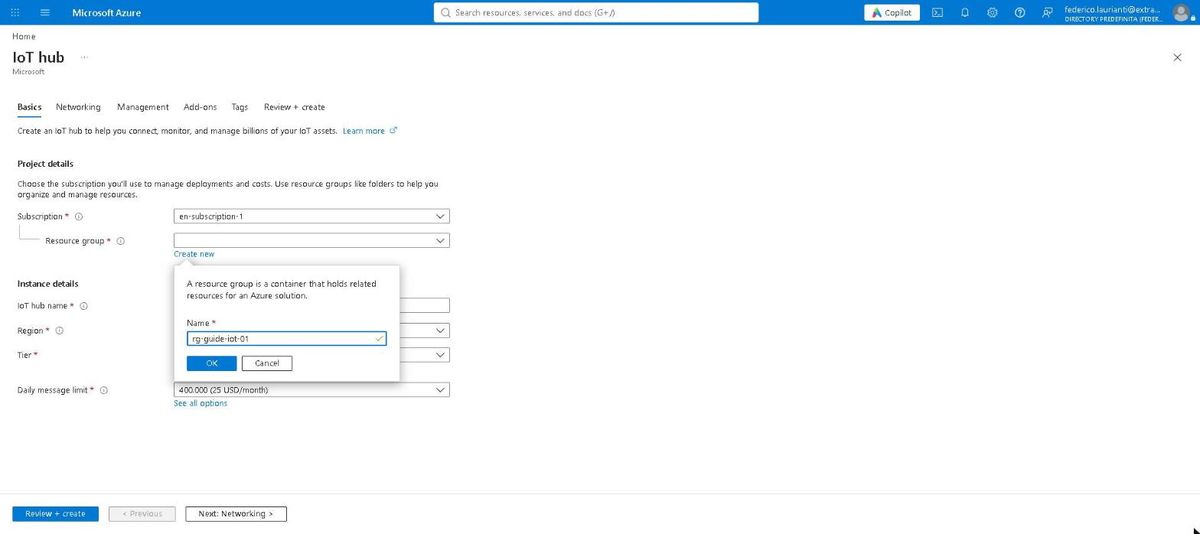
In the portal, Create a resource, search for IoT hub and press Create. On the Basics tab, next to Resource group, press Create new and type rg-guide-iot-01.
2. Pick the free tier
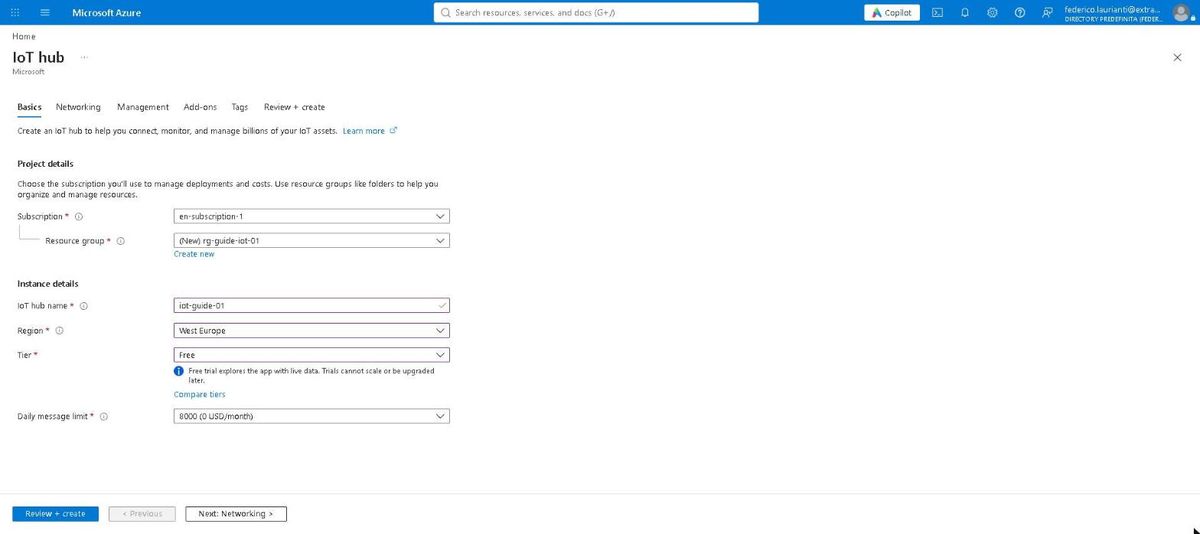
Fill in the rest of the tab:
- IoT hub name:
iot-guide-01 - Region: West Europe
- Tier: Free
Once Free is picked, the daily limit moves by itself to 8000 messages and the price to 0 USD a month. The portal warns that the free tier can neither scale nor be upgraded: it is there to try things out, not to carry a plant.
3. Review and create
Press Review + create. The summary shows 0 USD a month, the group, the name, the region and the tier.
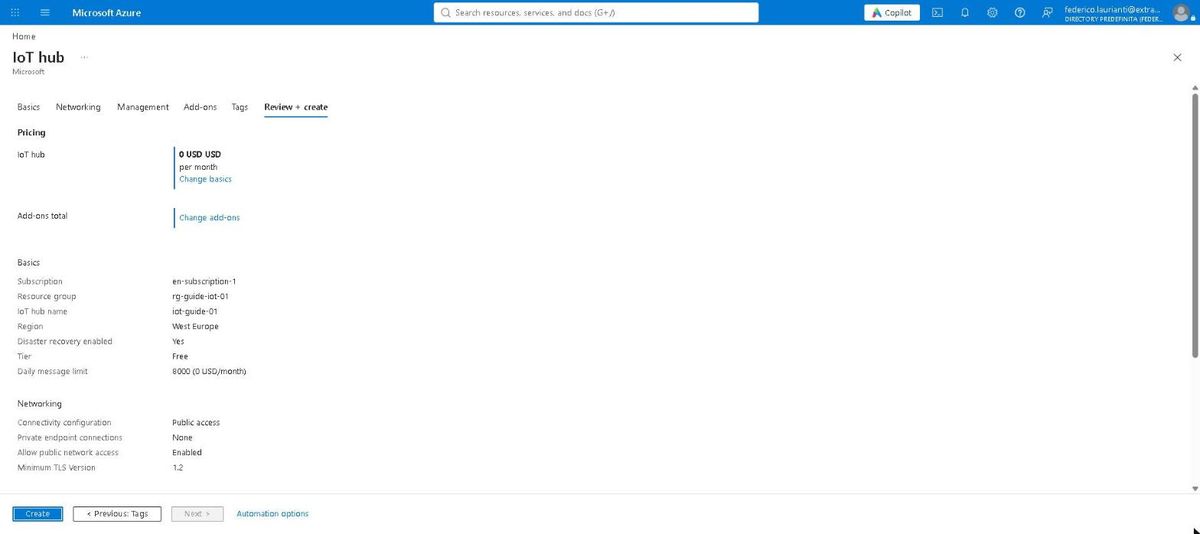
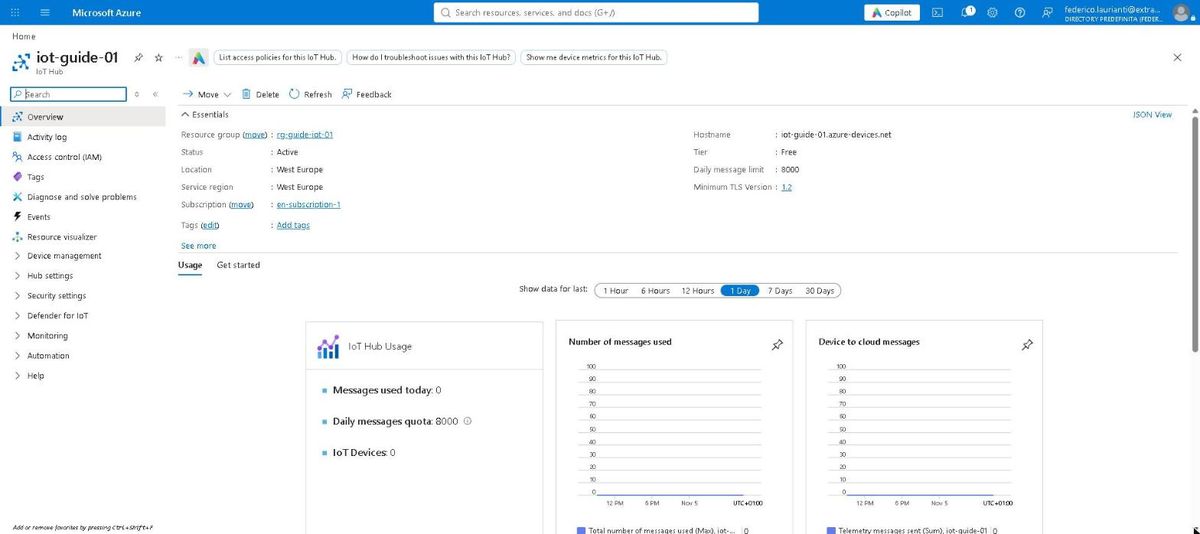
Press Create. Creation takes a little over a minute. When it ends, open the hub: the overview shows the host name (iot-guide-01.azure-devices.net), the tier and the message counter, still at zero.
4. Register the device
In the hub menu, Device management > Devices, then Add Device. Type raspberry-01 as the Device ID and leave the rest as it is: symmetric key, keys generated by the portal, device enabled.
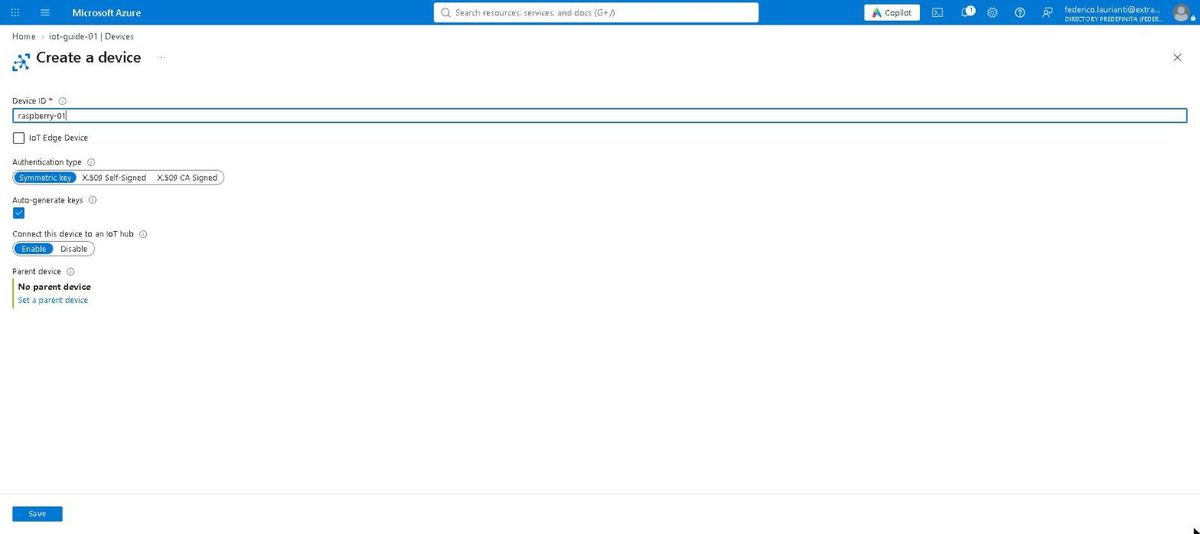
Press Save.
5. Copy the device connection string
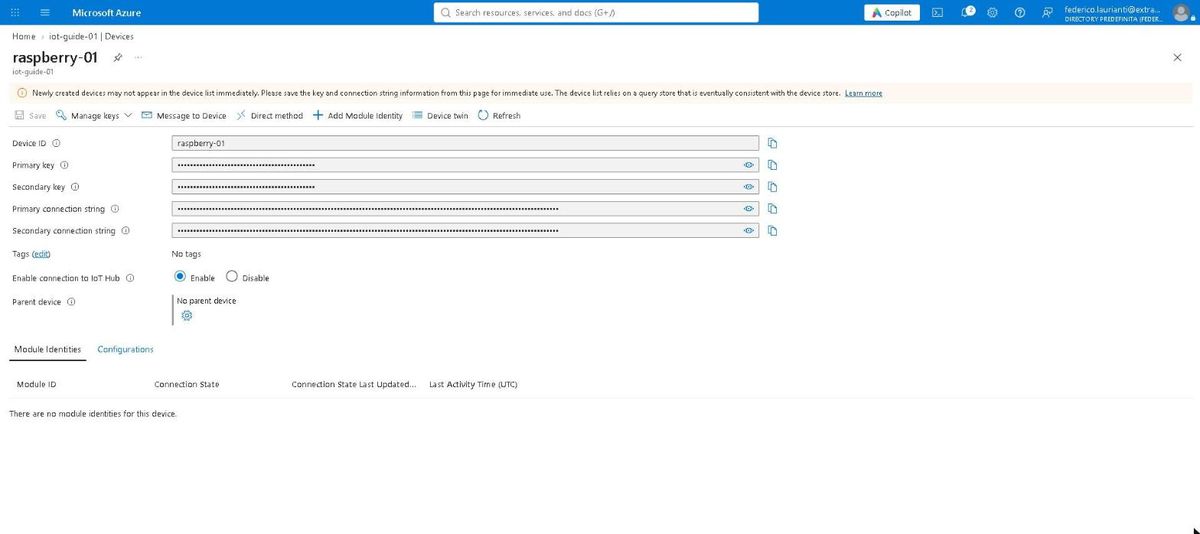
Open raspberry-01 again from the list. The page shows two keys and two connection strings, hidden. Press the eye next to Primary connection string and copy it: it is the device credential, valid for that device only.
Make the simulator talk
6. Open the simulator and paste the string
Open azure-samples.github.io/raspberry-pi-web-simulator. On the left there is a drawn Raspberry Pi with a temperature and humidity sensor; on the right there is the Node.js code the simulator runs.
In that code, on line 15, replace the placeholder with the string you copied:
const connectionString =
  'HostName=iot-guide-01.azure-devices.net;DeviceId=raspberry-01;SharedAccessKey=...';
7. Press Run
Press Run. The box at the bottom starts scrolling: one message every two seconds, with a running number, temperature and humidity, and the Message sent to Azure IoT Hub confirmation.
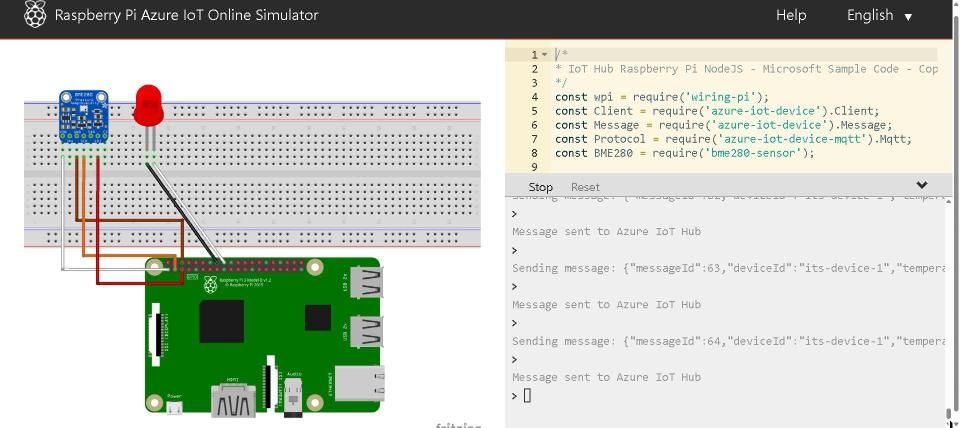
Leave it running: it is needed in the following steps. The button now reads Stop.
Read the telemetry from .NET
The hub keeps the messages it receives in an Event Hubs-compatible endpoint, ready to use and retained for one day. A .NET program reads it with the Event Hubs library: no IoT library is needed.
8. Take the built-in endpoint
In the hub menu, Hub settings > Built-in endpoints. Under Shared access policy pick service, the policy whose only permission is to read the messages, and copy the value of Event Hub-compatible endpoint.
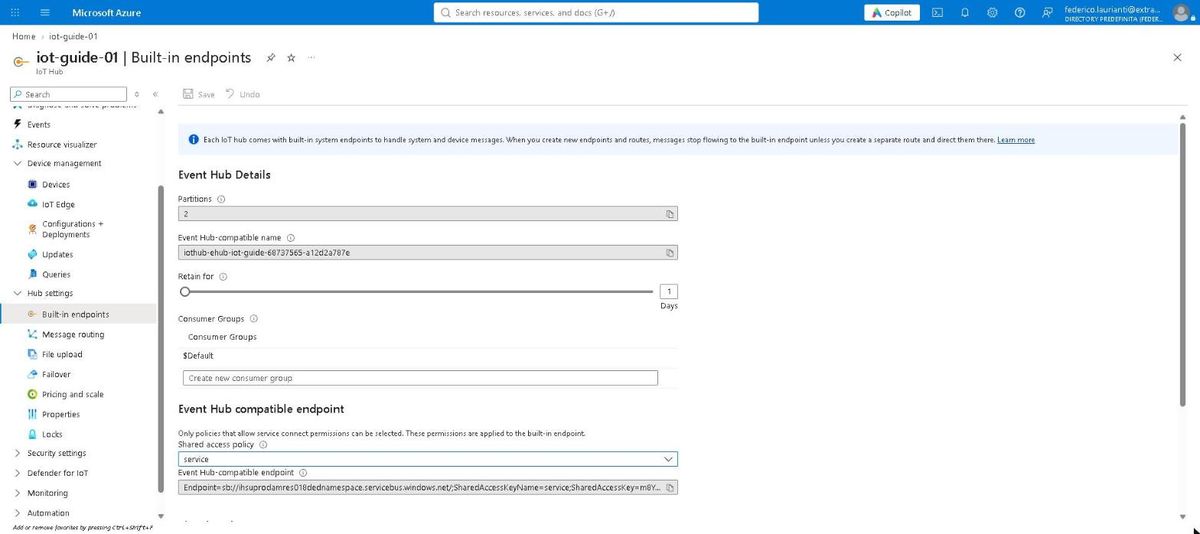
The string already contains the entity name, so that one string is all the program needs.
9. Create the project
dotnet new console -n iot-demo
cd iot-demo
dotnet add package Azure.Messaging.EventHubs --version 5.12.2
10. Write the program
Replace Program.cs:
using Azure.Messaging.EventHubs.Consumer;
using System.Globalization;
using System.Text;
using System.Text.Json;

CultureInfo.CurrentCulture = CultureInfo.InvariantCulture;

string connection = Environment.GetEnvironmentVariable("IOT_EVENTHUB")!;

await using EventHubConsumerClient reader = new(
    EventHubConsumerClient.DefaultConsumerGroupName,
    connection);

Console.WriteLine("Listening on the hub's built-in endpoint.\n");

using CancellationTokenSource stop = new(TimeSpan.FromSeconds(45));

try
{
    await foreach (PartitionEvent item in reader.ReadEventsAsync(
        startReadingAtEarliestEvent: false,
        cancellationToken: stop.Token))
    {
        string text = Encoding.UTF8.GetString(item.Data.EventBody.ToArray());
        string device = item.Data
            .SystemProperties["iothub-connection-device-id"].ToString()!;

        JsonElement message = JsonDocument.Parse(text).RootElement;
        double temperature = message.GetProperty("temperature").GetDouble();
        double humidity = message.GetProperty("humidity").GetDouble();

        Console.WriteLine($"{device}  {temperature:F1} C  {humidity:F1} %");
    }
}
catch (OperationCanceledException)
{
    Console.WriteLine("\nTime is up, stopping.");
}
startReadingAtEarliestEvent: false starts the reading from new messages, not from those already piled up. The message body is the JSON the simulator writes, and the program pulls temperature and humidity out of it. The device name is not in there: the hub writes it among the system properties, and that is the name to trust.
11. Run it
Put the string in the environment variable and start:
export IOT_EVENTHUB="<Event Hub-compatible endpoint copied from the portal>"
dotnet run
On Windows, in PowerShell:
$env:IOT_EVENTHUB = "<Event Hub-compatible endpoint copied from the portal>"
dotnet run
The program prints the messages as they arrive, one every two seconds, and stops by itself after forty-five seconds:
Listening on the hub's built-in endpoint.

raspberry-01  20.0 C  71.0 %
raspberry-01  30.7 C  60.6 %
raspberry-01  20.3 C  67.5 %
raspberry-01  30.4 C  76.1 %
raspberry-01  25.2 C  67.9 %
Inside the message the simulator writes a deviceId of its own, its-device-1, which is not the registered device: the name to use is raspberry-01, the one the hub puts at the start of the line.
Go back to the simulator and press Stop.
Clean up
12. Delete the resource group
Open rg-guide-iot-01: it holds the hub alone.
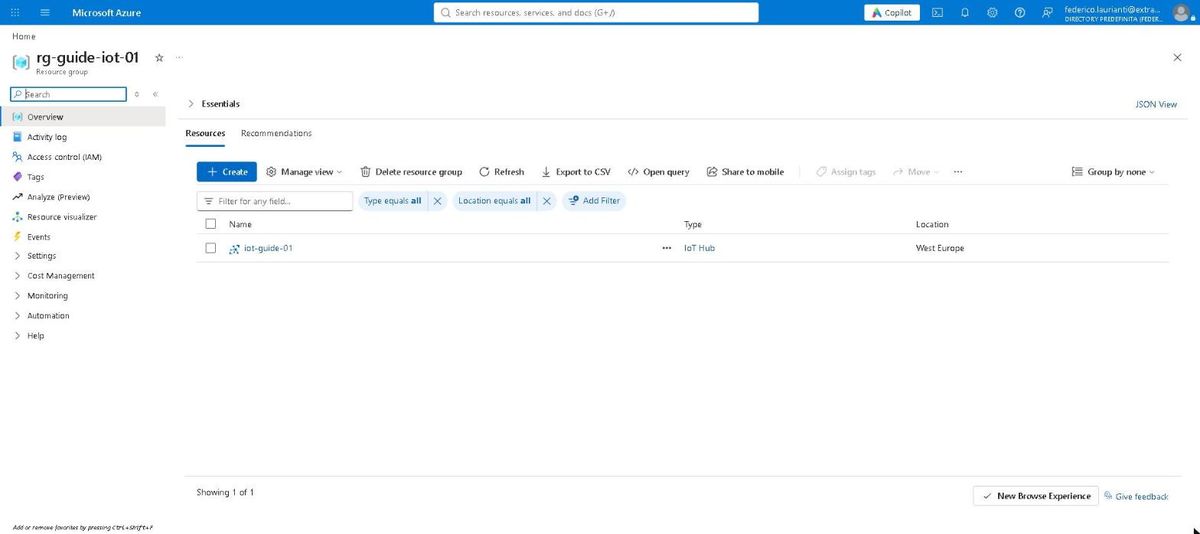
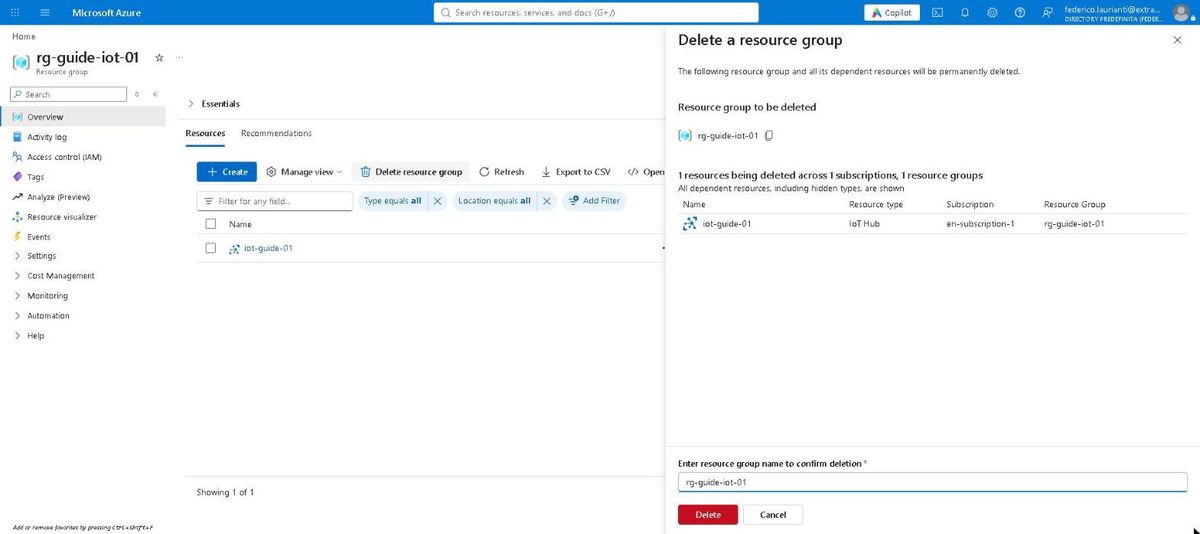
Press Delete resource group, type the group name again and press Delete.
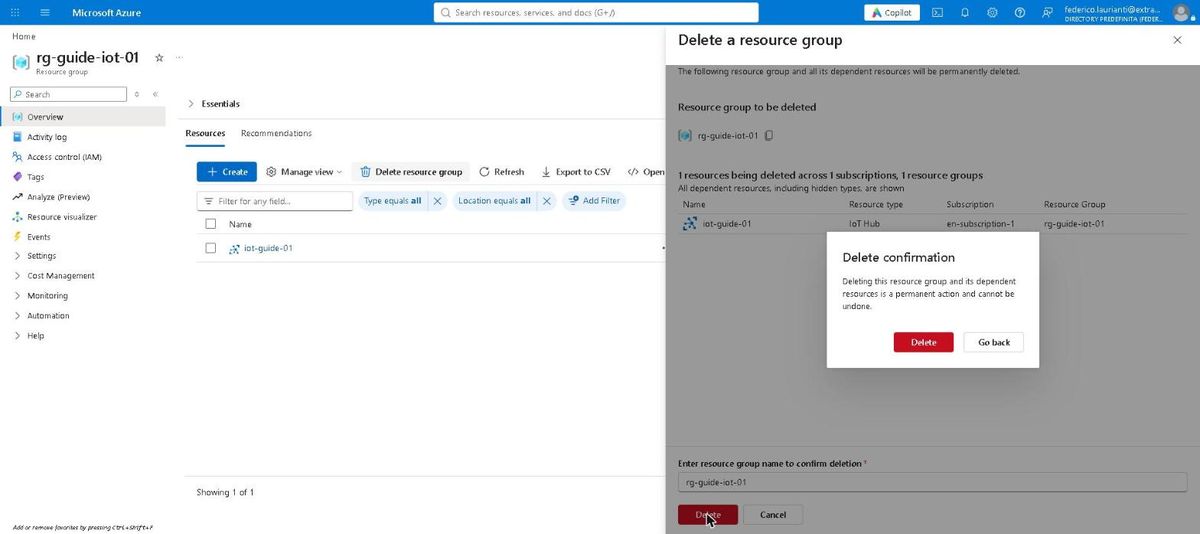
Confirm in the window that appears.
Once the hub is gone, the free tier is available again for the subscription.
Command names and screenshots taken on the Azure portal on 5 November 2026, West Europe region, with .NET 10.0.401 and the Azure command-line interface 2.91.0.