

Procedure to create a Windows virtual machine in the Azure portal and reach its desktop in a browser tab through Azure Bastion. The machine exposes no ports to the internet and no software has to be installed on the connecting computer.
Required: an Azure account with an active subscription and a browser. Duration: about fifteen minutes. Cost: 0.1330 USD per hour for the machine; the Developer tier of Bastion is free.
The portal in the screenshots is in English: command names are reported as they appear on screen.
Create the machine
1. Open the machine creation form
On portal.azure.com, search for Virtual machines, press + Create and choose Azure virtual machine.
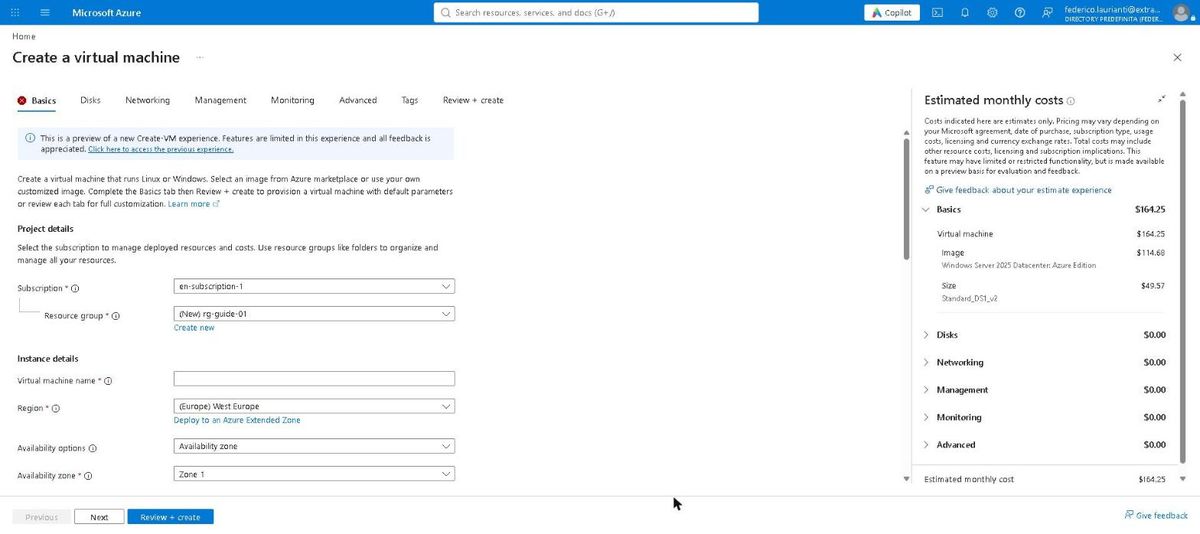
2. Create the group and name the machine
Under Resource group press Create new and type the name. Then fill in the machine name and the availability options.
| Field | Value |
|---|---|
| Resource group | rg-guide-01 (new) |
| Virtual machine name | vm-demo-01 |
| Region | (Europe) West Europe |
| Availability options | No infrastructure redundancy required |
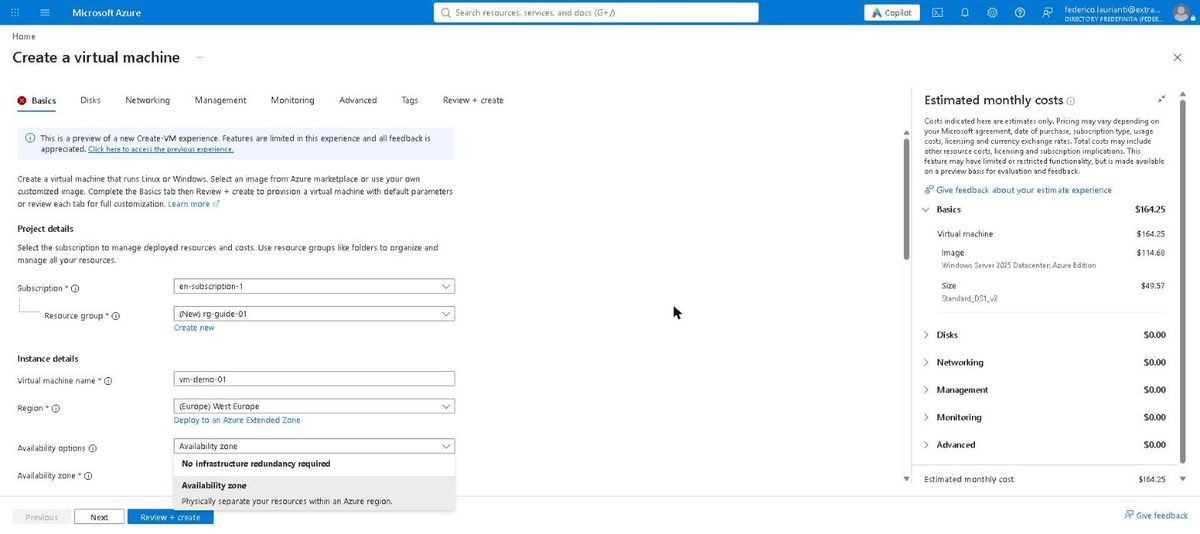
With Availability zone the default size is not available in zone 1 and the creation stops.
3. Password and inbound ports
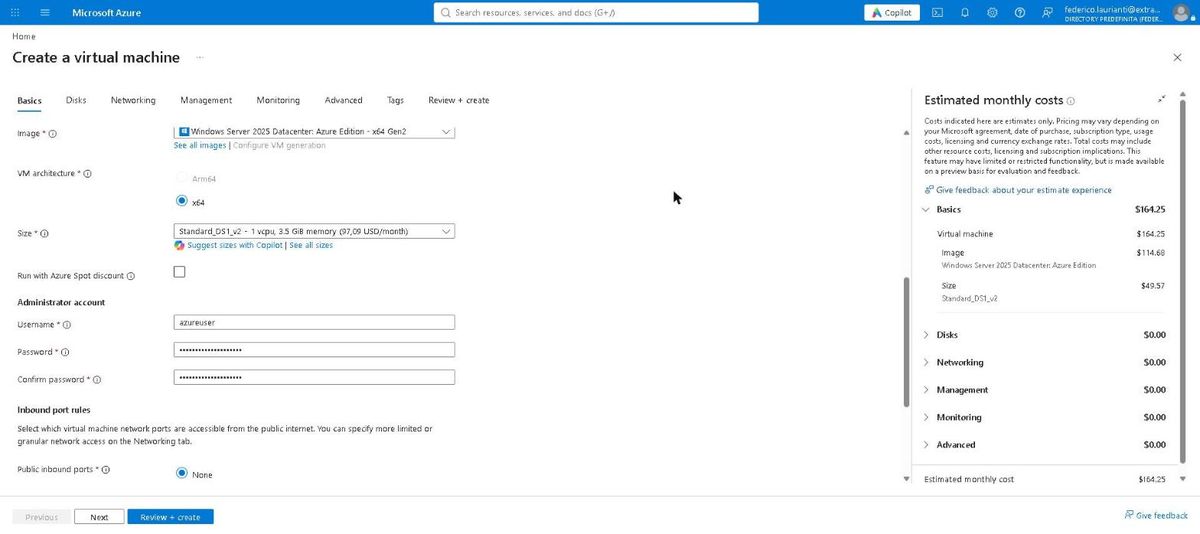
Scroll down to Administrator account. Image and size stay as proposed. Type a password of at least twelve characters and repeat it in Confirm password; it is needed at every connection. Under Public inbound ports choose None.
| Field | Value |
|---|---|
| Image | Windows Server 2025 Datacenter: Azure Edition – x64 Gen2 |
| Size | Standard_DS1_v2 – 1 vcpu, 3.5 GiB |
| Username | azureuser |
| Public inbound ports | None |
4. Review and create
Press Review + create. Check the hourly price, the resource group and that Public inbound ports reads None, then press Create.
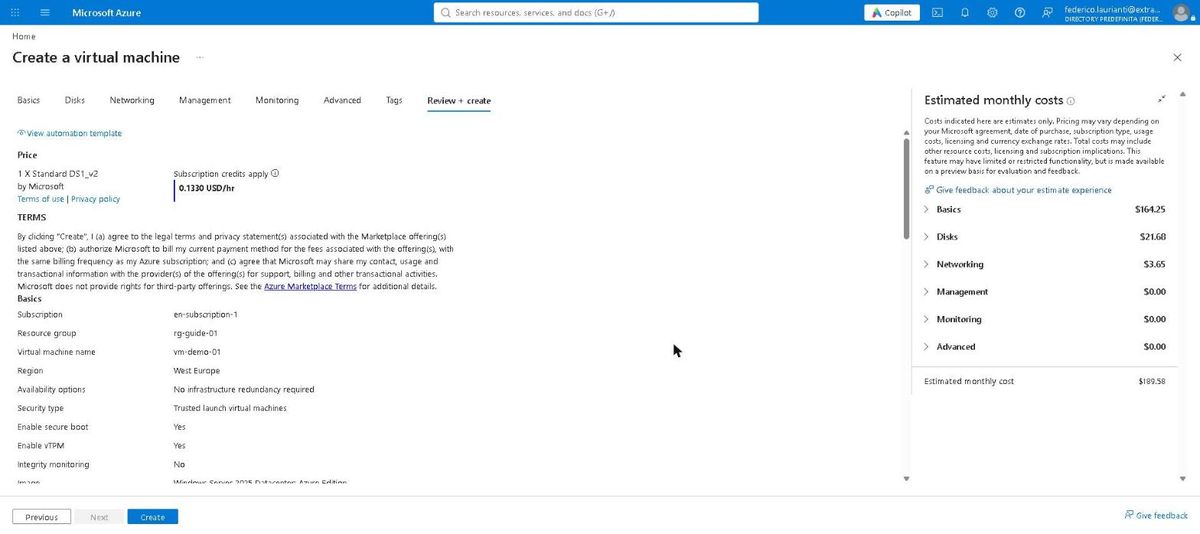
5. Wait for the deployment to finish
The deployment takes about two minutes. When it is done, press Go to resource.
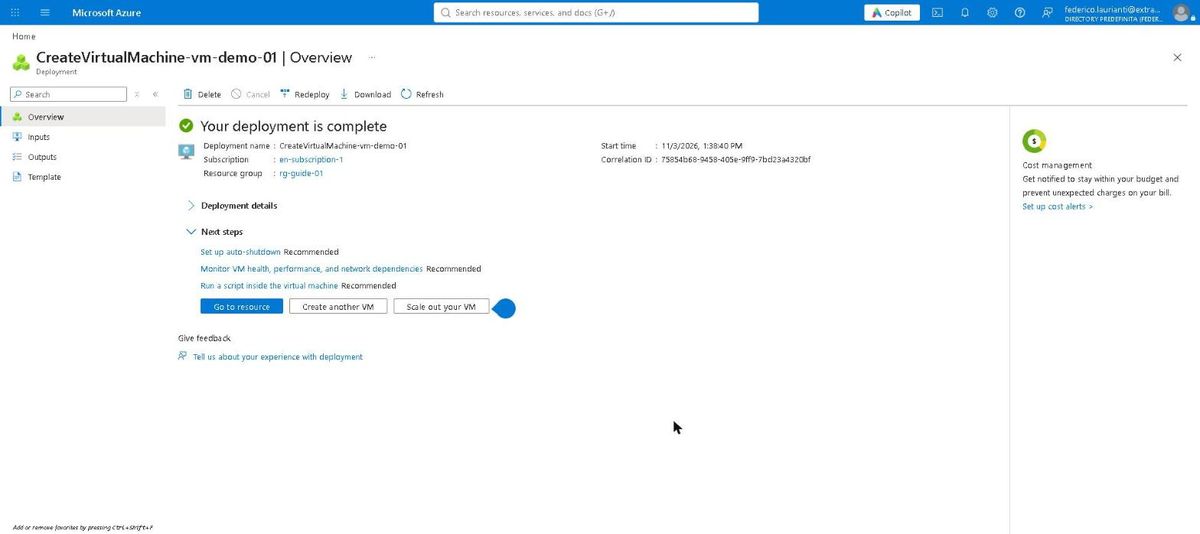
Connect
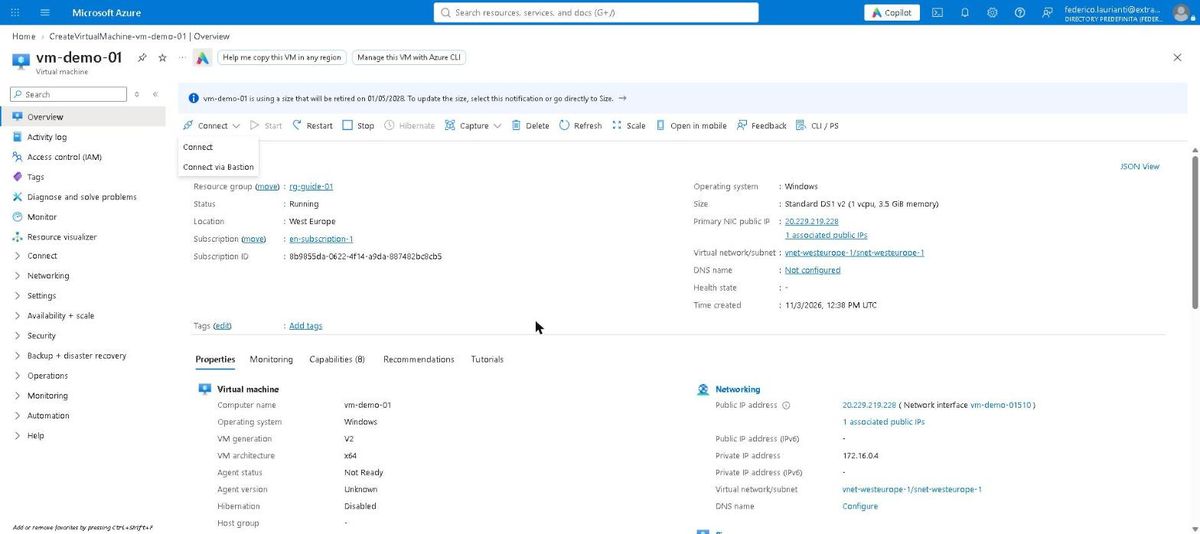
6. Open the Bastion connection
On the machine page press Connect and choose Connect via Bastion.
7. Choose the tier and enter the credentials
Under SKU select Developer: it allows one machine at a time and is free. Enter the credentials and press Deploy + Connect with Bastion Developer.
| Field | Value |
|---|---|
| SKU | Developer |
| Authentication Type | VM Password |
| Username | azureuser |
| VM Password | the password from step 3 |
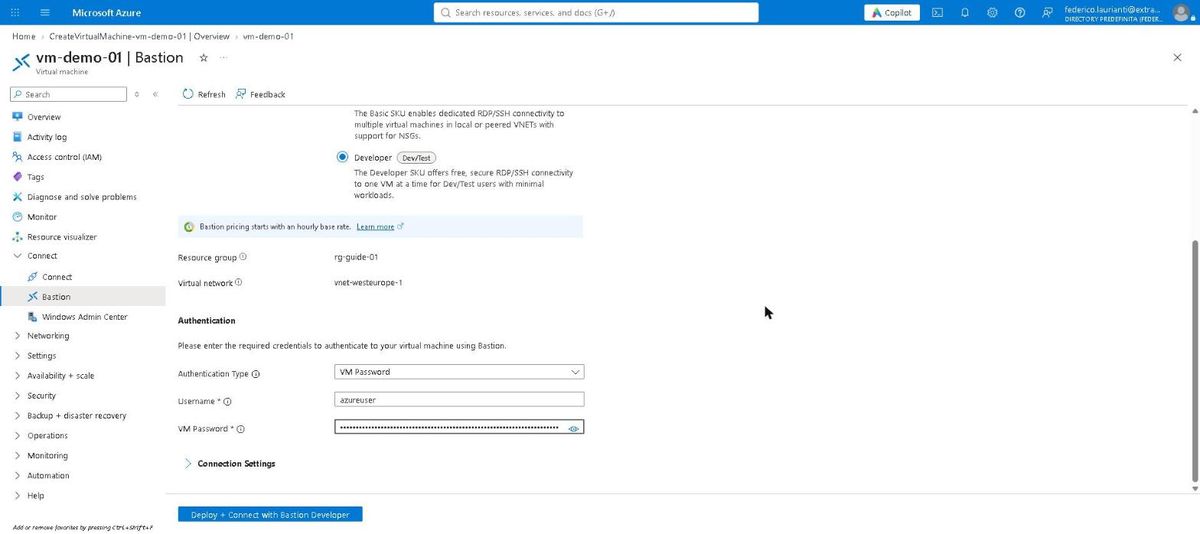
Bastion does not store the password: it has to be entered at every connection. If the session opens with a connection error, press Reconnect: a freshly created machine takes a few minutes before it accepts connections.
8. First boot of Windows
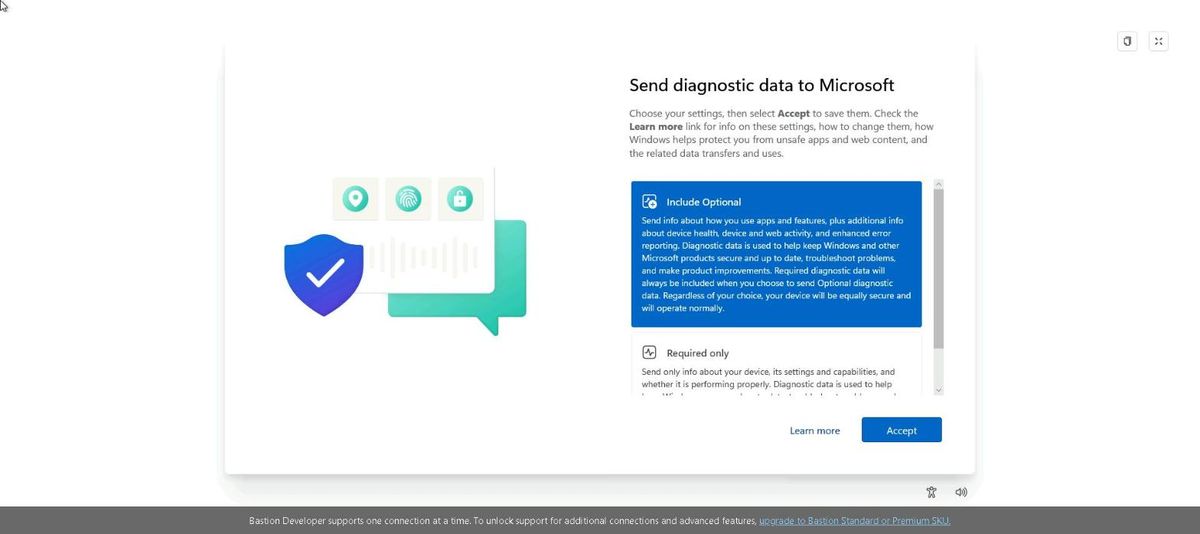
The screen stays black for a few minutes, then Windows asks which diagnostic data to send. Choose Required only and press Accept.
9. Desktop reached
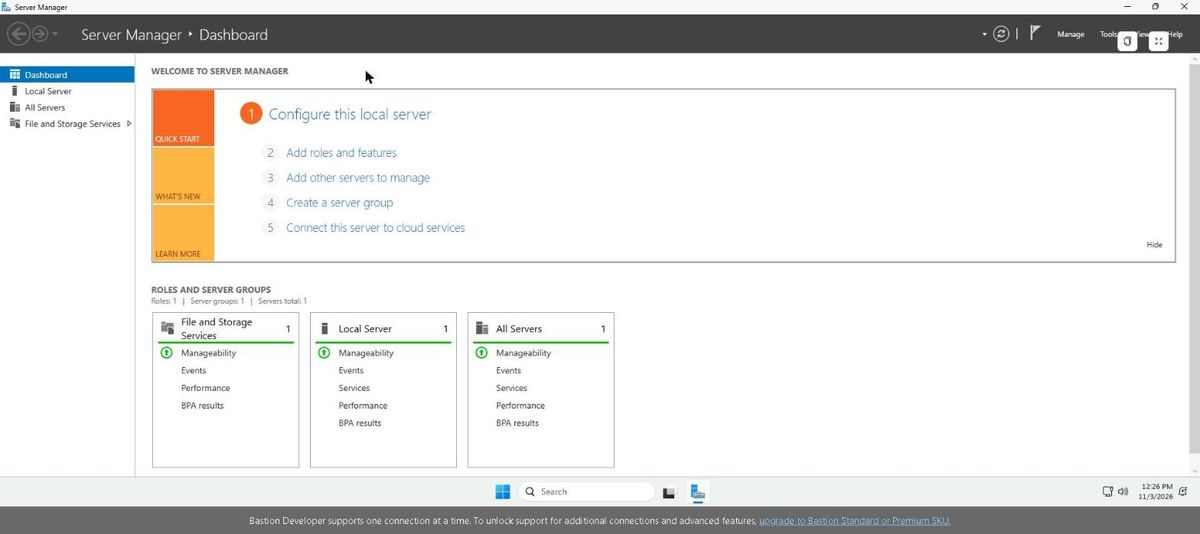
The Windows Server desktop appears with Server Manager. Keyboard, mouse and clipboard work as they do on a local machine.
Delete the resources
10. Open the resource group
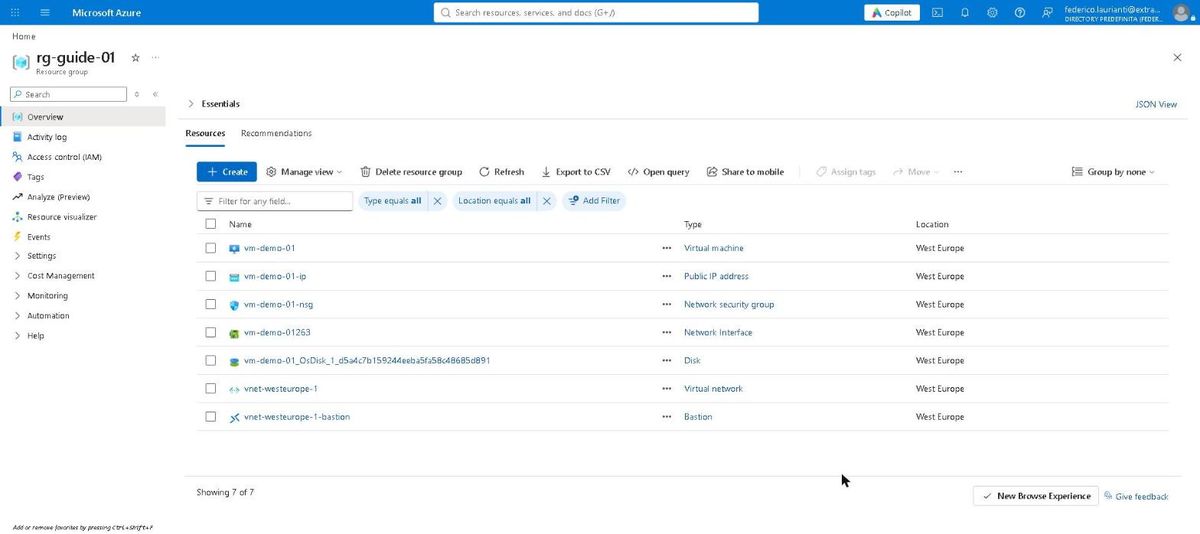
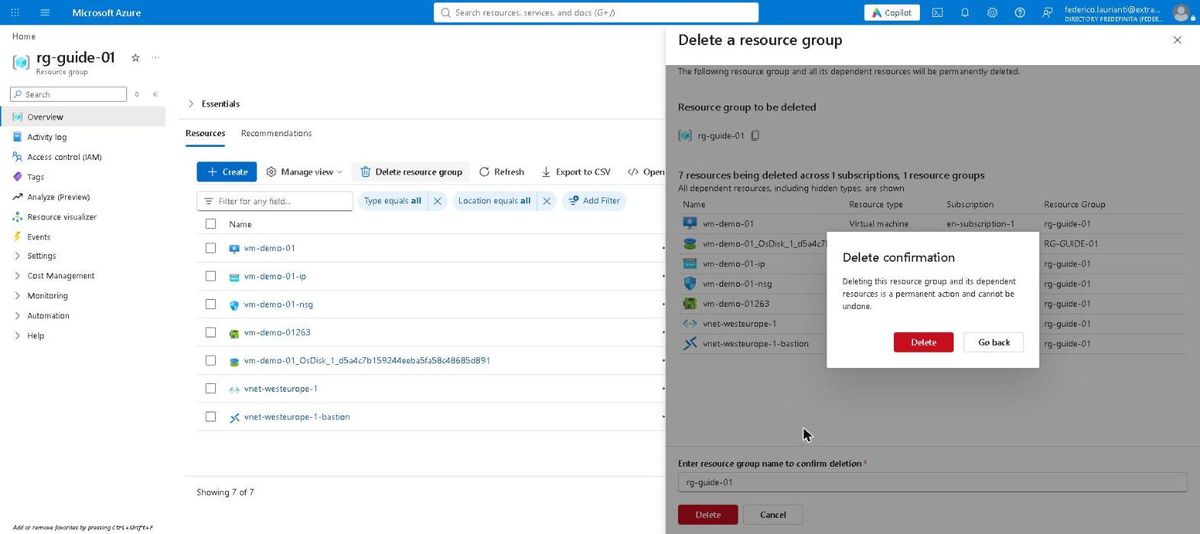
Search for Resource groups and open rg-guide-01. It contains seven resources: machine, disk, public IP address, network security group, network interface, virtual network and Bastion.
11. Start the deletion
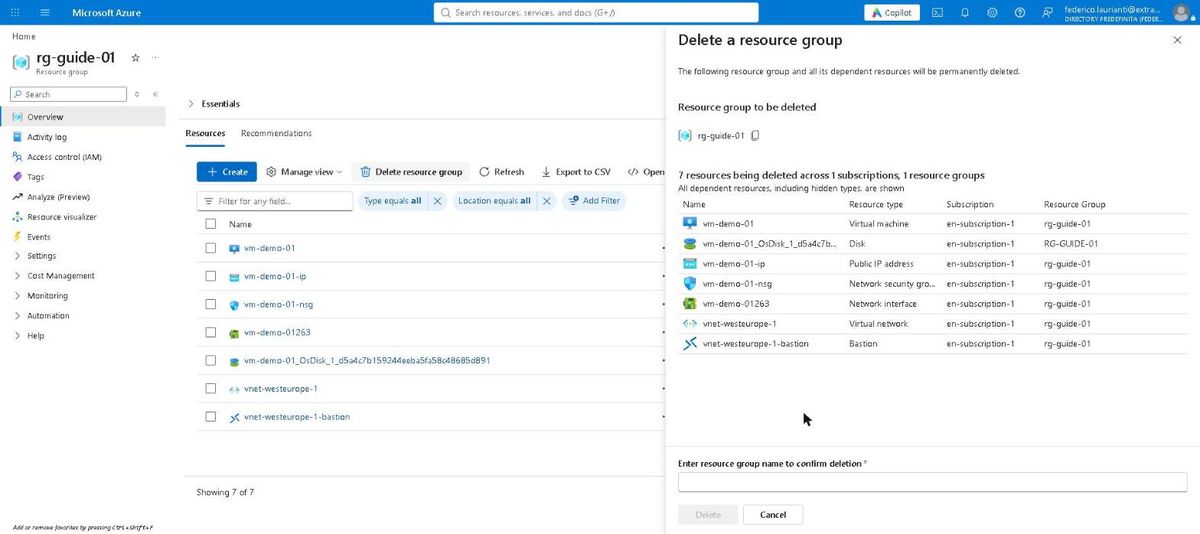
Press Delete resource group. The portal lists the resources involved and asks you to retype the group name.
12. Confirm
Type rg-guide-01, press Delete and confirm. The deletion takes a few minutes.
As long as the resource group exists, the machine keeps being billed even when not in use.
Prices, command names and screenshots taken from the portal on 3 November 2026, West Europe region. The hourly cost covers the machine alone: disk and public IP address are billed separately.