


Procedure to train a small PyTorch neural network on Azure Machine Learning, compare two training runs, register the model and deploy it to a real-time endpoint, then call it from a .NET console. Resources are created, tested and deleted from the portal and Azure Machine Learning studio; your computer is used to write the training program, which is a Python file, and the .NET console.
You need: an Azure account with an active subscription and .NET 10 on your computer. Time: over an hour, most of it waiting: about a quarter of an hour for each training run and twenty minutes for the deployment. Cost: less than one dollar, if you delete the resources at the end. The portal shows 0.27 dollars an hour for the training machine and 0.12 dollars an hour for the endpoint machine.
The portal and studio in the screenshots are in English: command names are written as they appear on screen.
The workspace
1. Create the workspace
Open https://portal.azure.com/#create/Microsoft.MachineLearningServices and fill in:
- Resource group: Create new,
rg-guide-ml-01, OK - Name:
mlw-guide-extranet-01 - Region: West Europe
The portal proposes the storage account, Key Vault and Application Insights by itself.
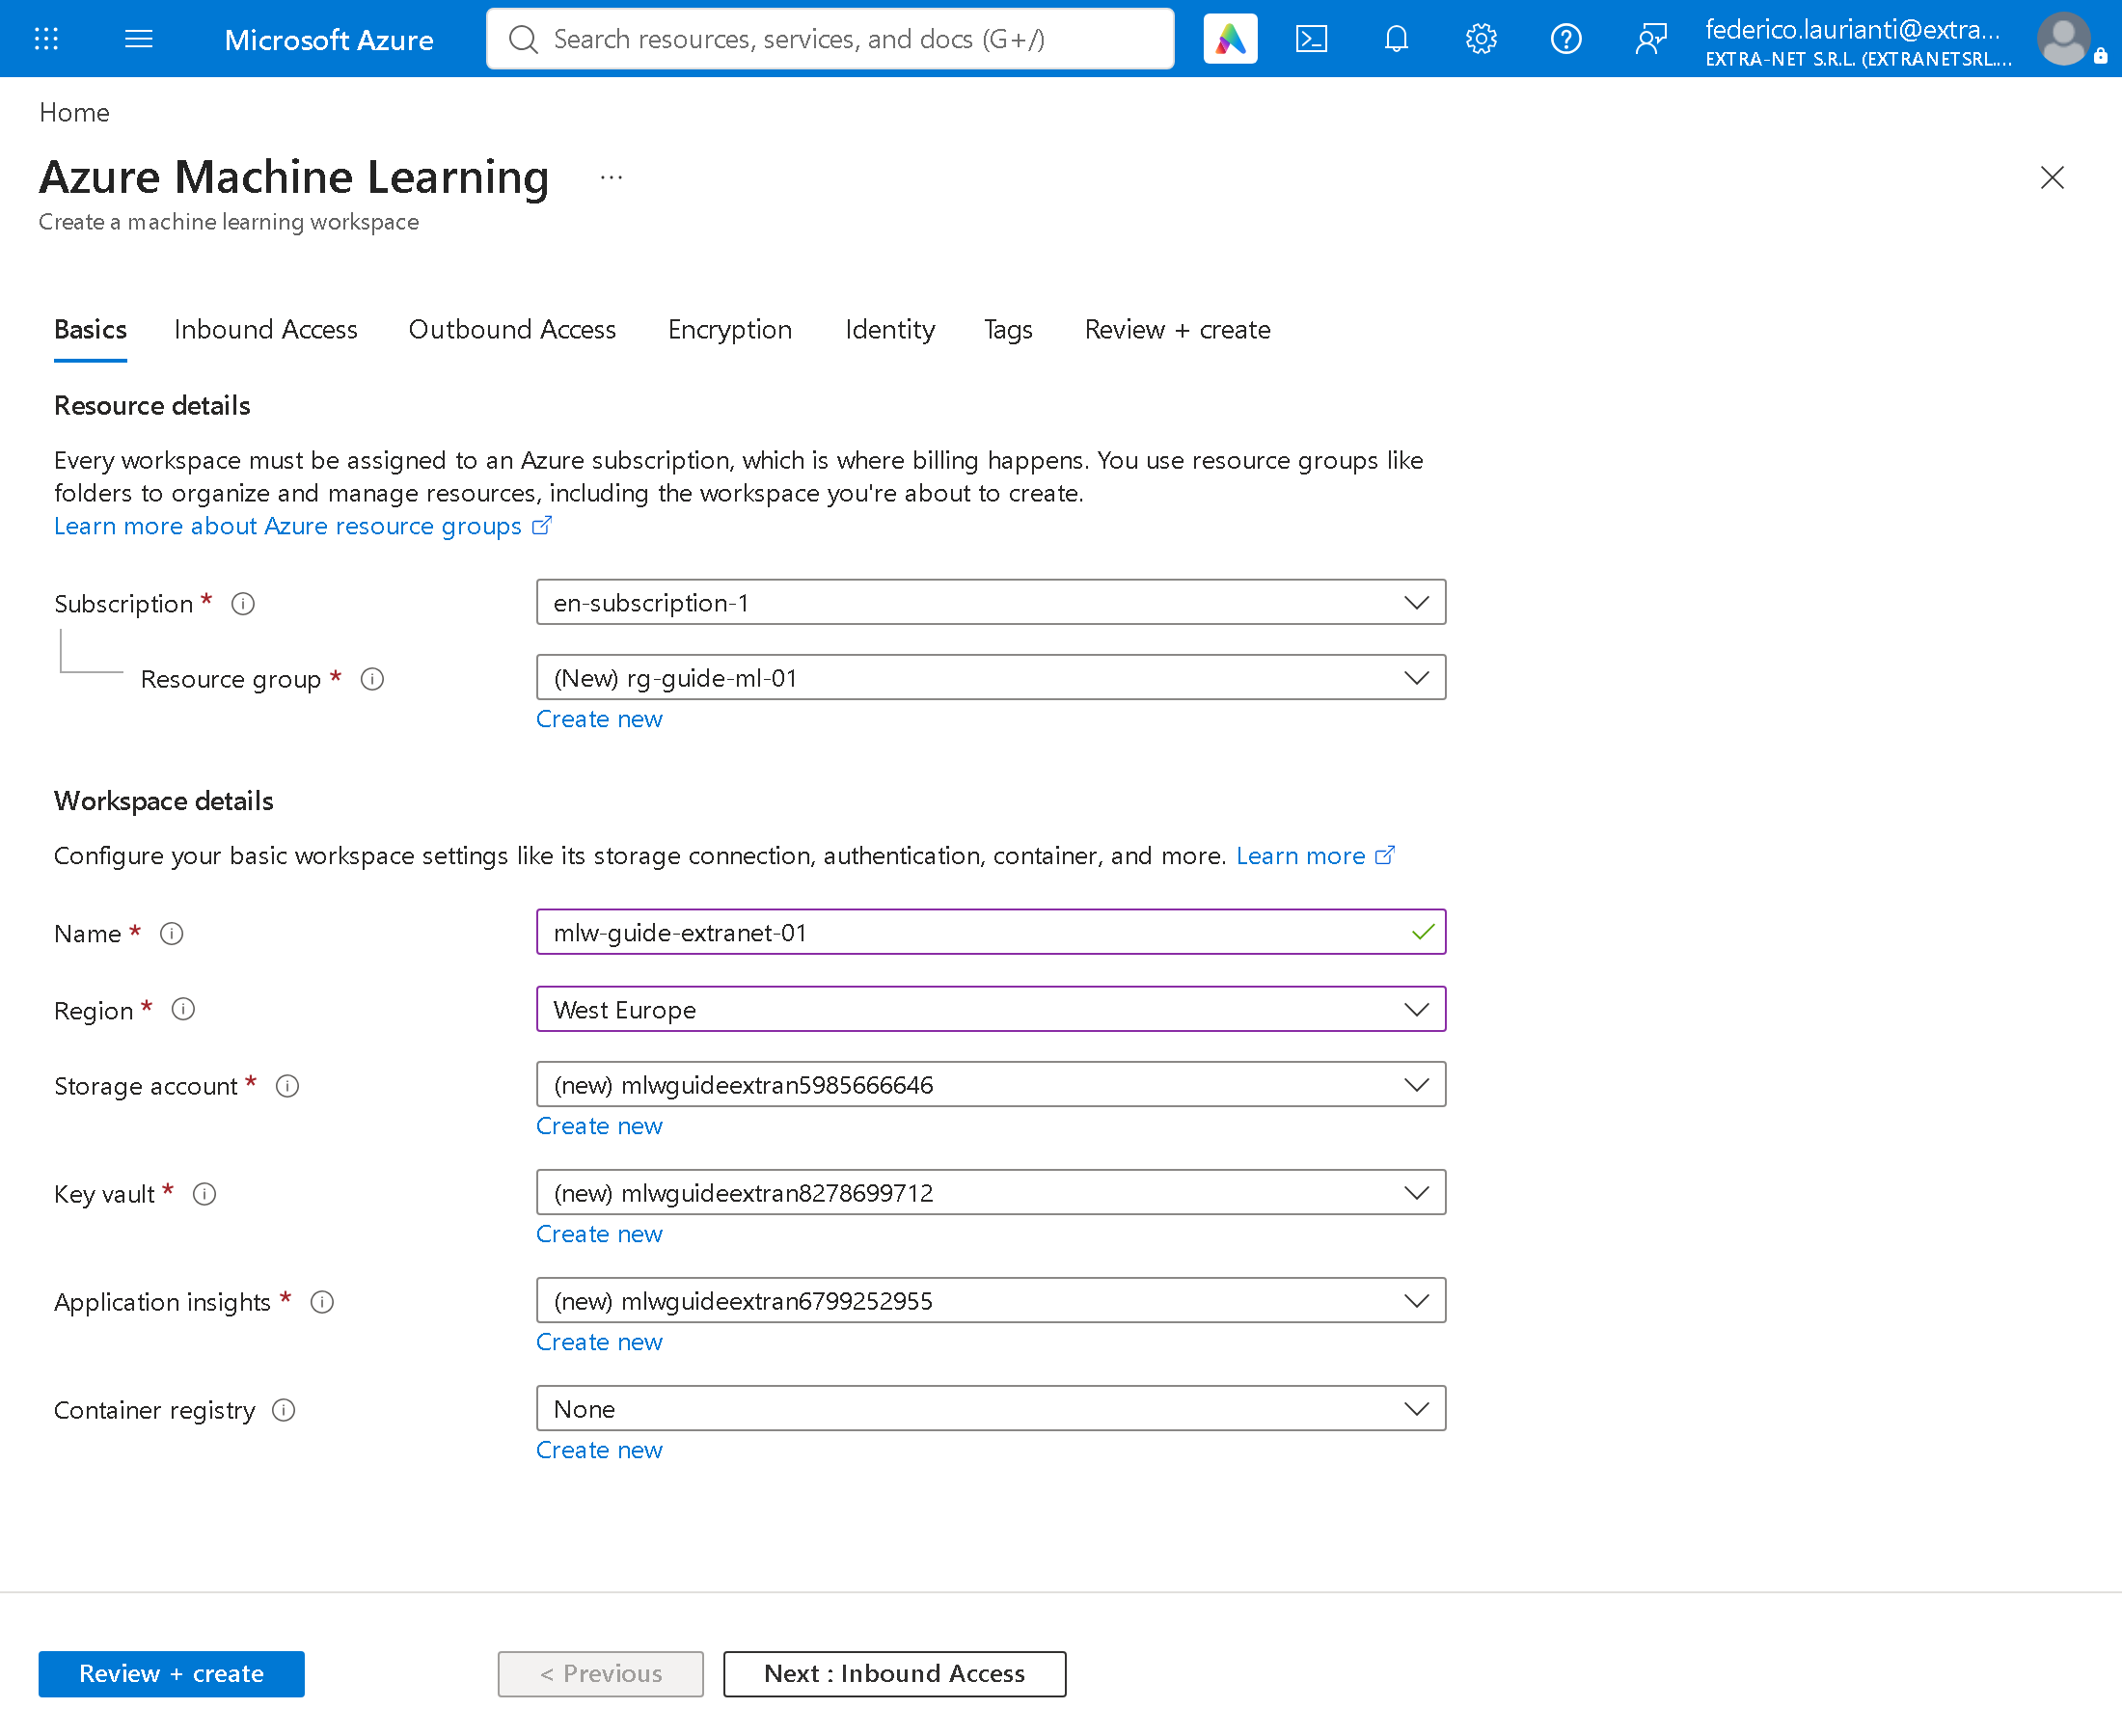
Press Review + create.
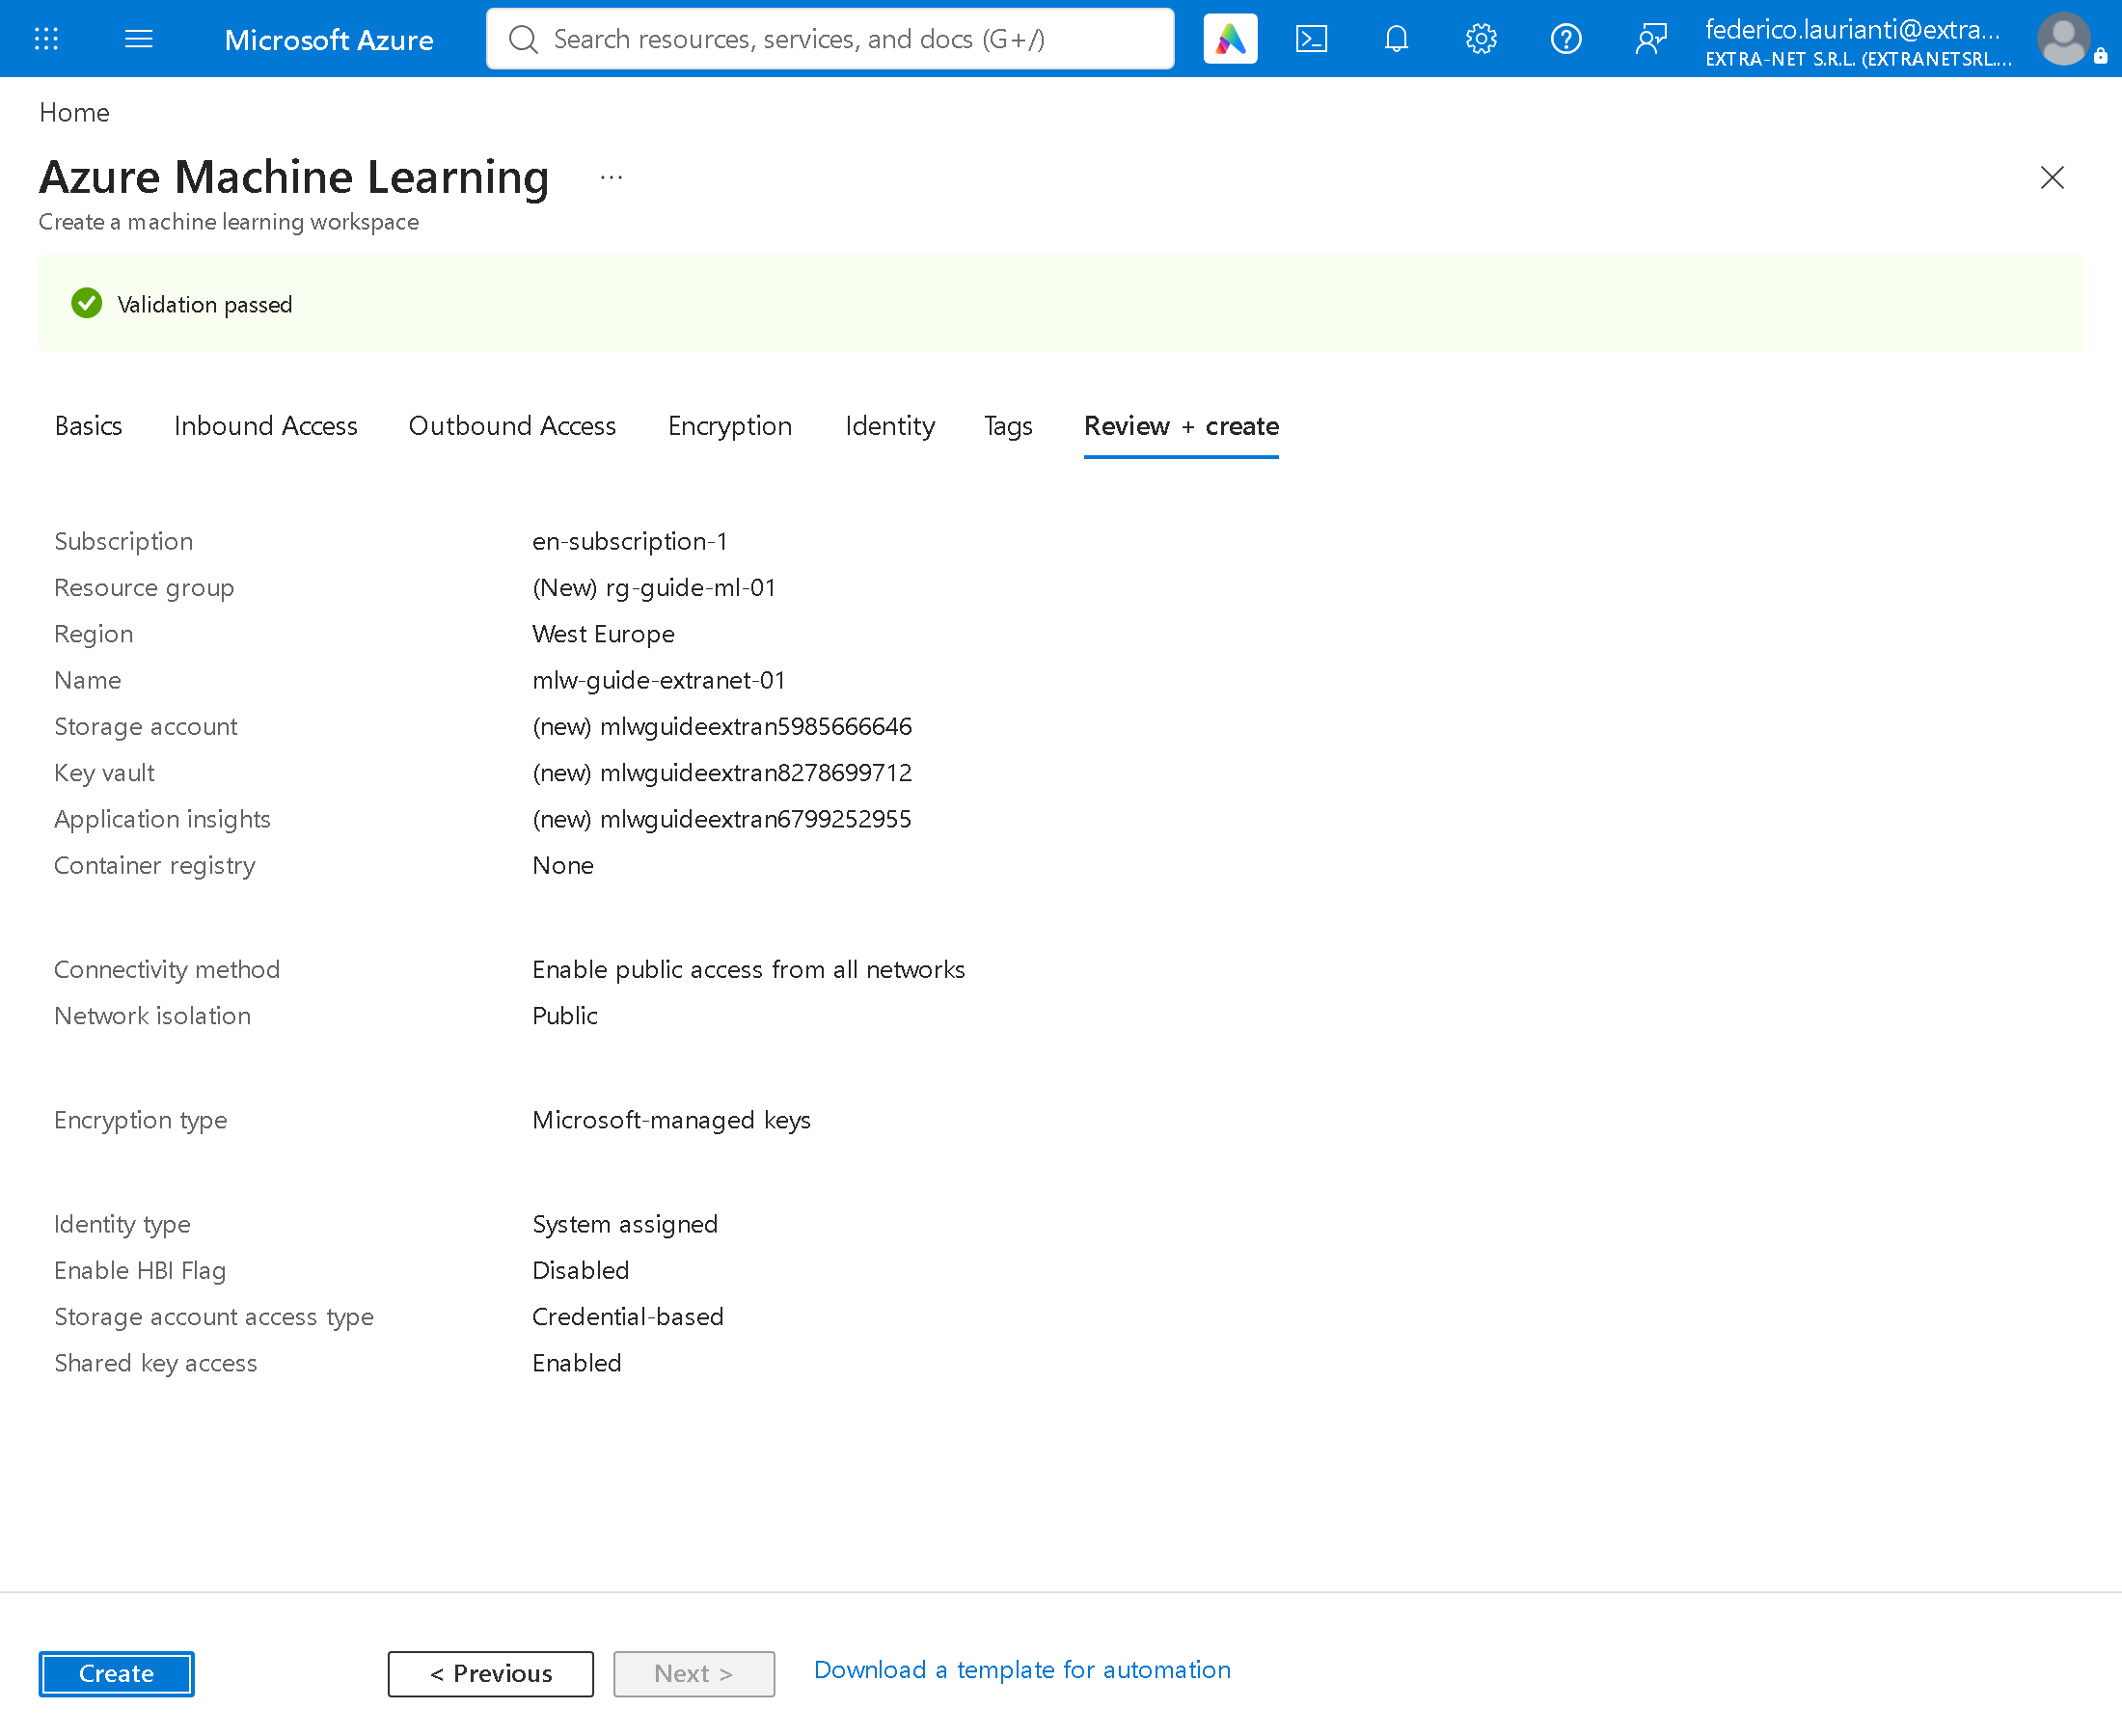
Press Create and wait for Your deployment is complete.
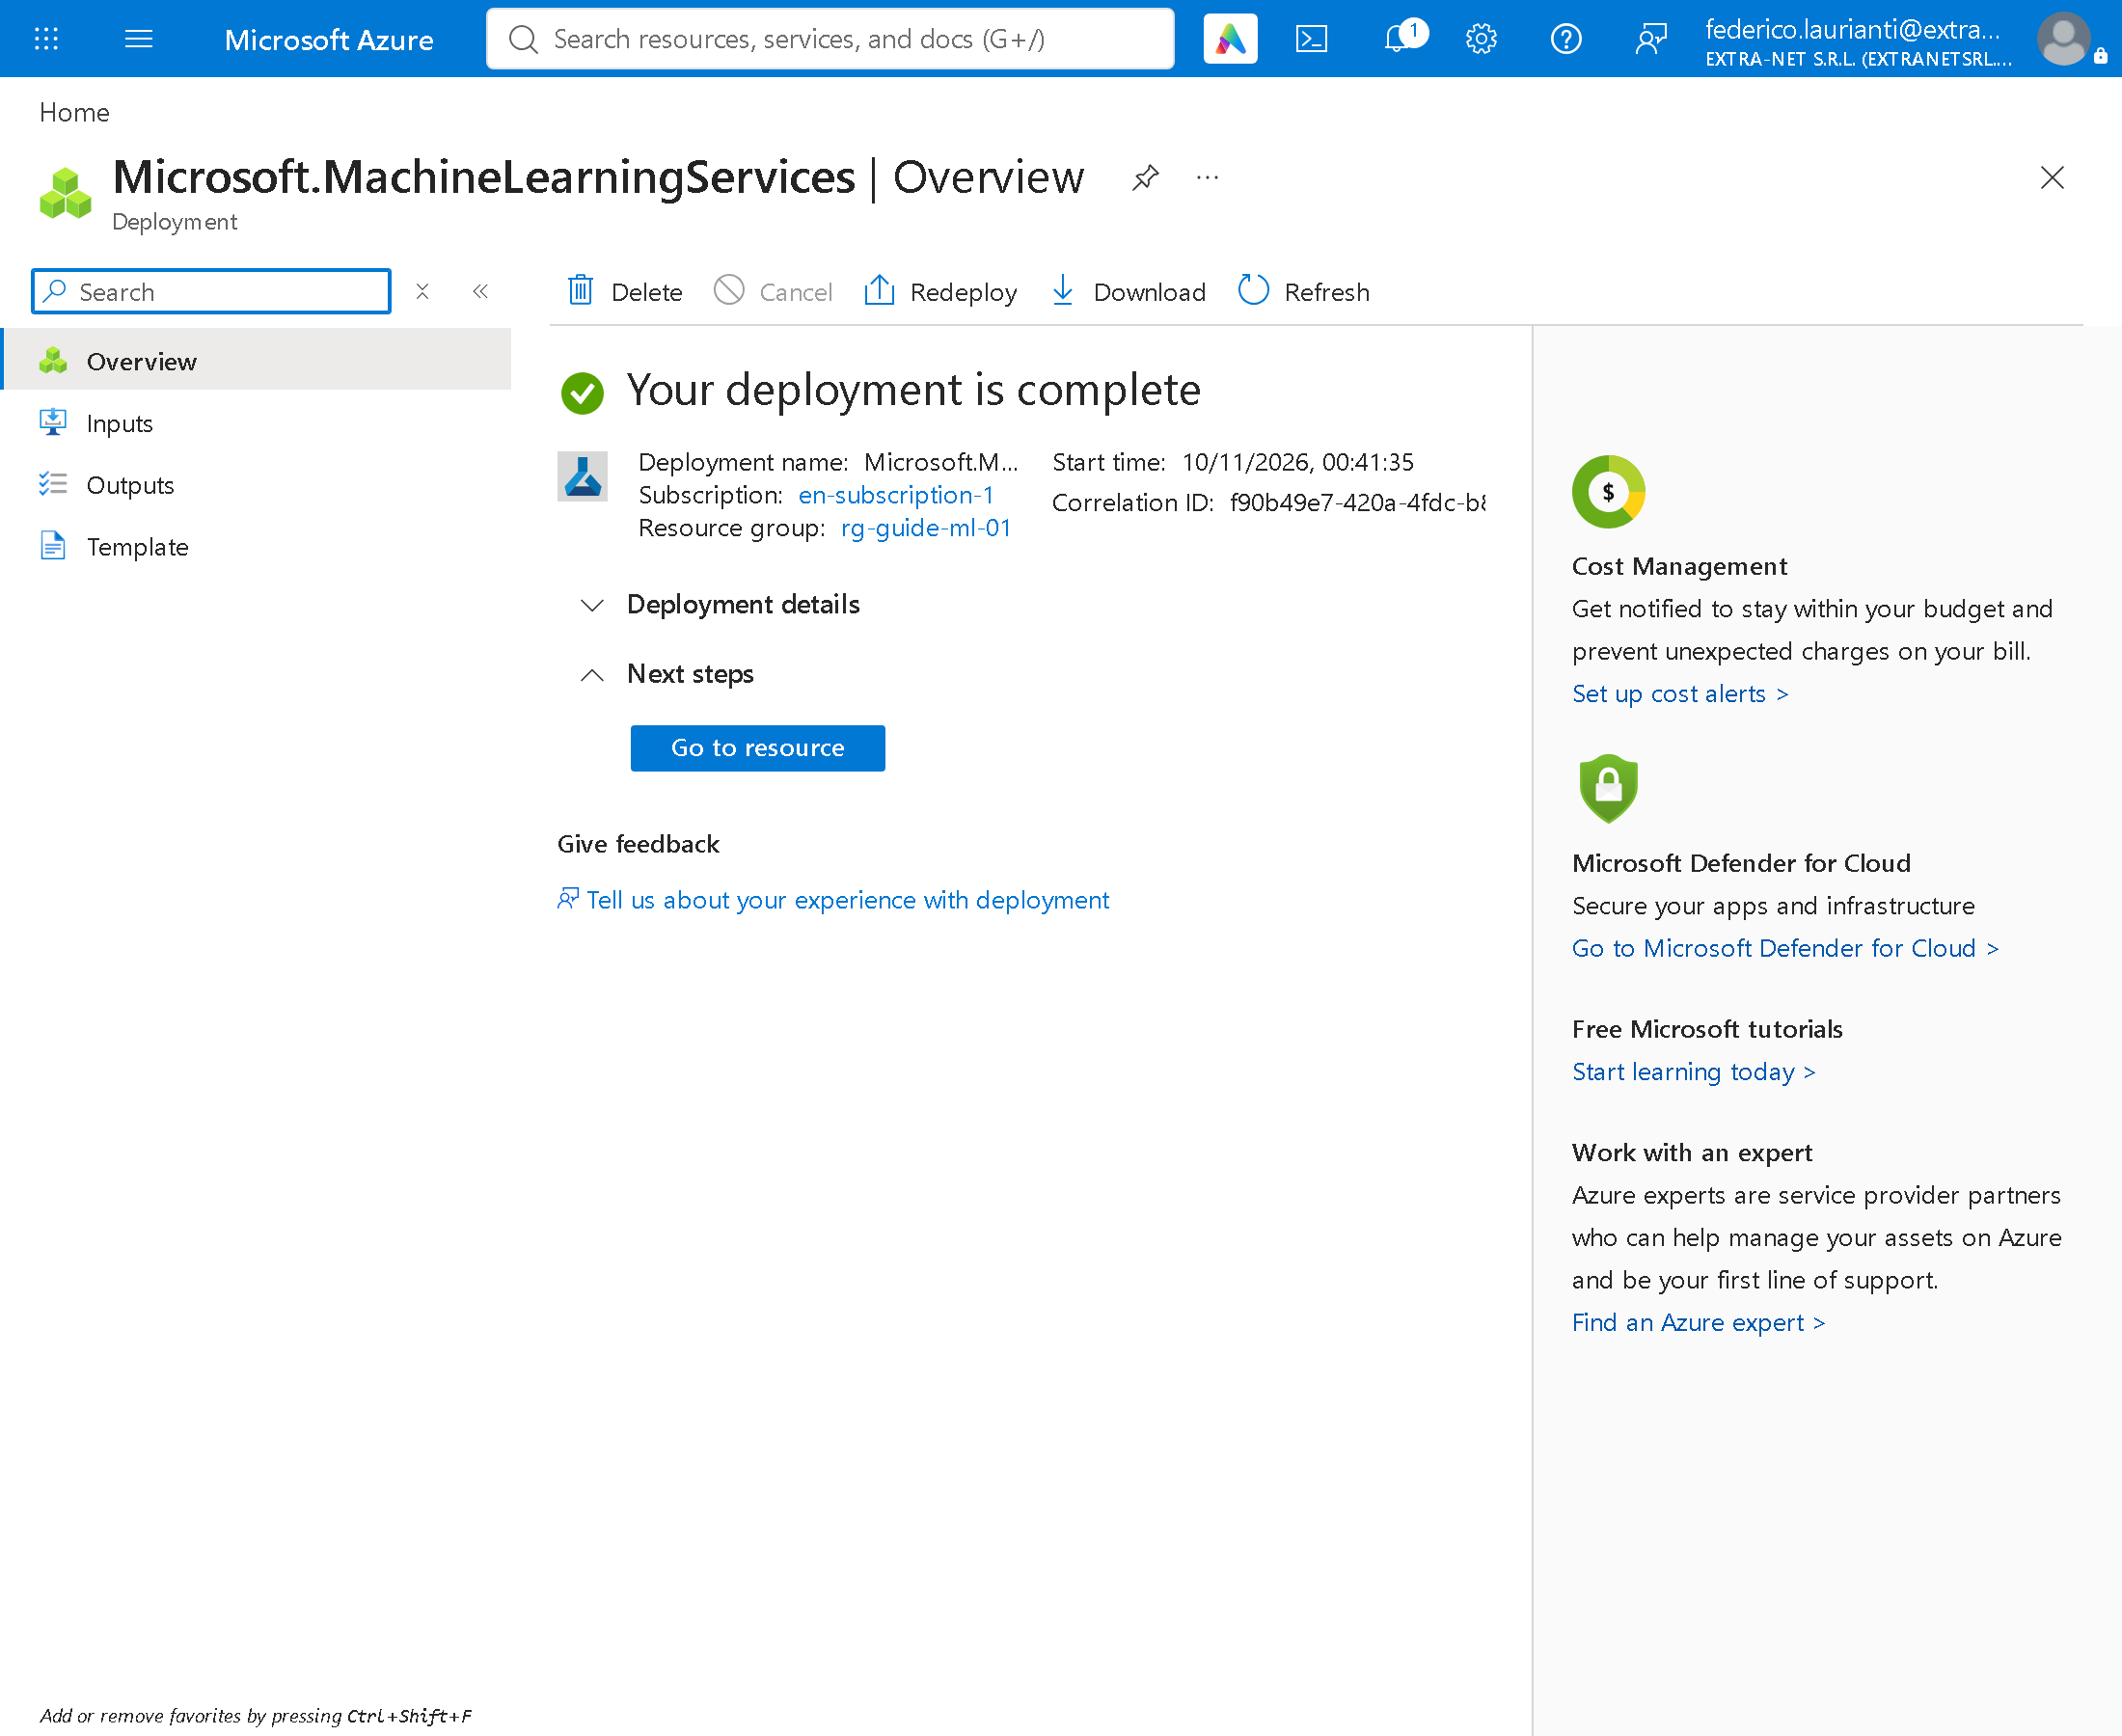
2. Open the studio
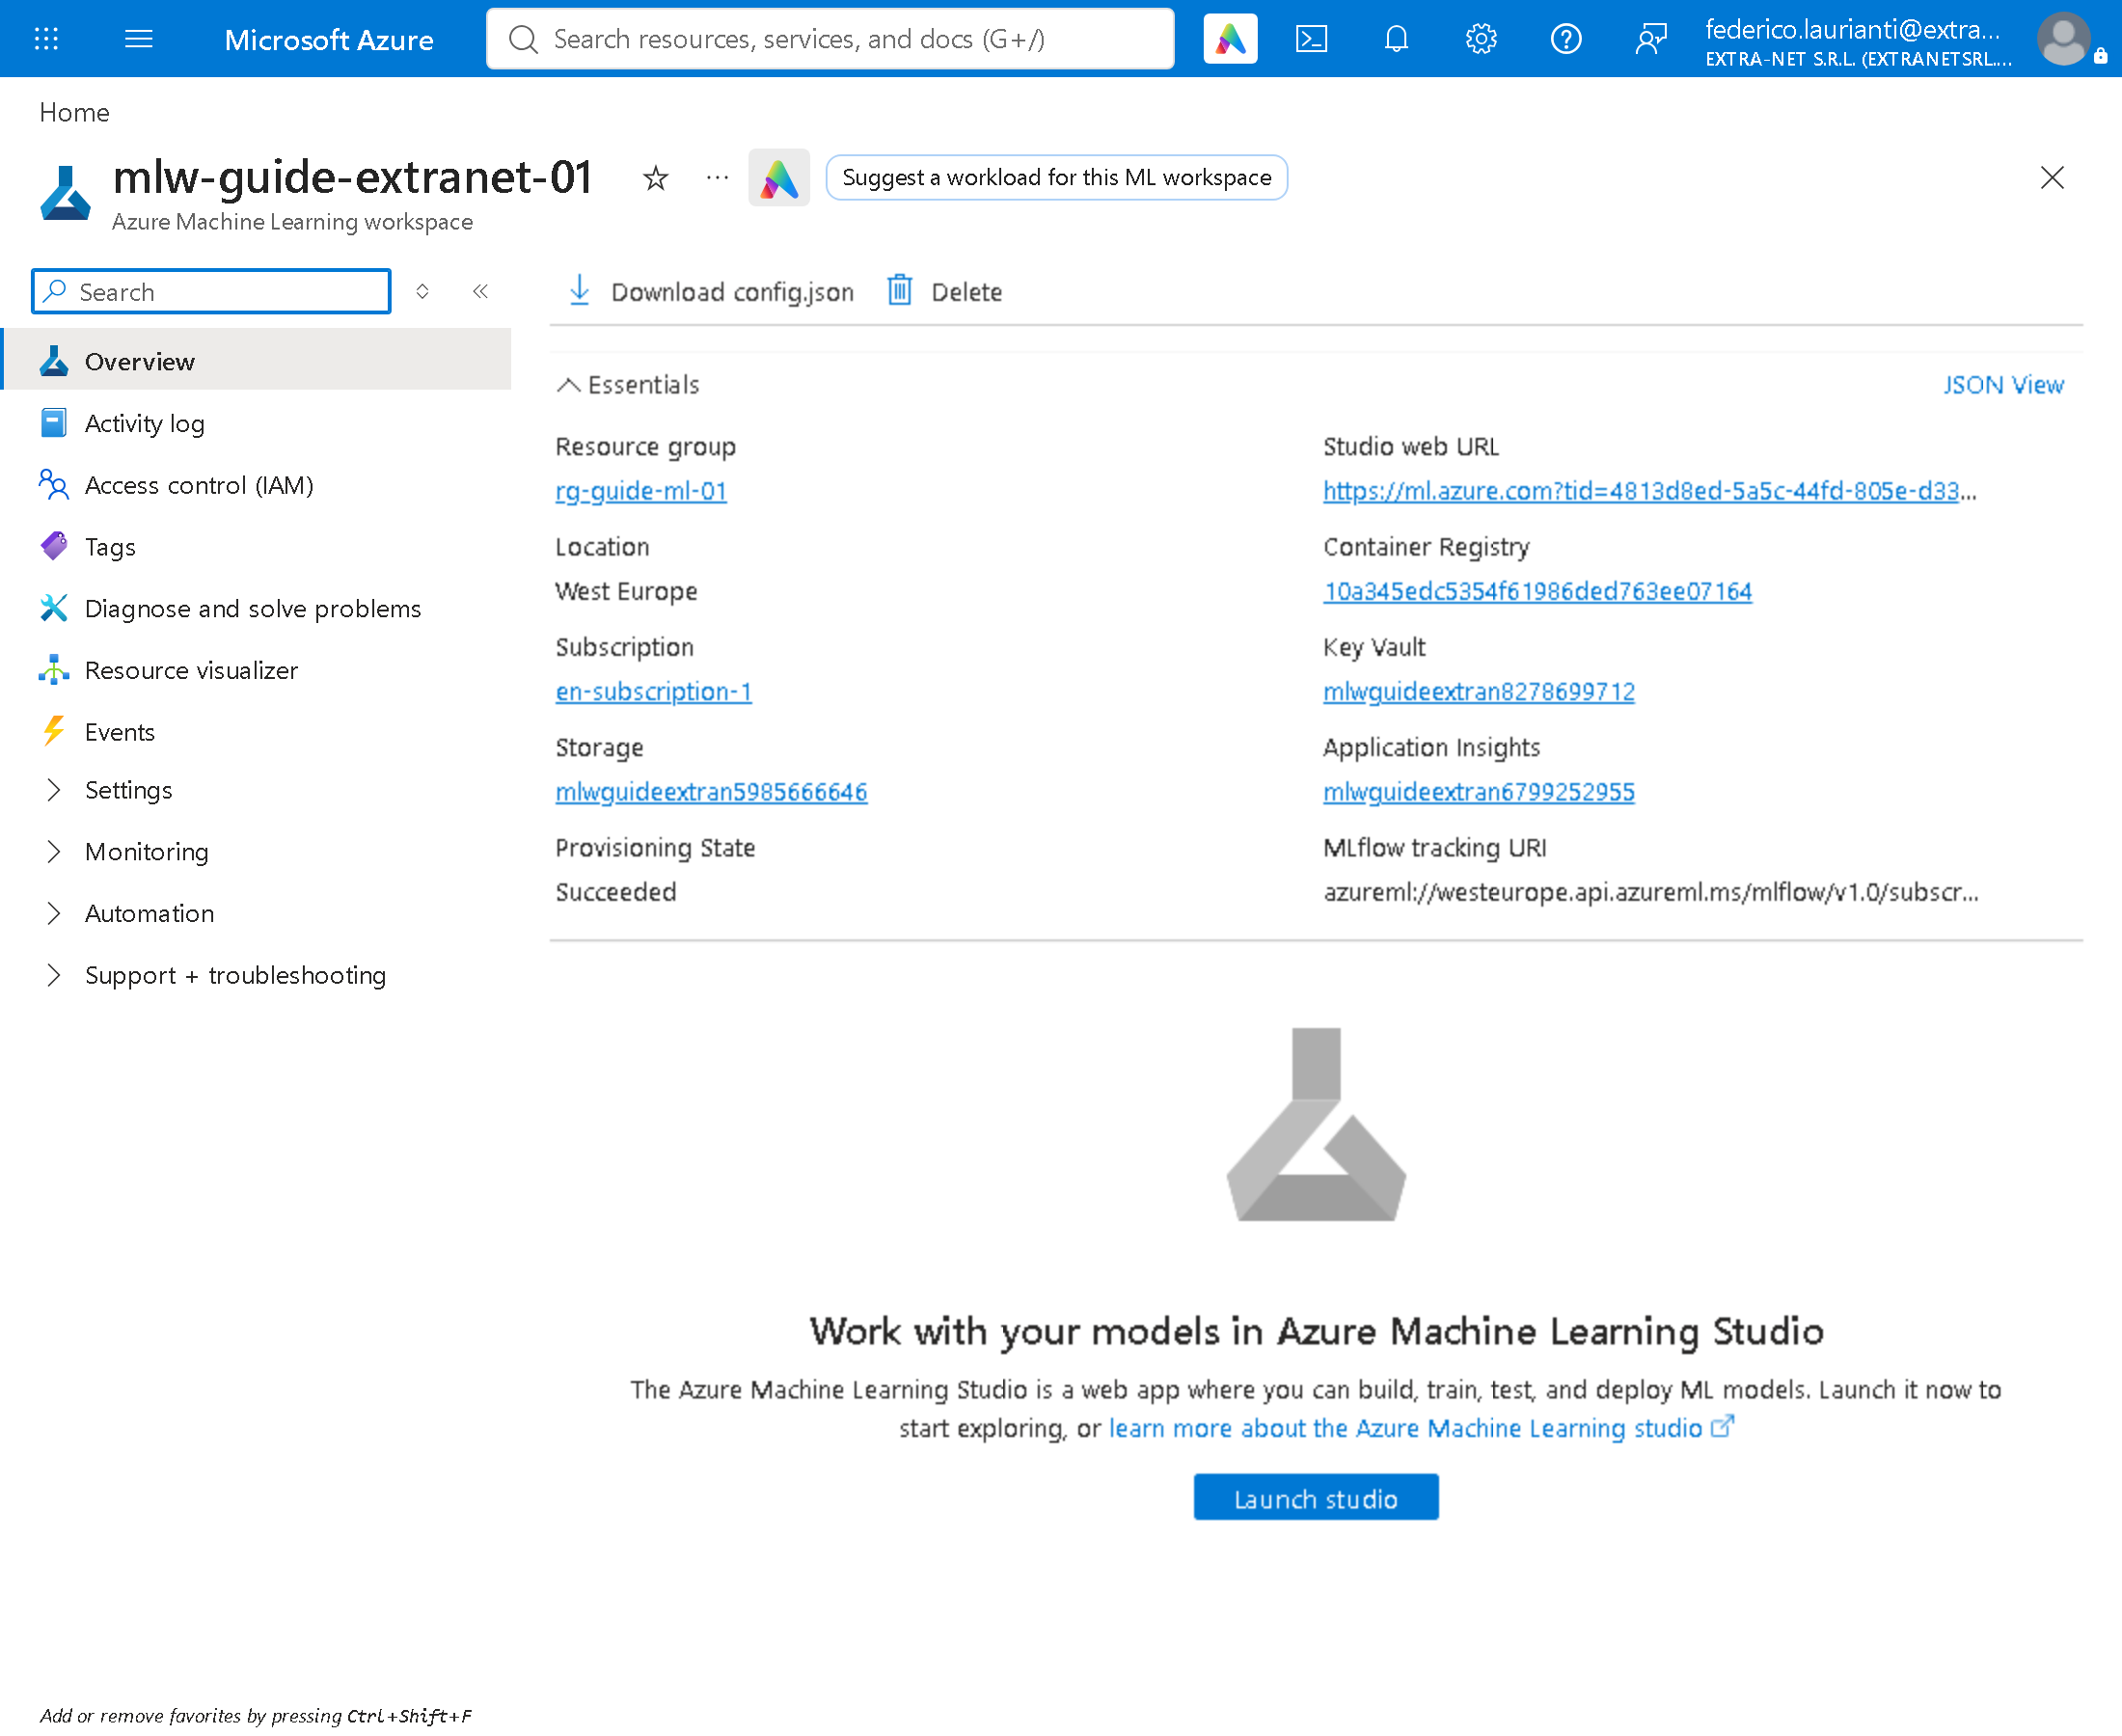
Press Go to resource and then Launch studio. The following steps, up to the deployment, take place in the studio.
Training
3. Write the training program
On your computer create the file train.py. It trains a network with one hidden layer on the scikit-learn Iris dataset: 150 flowers, four measurements per flower, three species to recognise.
import argparse

import mlflow
import mlflow.pytorch
import pandas as pd
import torch
from mlflow.models import infer_signature
from sklearn.datasets import load_iris
from sklearn.model_selection import train_test_split
from torch import nn

parser = argparse.ArgumentParser()
parser.add_argument("--epochs", type=int, default=200)
parser.add_argument("--hidden", type=int, default=8)
parser.add_argument("--lr", type=float, default=0.01)
args = parser.parse_args()

iris = load_iris(as_frame=True)
columns = ["sepal_length", "sepal_width", "petal_length", "petal_width"]
features = iris.data.set_axis(columns, axis=1).astype("float32")
x_train, x_test, y_train, y_test = train_test_split(
    features, iris.target, test_size=0.3, random_state=42, stratify=iris.target)

to_x = lambda frame: torch.tensor(frame.values, dtype=torch.float32)
to_y = lambda series: torch.tensor(series.values, dtype=torch.long)

torch.manual_seed(42)
network = nn.Sequential(nn.Linear(4, args.hidden), nn.ReLU(), nn.Linear(args.hidden, 3))
optimizer = torch.optim.Adam(network.parameters(), lr=args.lr)
loss_function = nn.CrossEntropyLoss()

mlflow.log_params(vars(args))

for epoch in range(args.epochs):
    optimizer.zero_grad()
    loss = loss_function(network(to_x(x_train)), to_y(y_train))
    loss.backward()
    optimizer.step()
    if epoch % 10 == 0:
        mlflow.log_metric("loss", loss.item(), step=epoch)

model = nn.Sequential(network, nn.Softmax(dim=1)).eval()
with torch.no_grad():
    probabilities = model(to_x(x_test))
accuracy = (probabilities.argmax(dim=1) == to_y(y_test)).float().mean().item()
mlflow.log_metric("accuracy", accuracy)
print(f"accuracy: {accuracy:.4f}")

signature = infer_signature(x_test, pd.DataFrame(probabilities.numpy()))
requirements = [
    f"mlflow=={mlflow.__version__}",
    f"torch=={torch.__version__.split('+')[0]}",
    "cloudpickle",
    "pandas<3",
    "azureml-ai-monitoring",
]
mlflow.pytorch.save_model(model, "model", signature=signature,
                          serialization_format="pickle", pip_requirements=requirements)
mlflow.log_artifacts("model", artifact_path="model")
Parameters and metrics logged with MLflow show up in the studio. The last lines save the model in the format Azure can deploy without a scoring script. In this run each of these choices avoided an error:
save_modelfollowed bylog_artifacts, becausemlflow.pytorch.log_modelwith MLflow 3.15 stopped on a call that Azure Machine Learning does not accept.serialization_format="pickle", because with MLflow 3 the default format for PyTorch requires an input example.pandas<3, because without this line the model asks for pandas 3.1.1, MLflow 3.15 wants pandas below 3, and Azure cannot build the endpoint image.azureml-ai-monitoring, because the scoring script generated by Azure imports this package and without it the endpoint does not start.
4. Set up the first training run
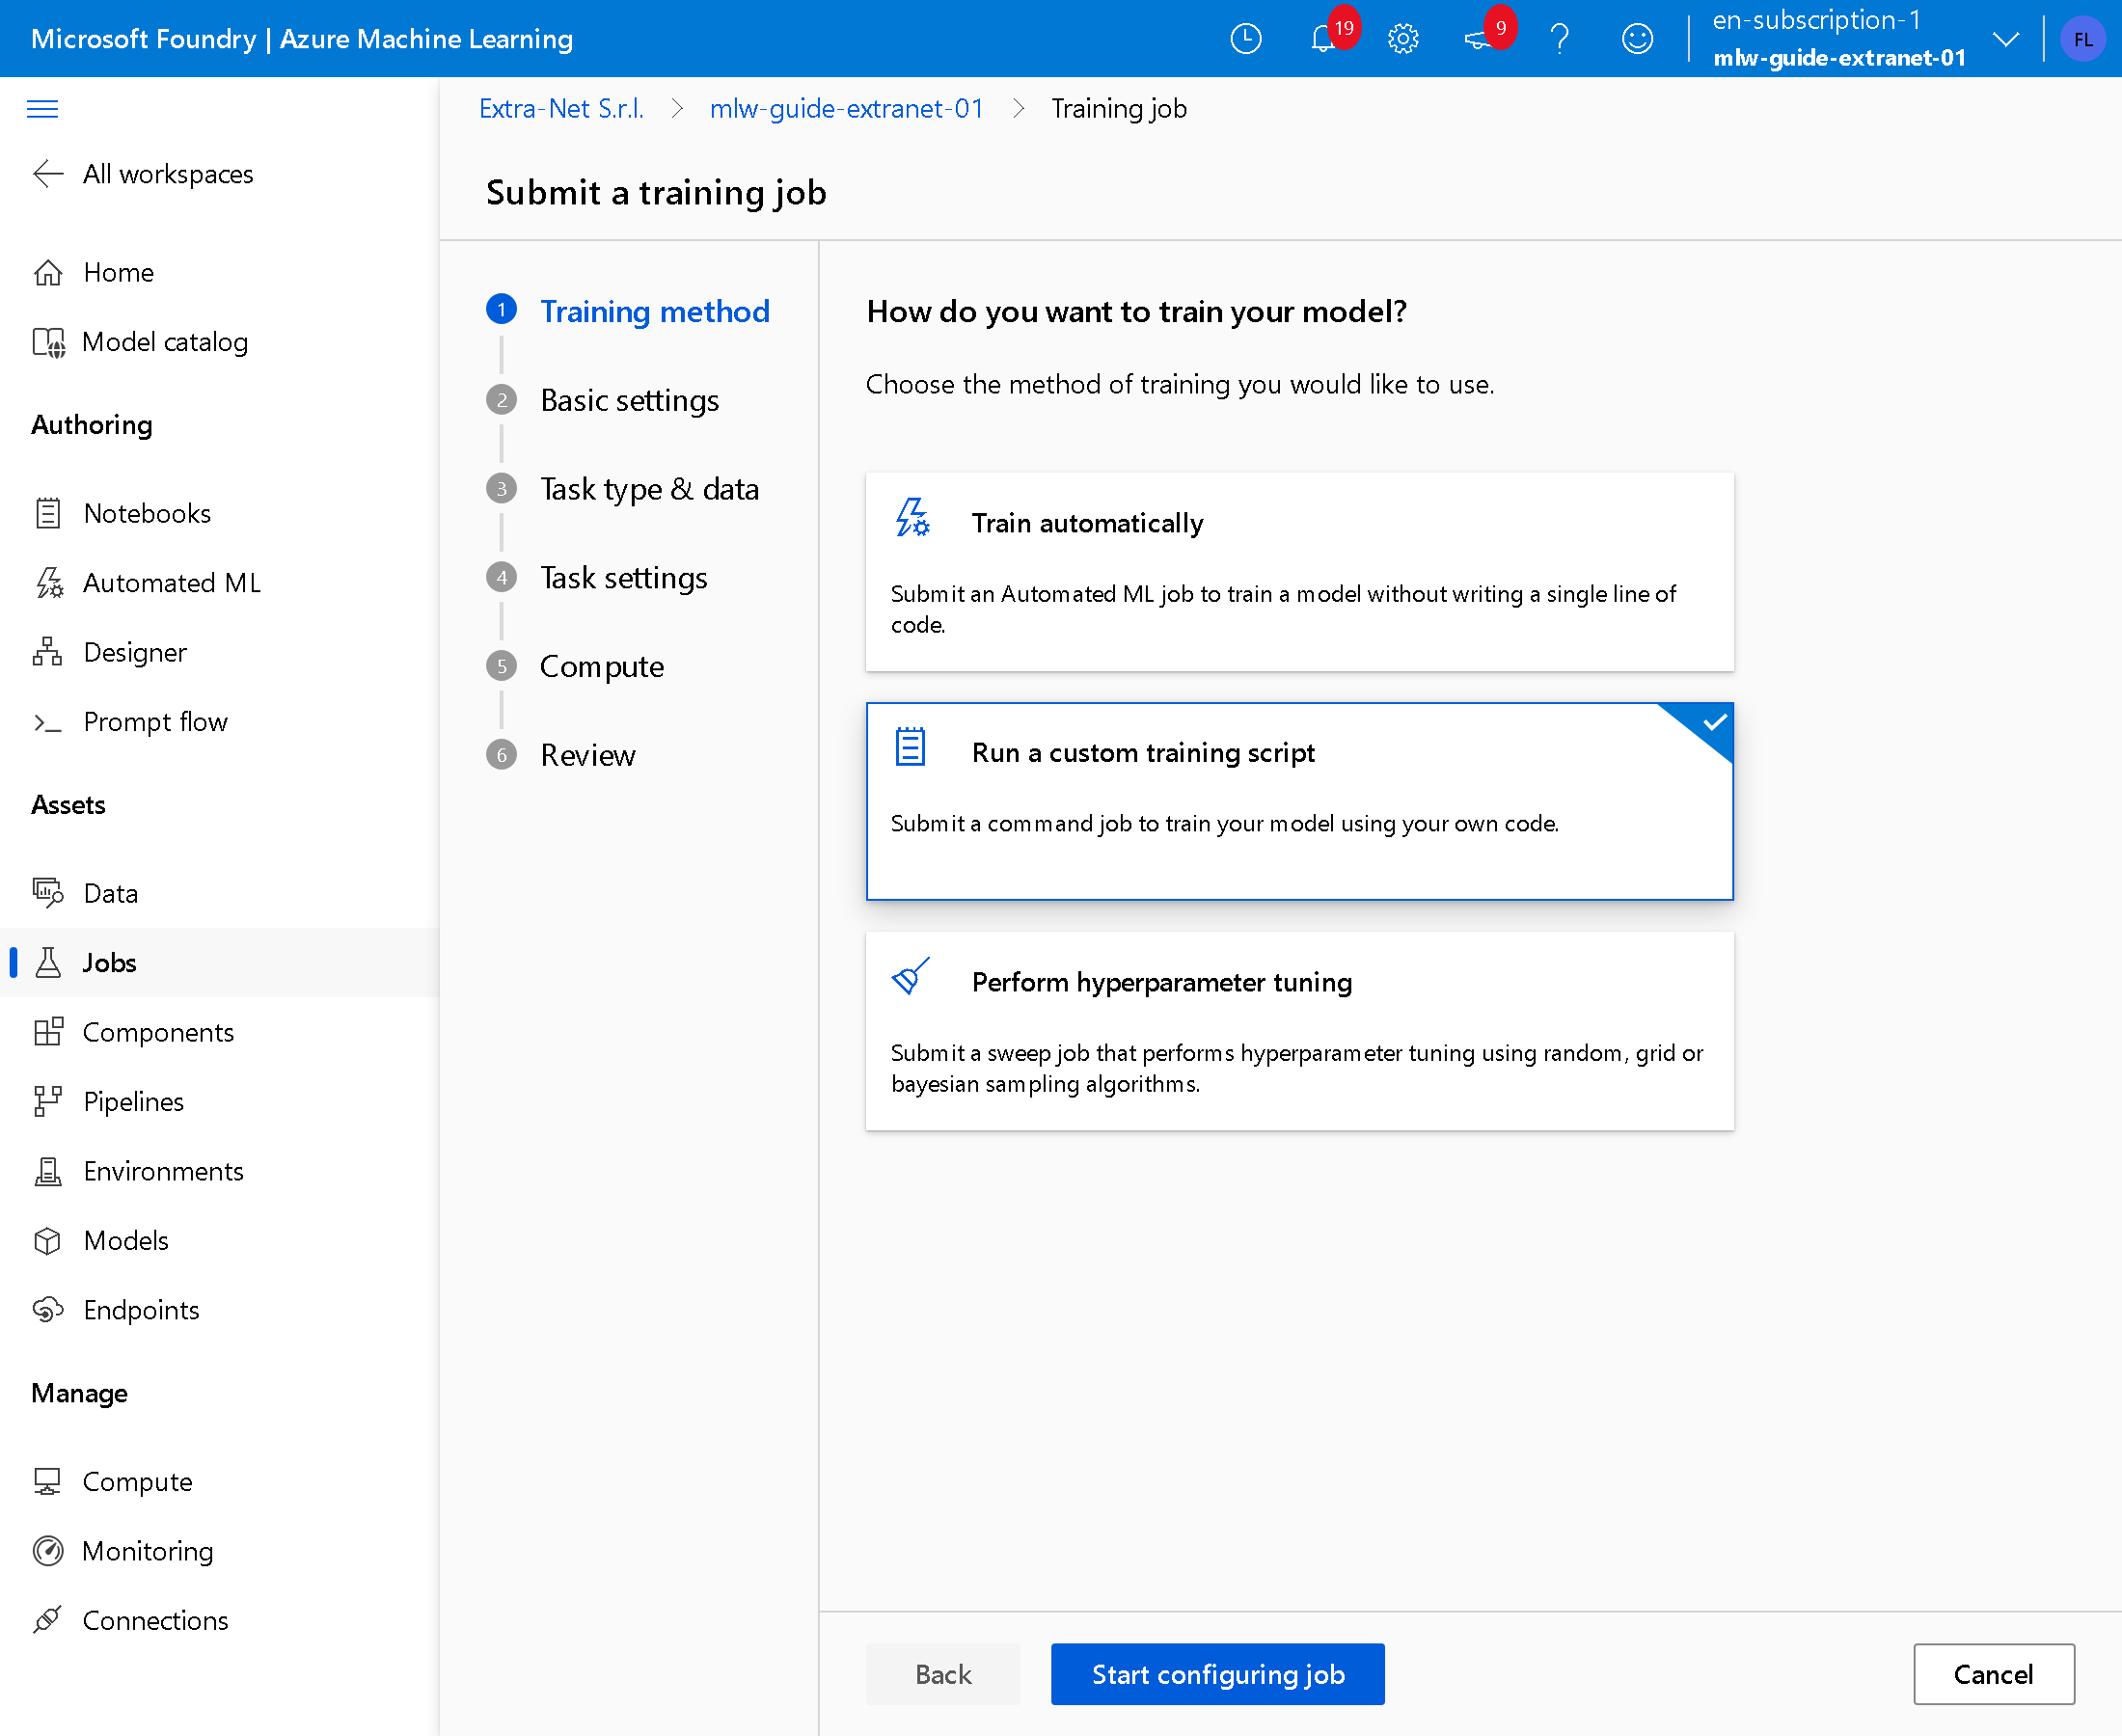
In the studio open Jobs, press Create job, choose Run a custom training script and press Start configuring job.
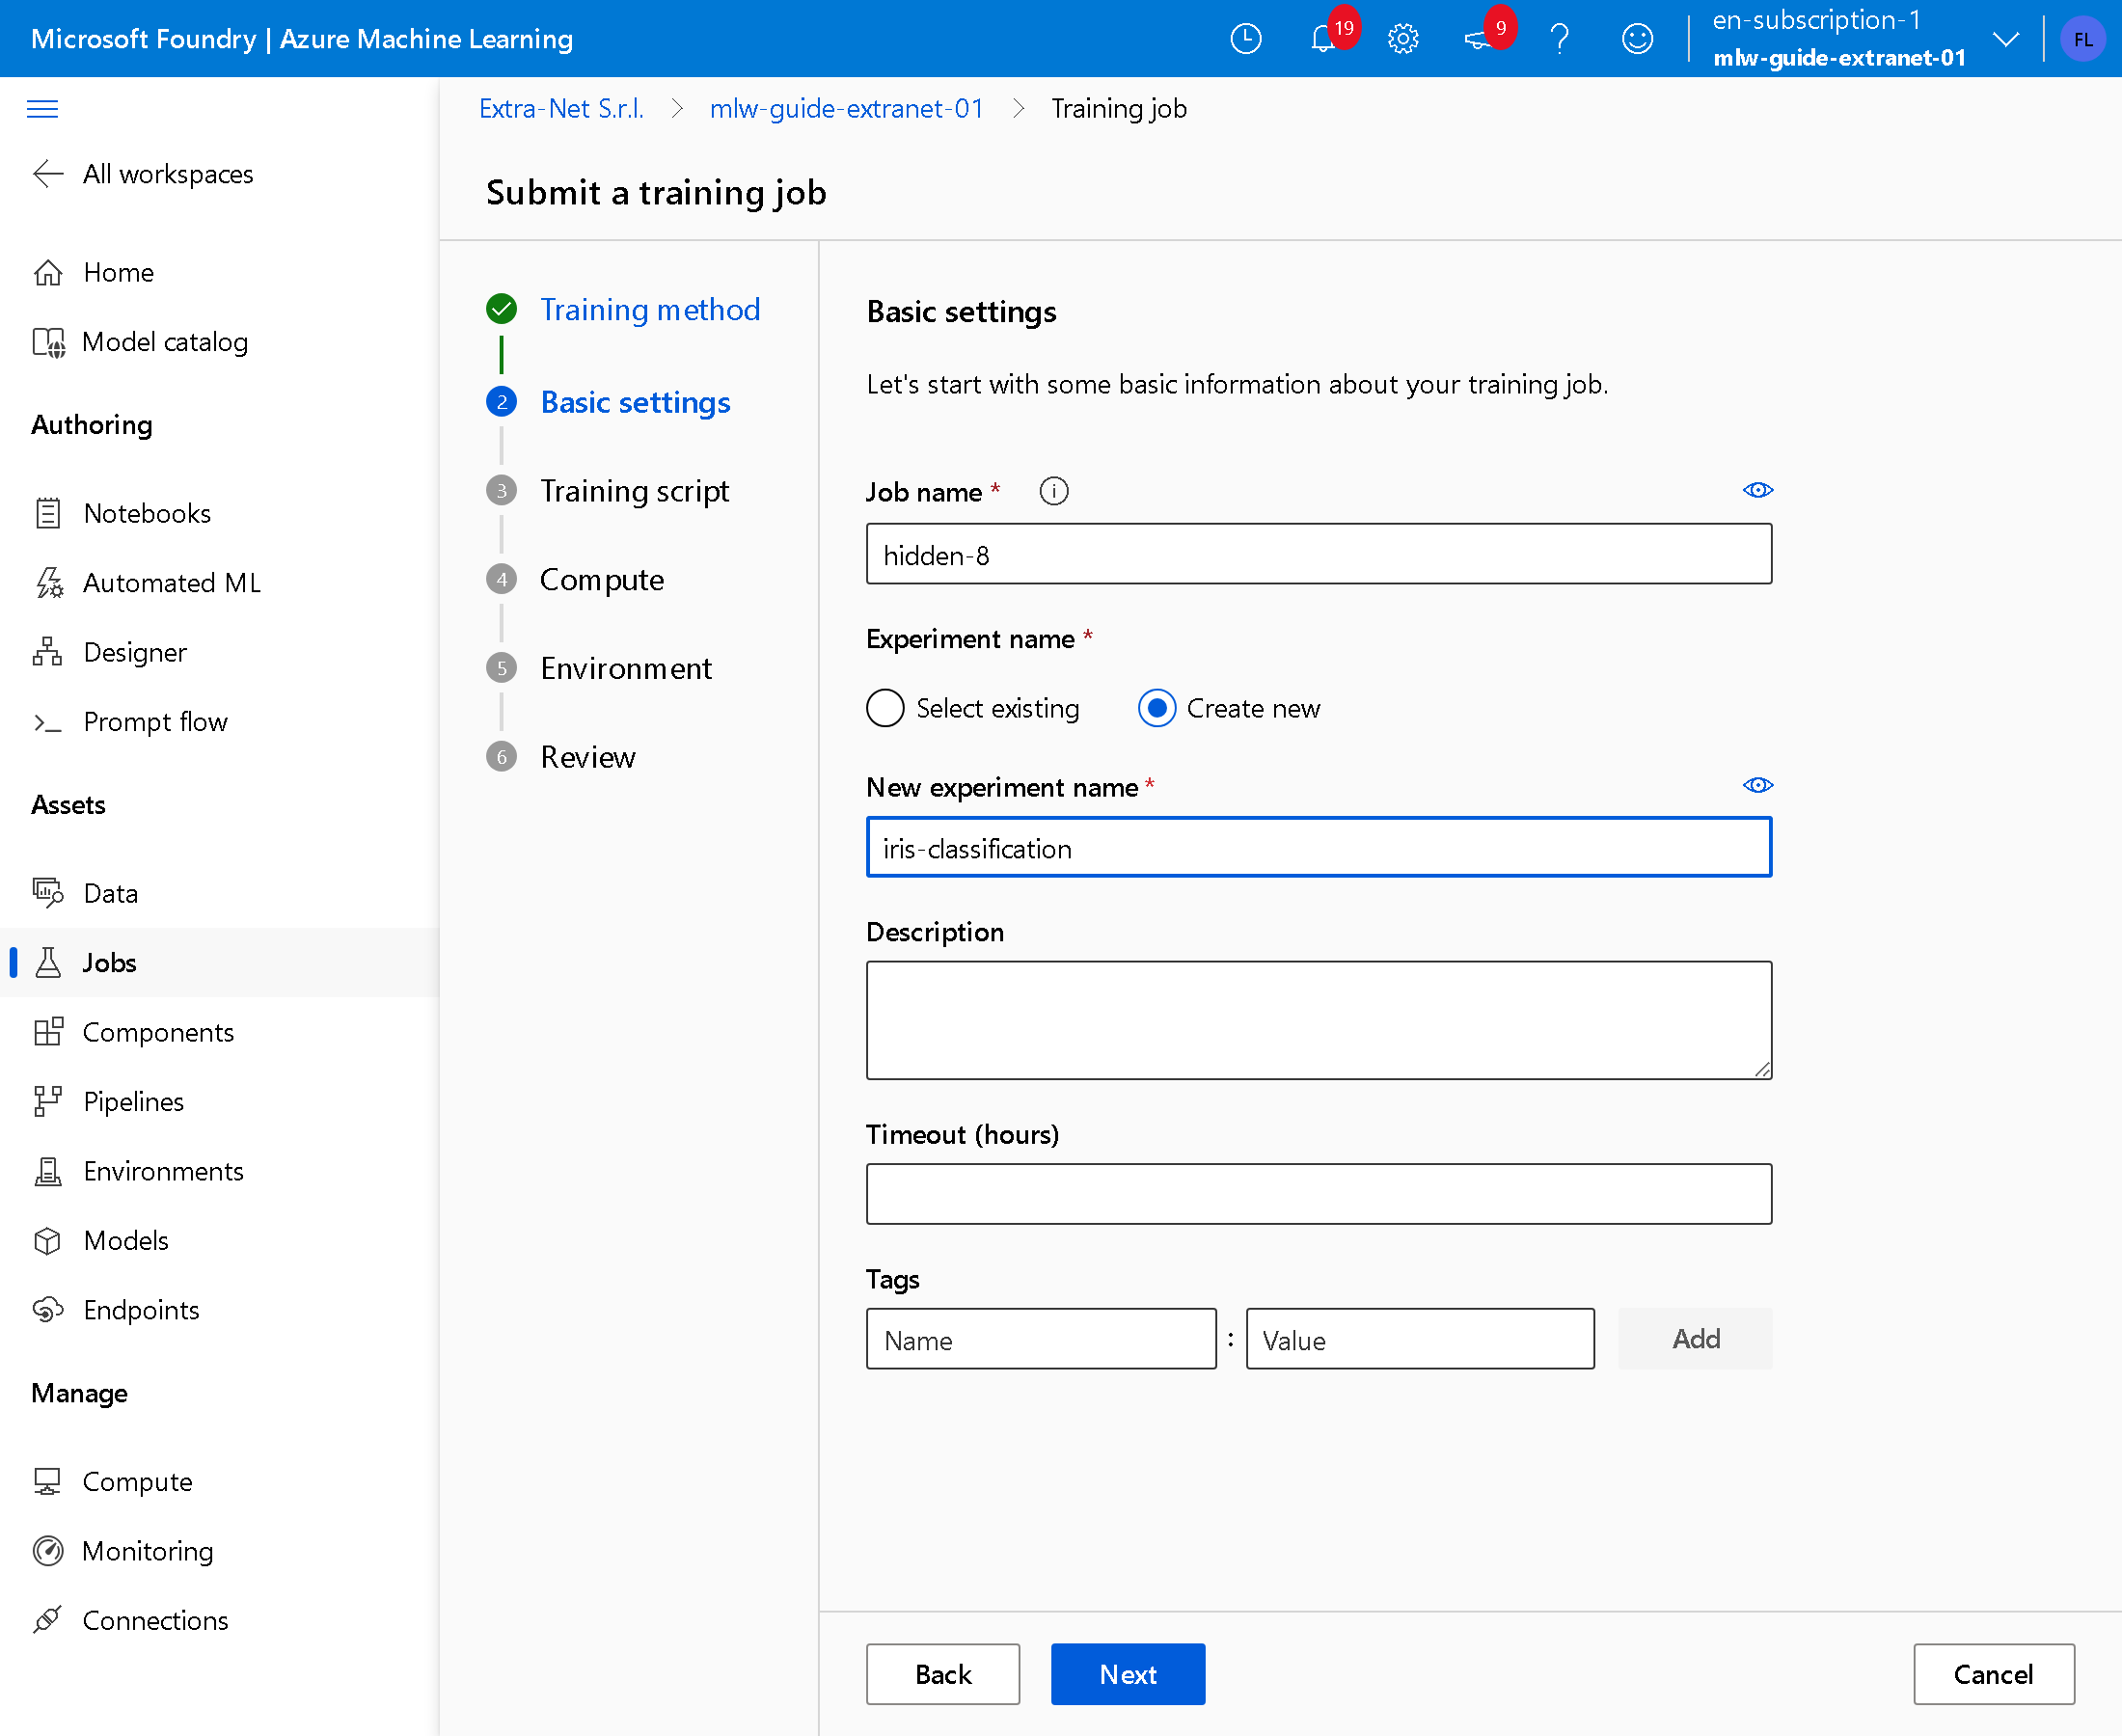
In Job name write hidden-8, in New experiment name iris-classification, and press Next.
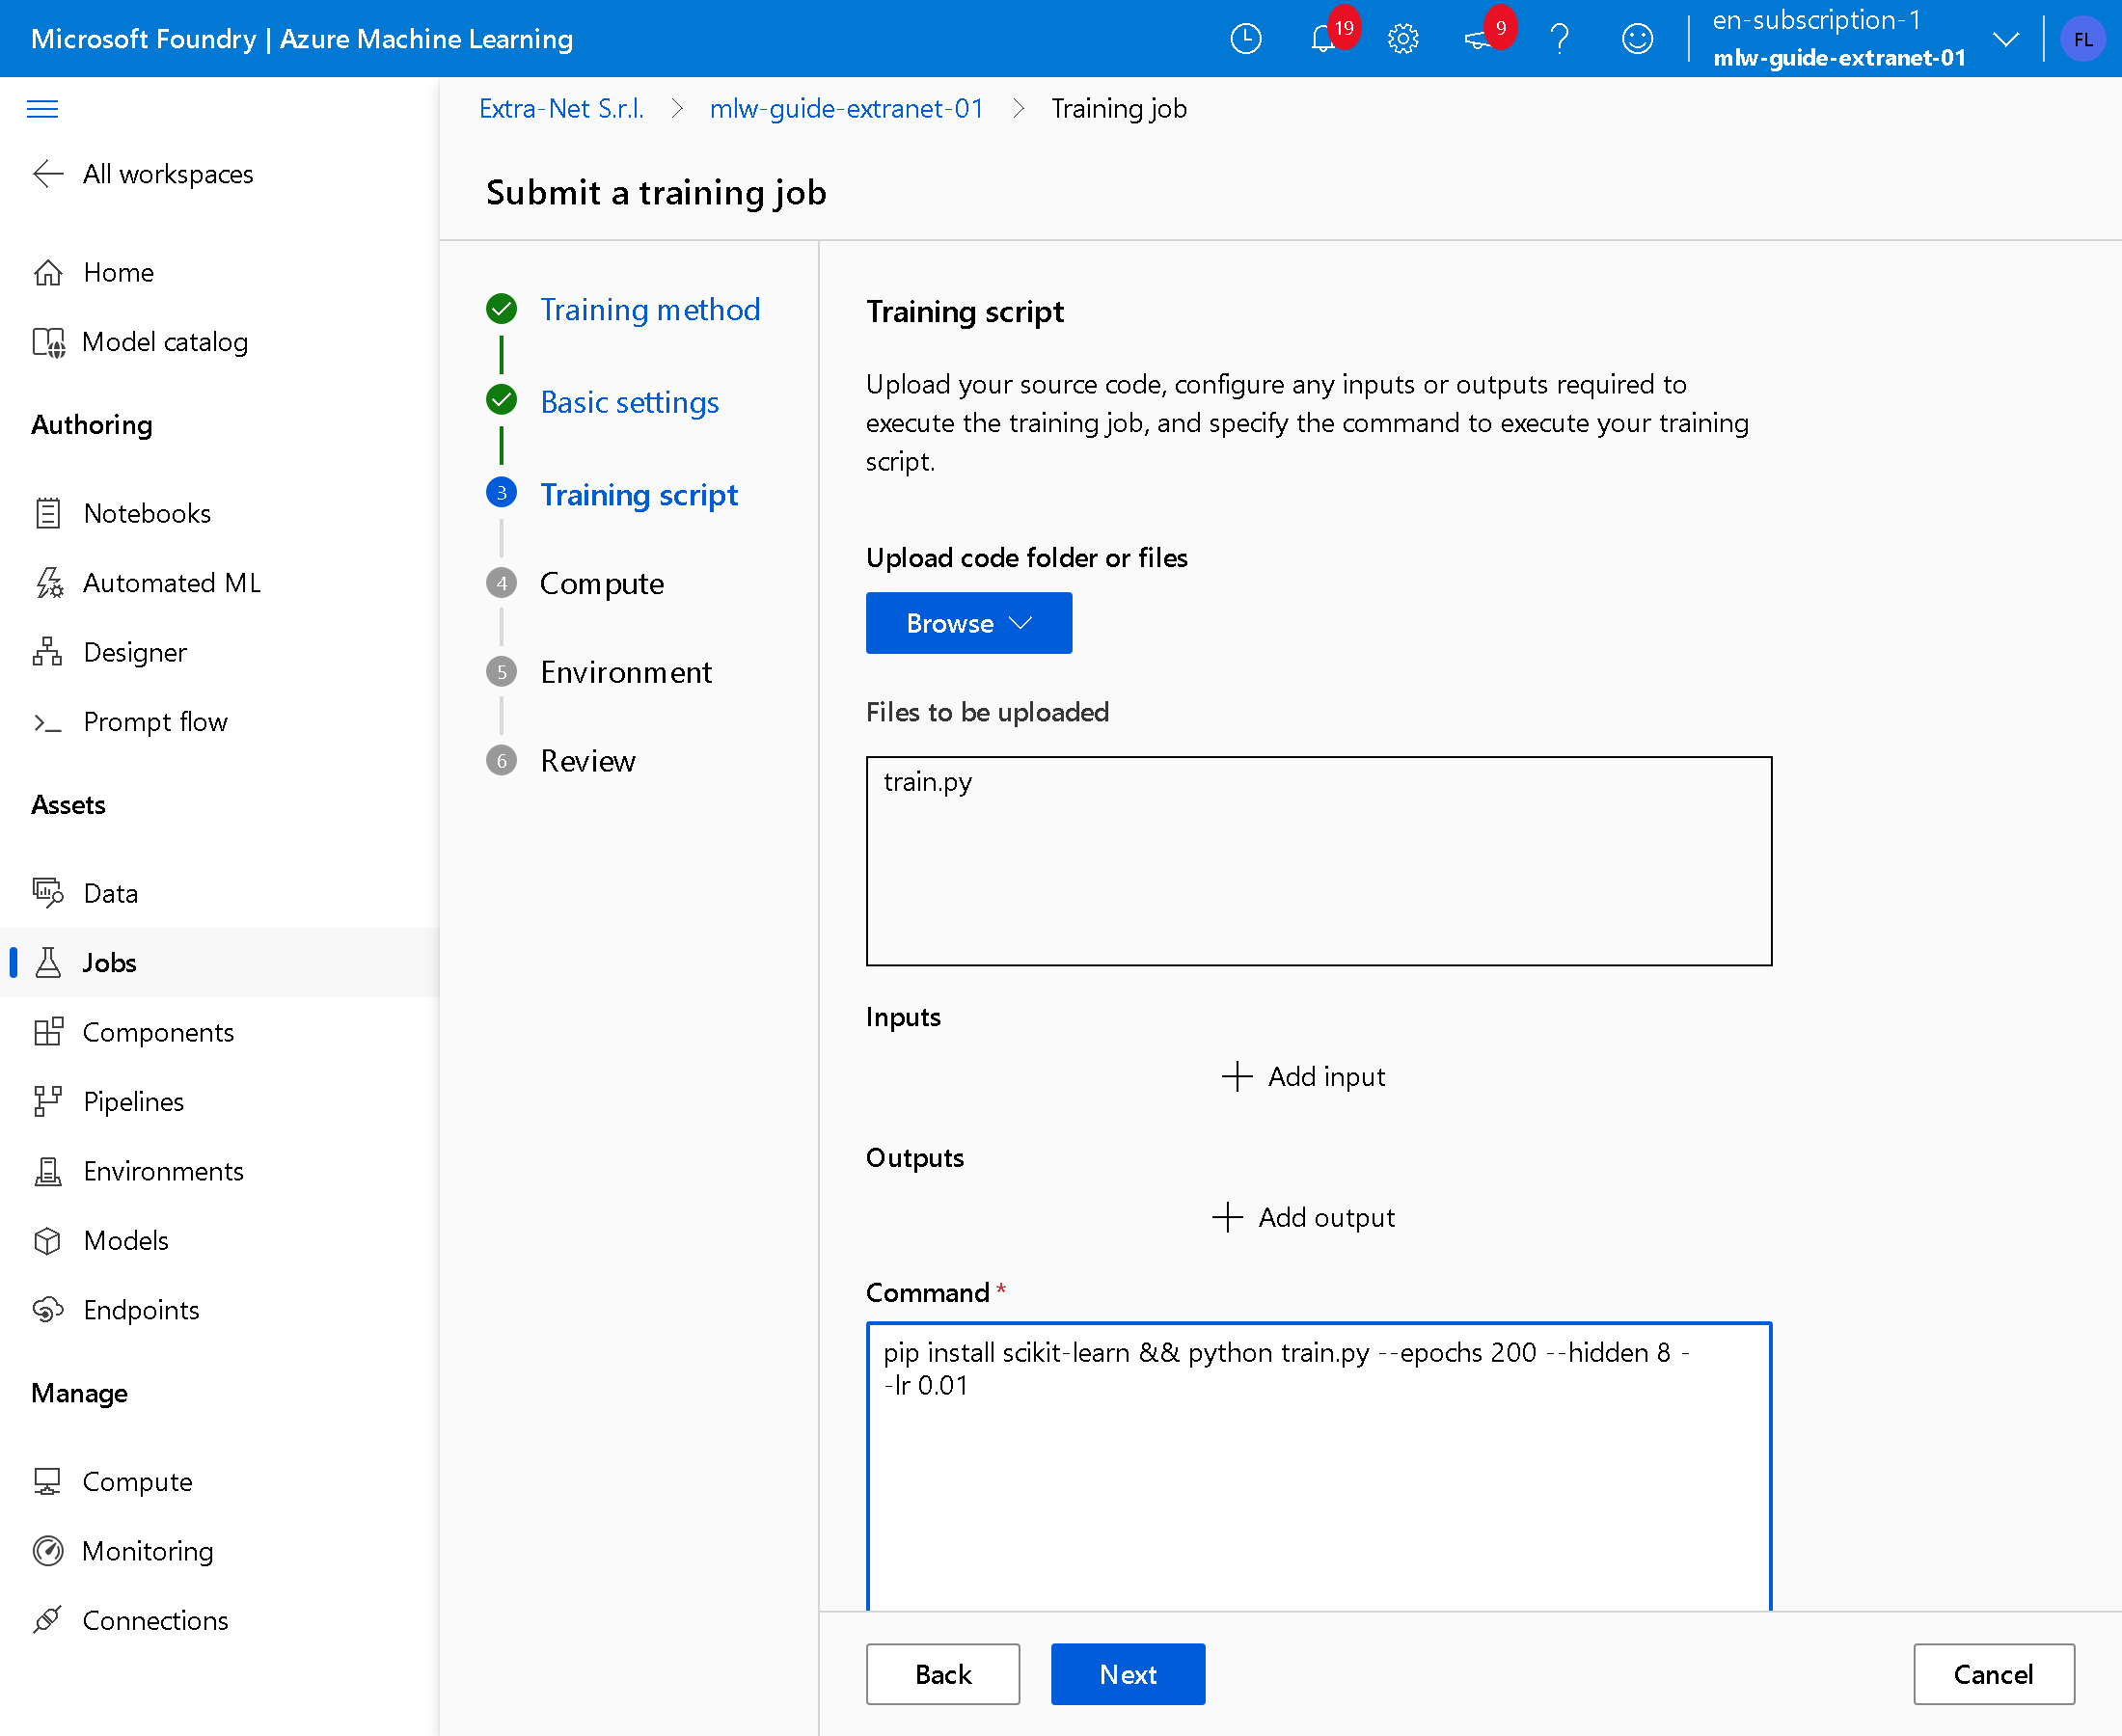
Press Browse > Local files and choose train.py. In Command write:
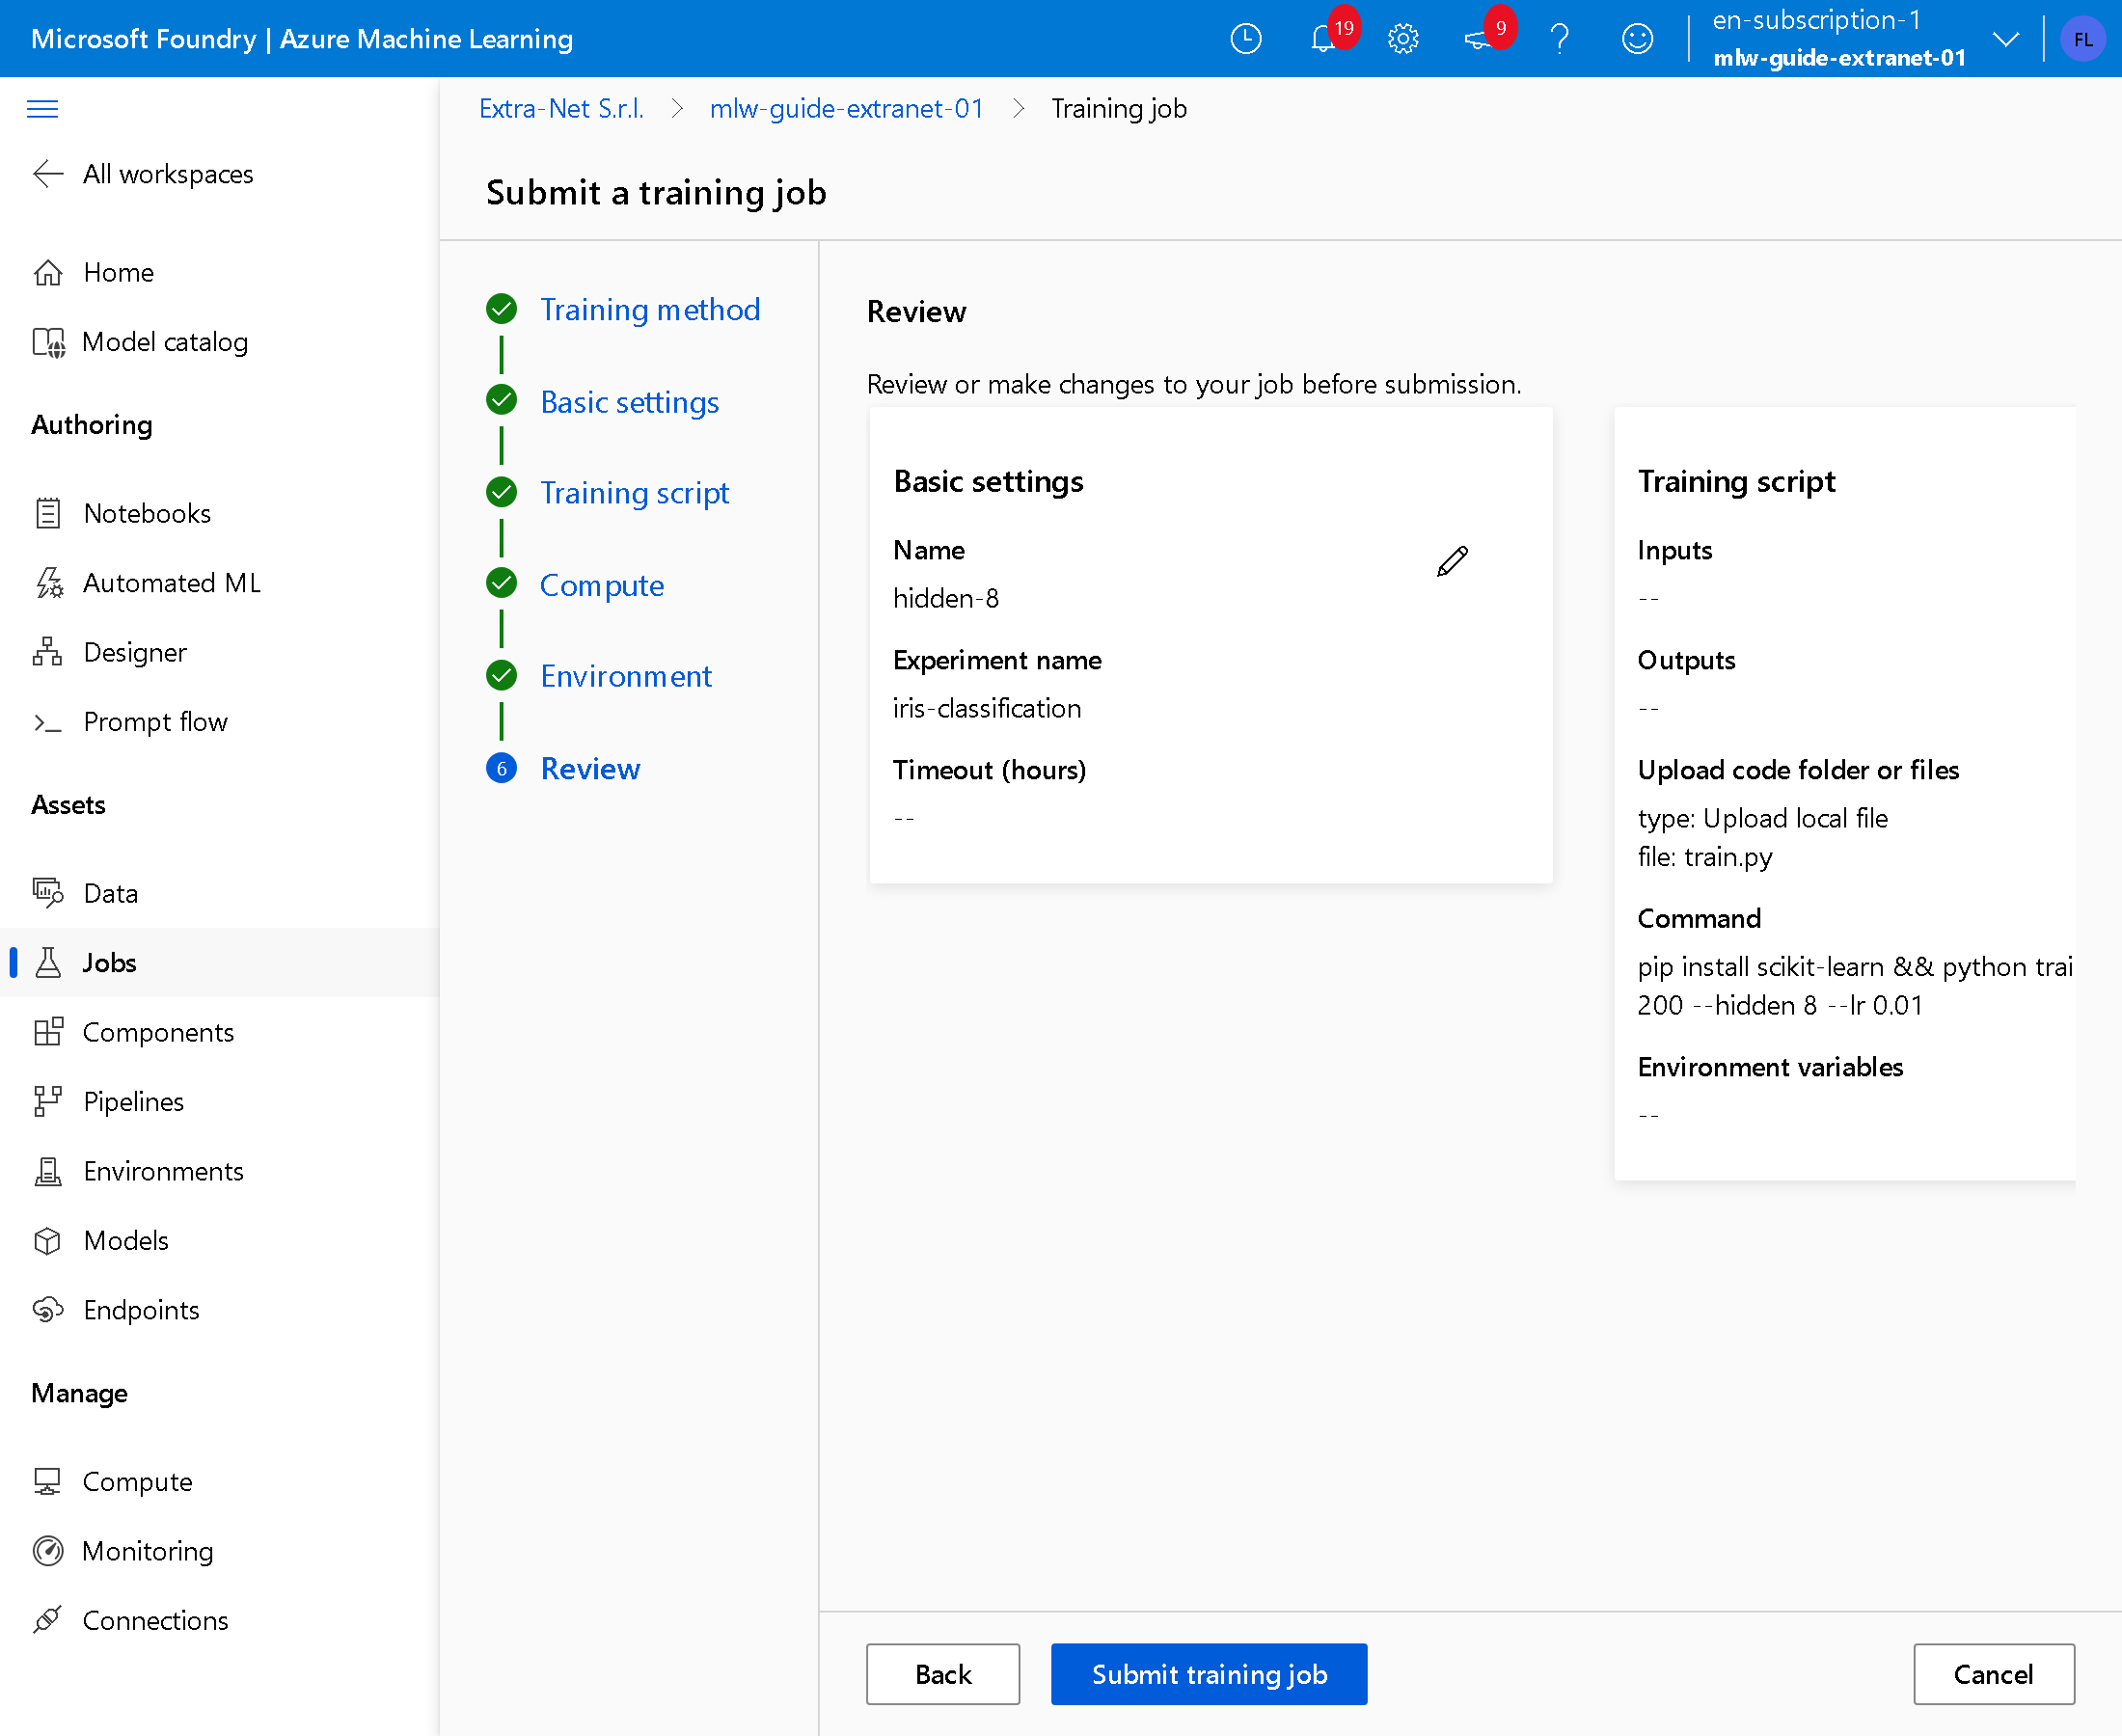
pip install scikit-learn && python train.py --epochs 200 --hidden 8 --lr 0.01The PyTorch environment chosen later does not contain scikit-learn: the first part of the command installs it. Press Next.
5. Choose the machine and the environment
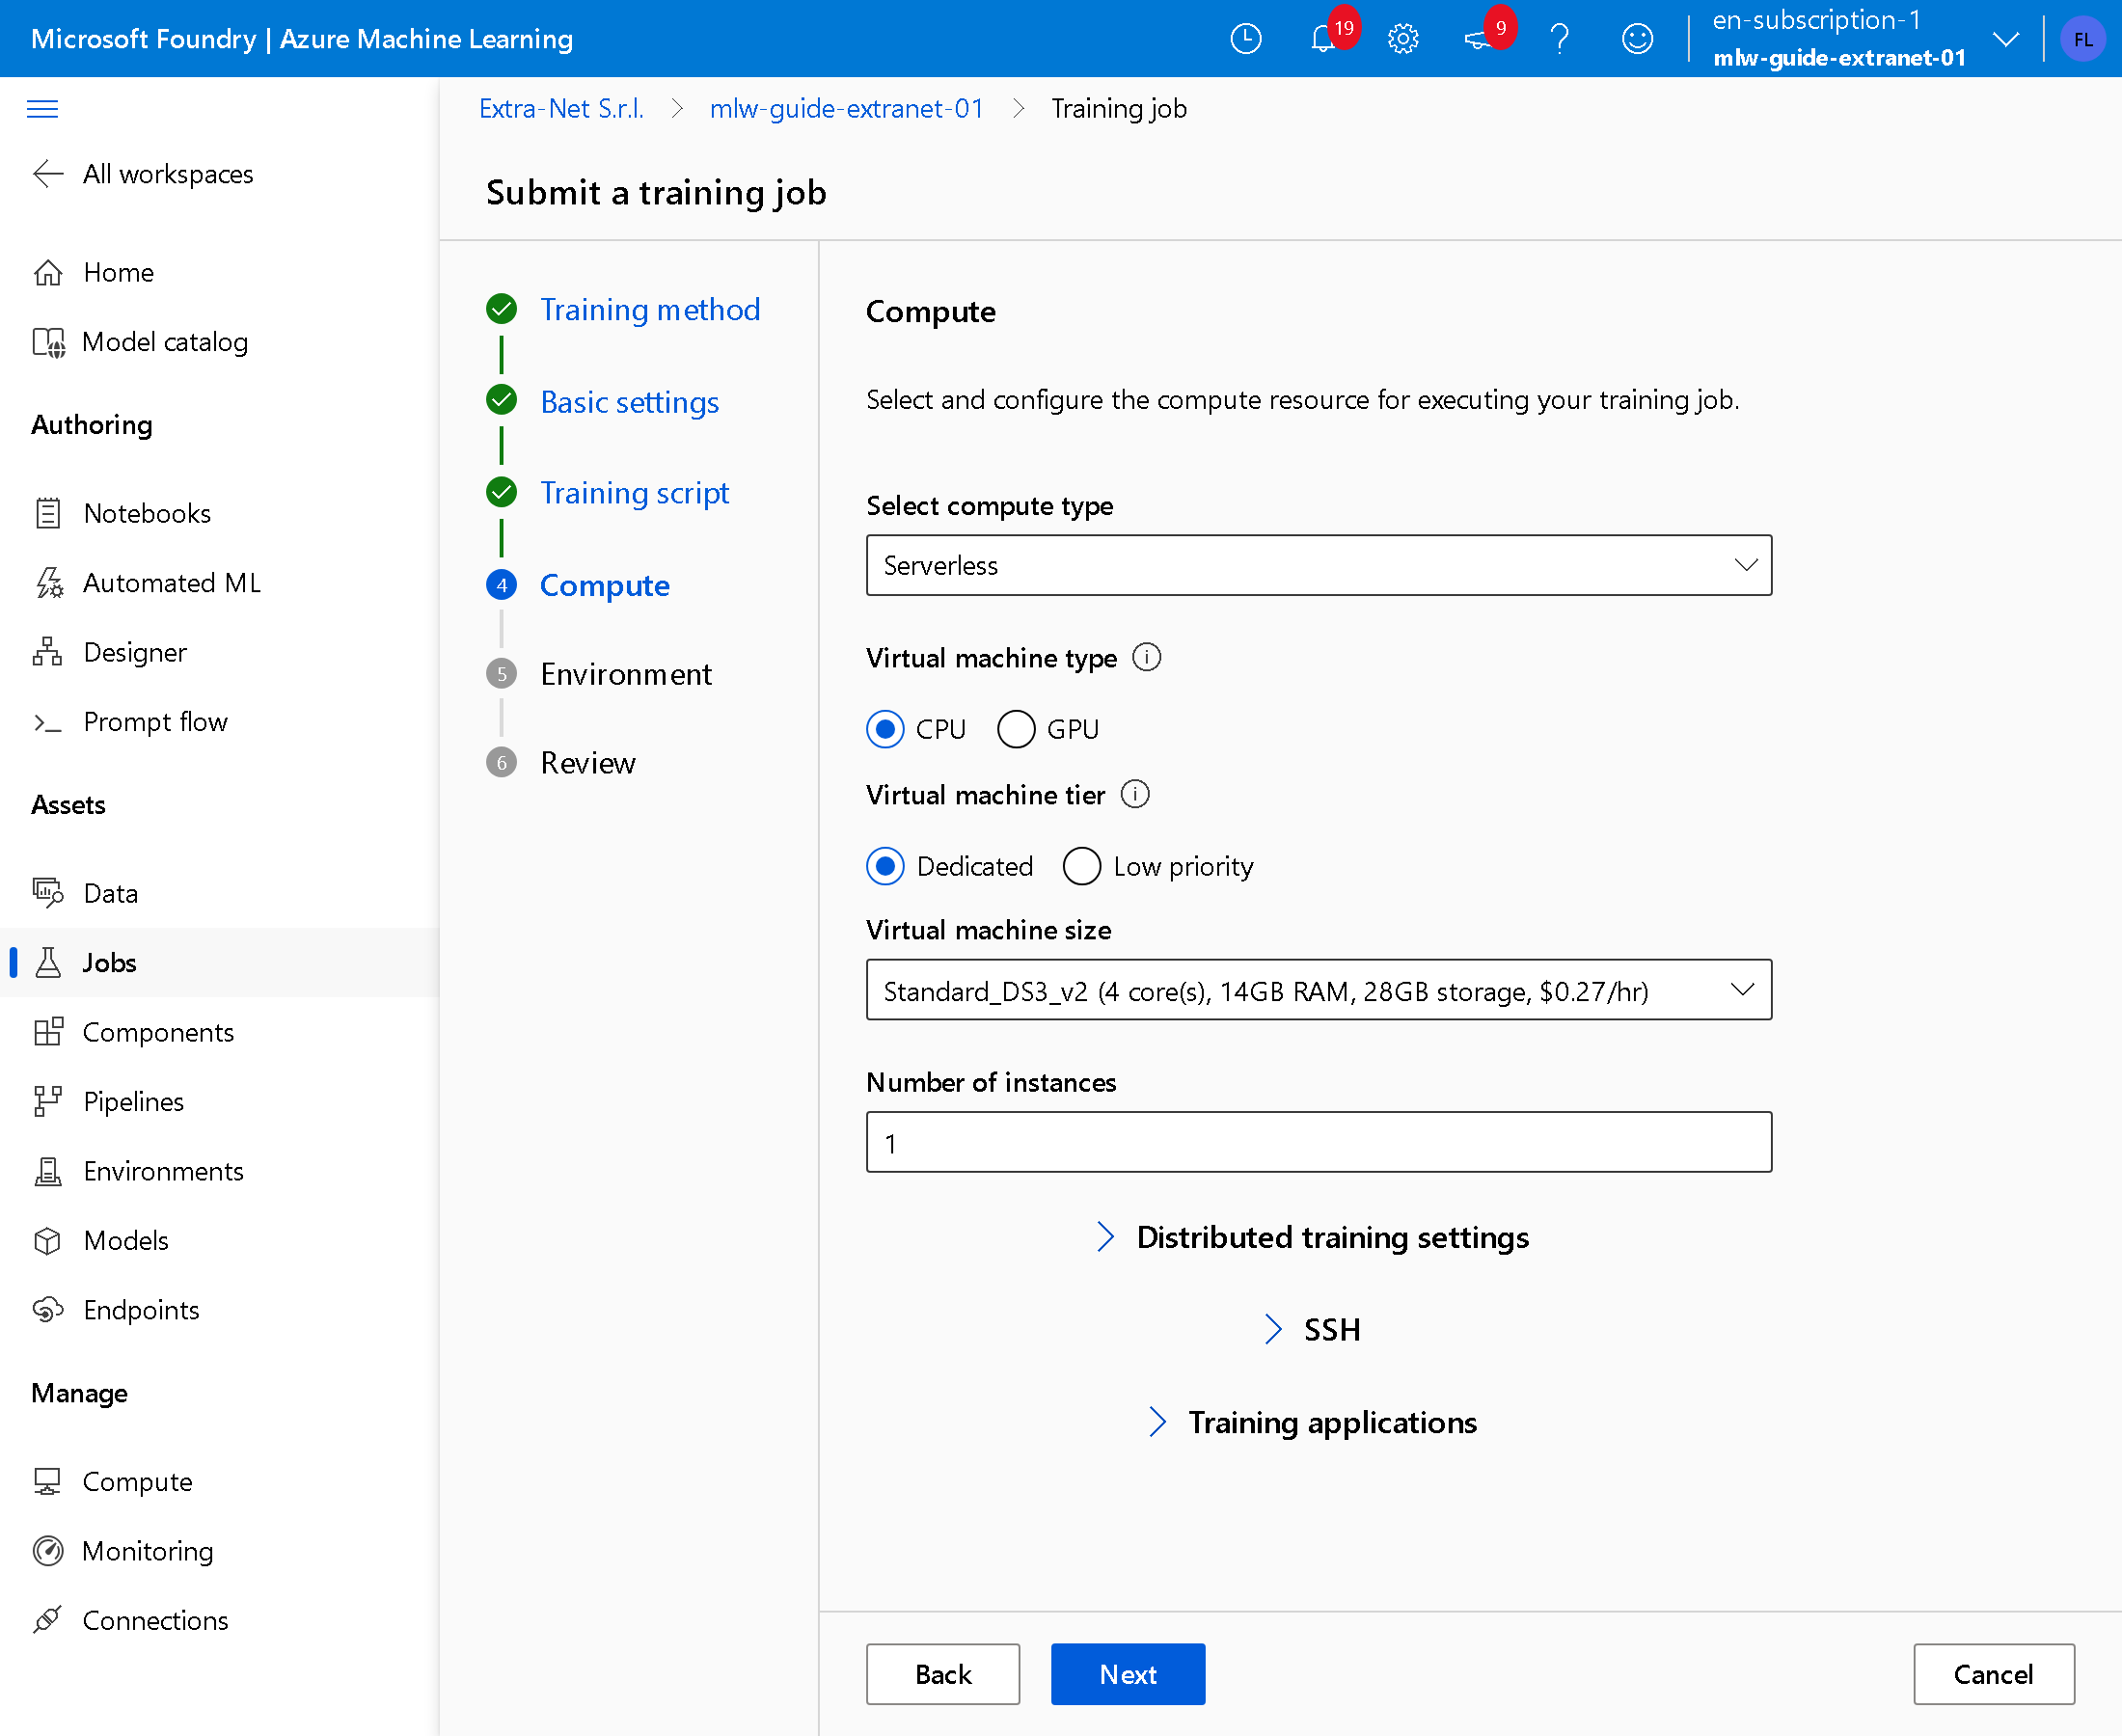
Leave Serverless, CPU, Dedicated and the proposed machine, Standard_DS3_v2. Azure switches it on for the training run and off at the end. Press Next.
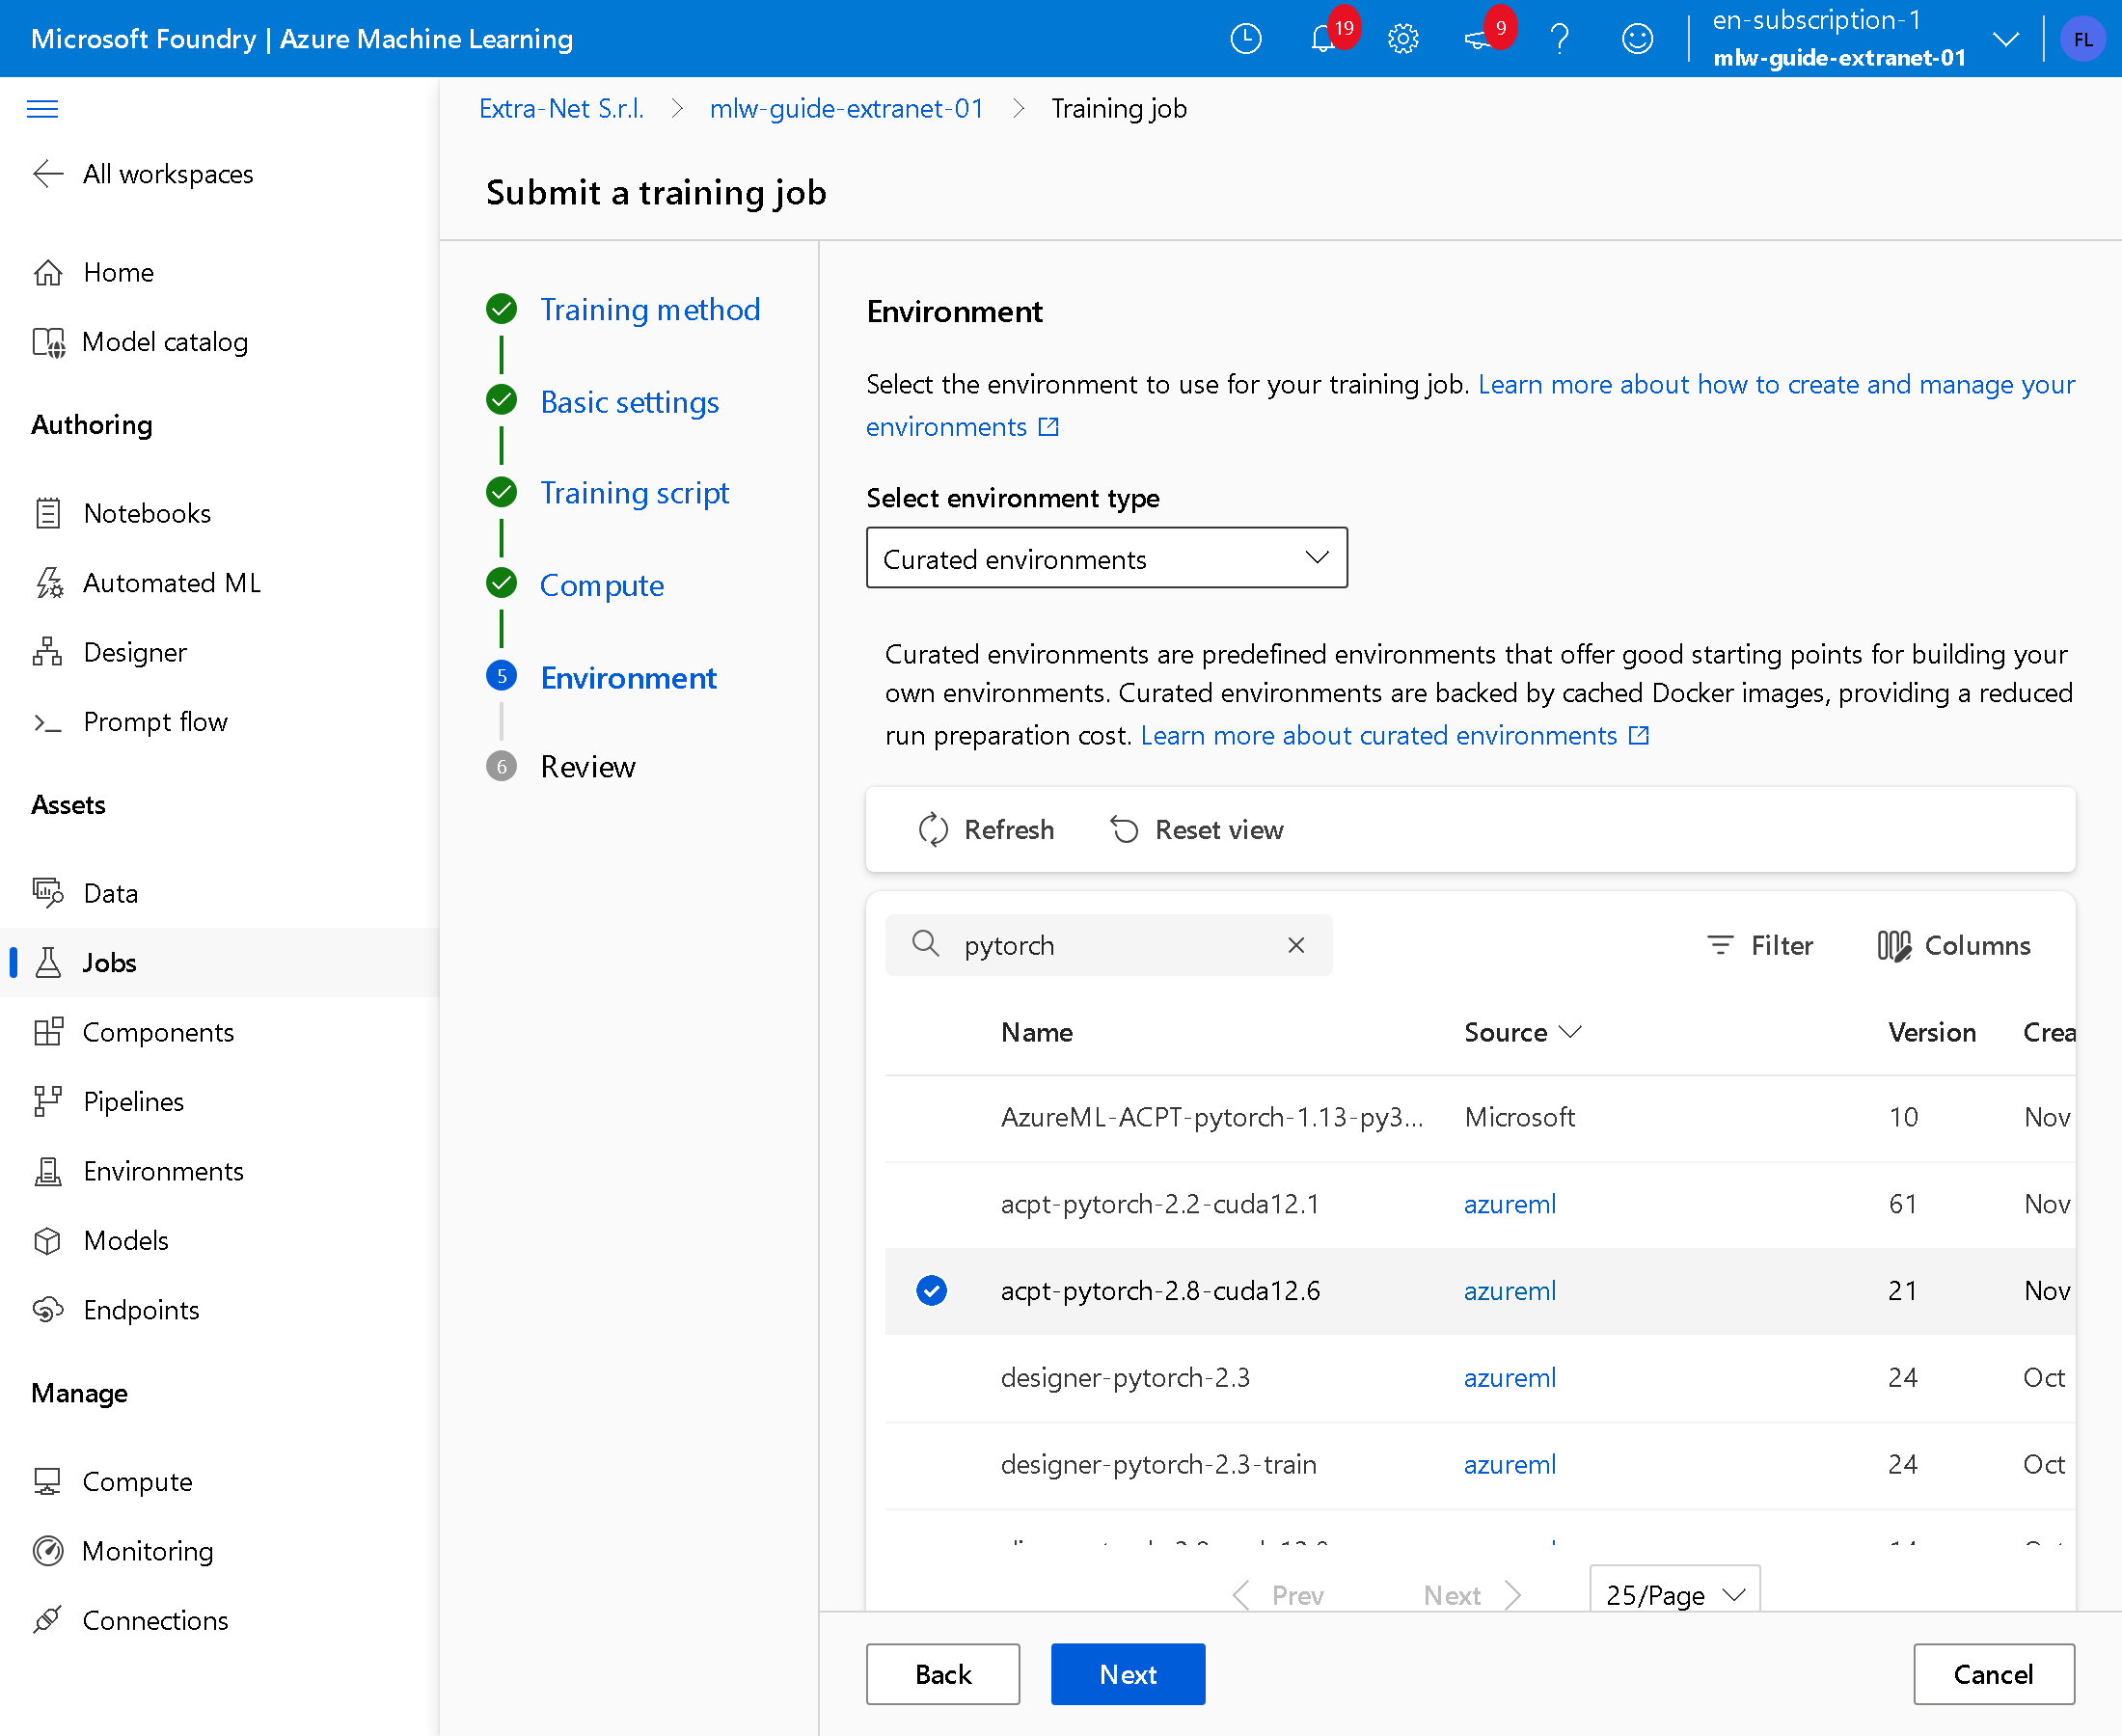
Under Curated environments search for pytorch, select acpt-pytorch-2.8-cuda12.6 and press Next.
Check the summary and press Submit training job.
6. Read the result
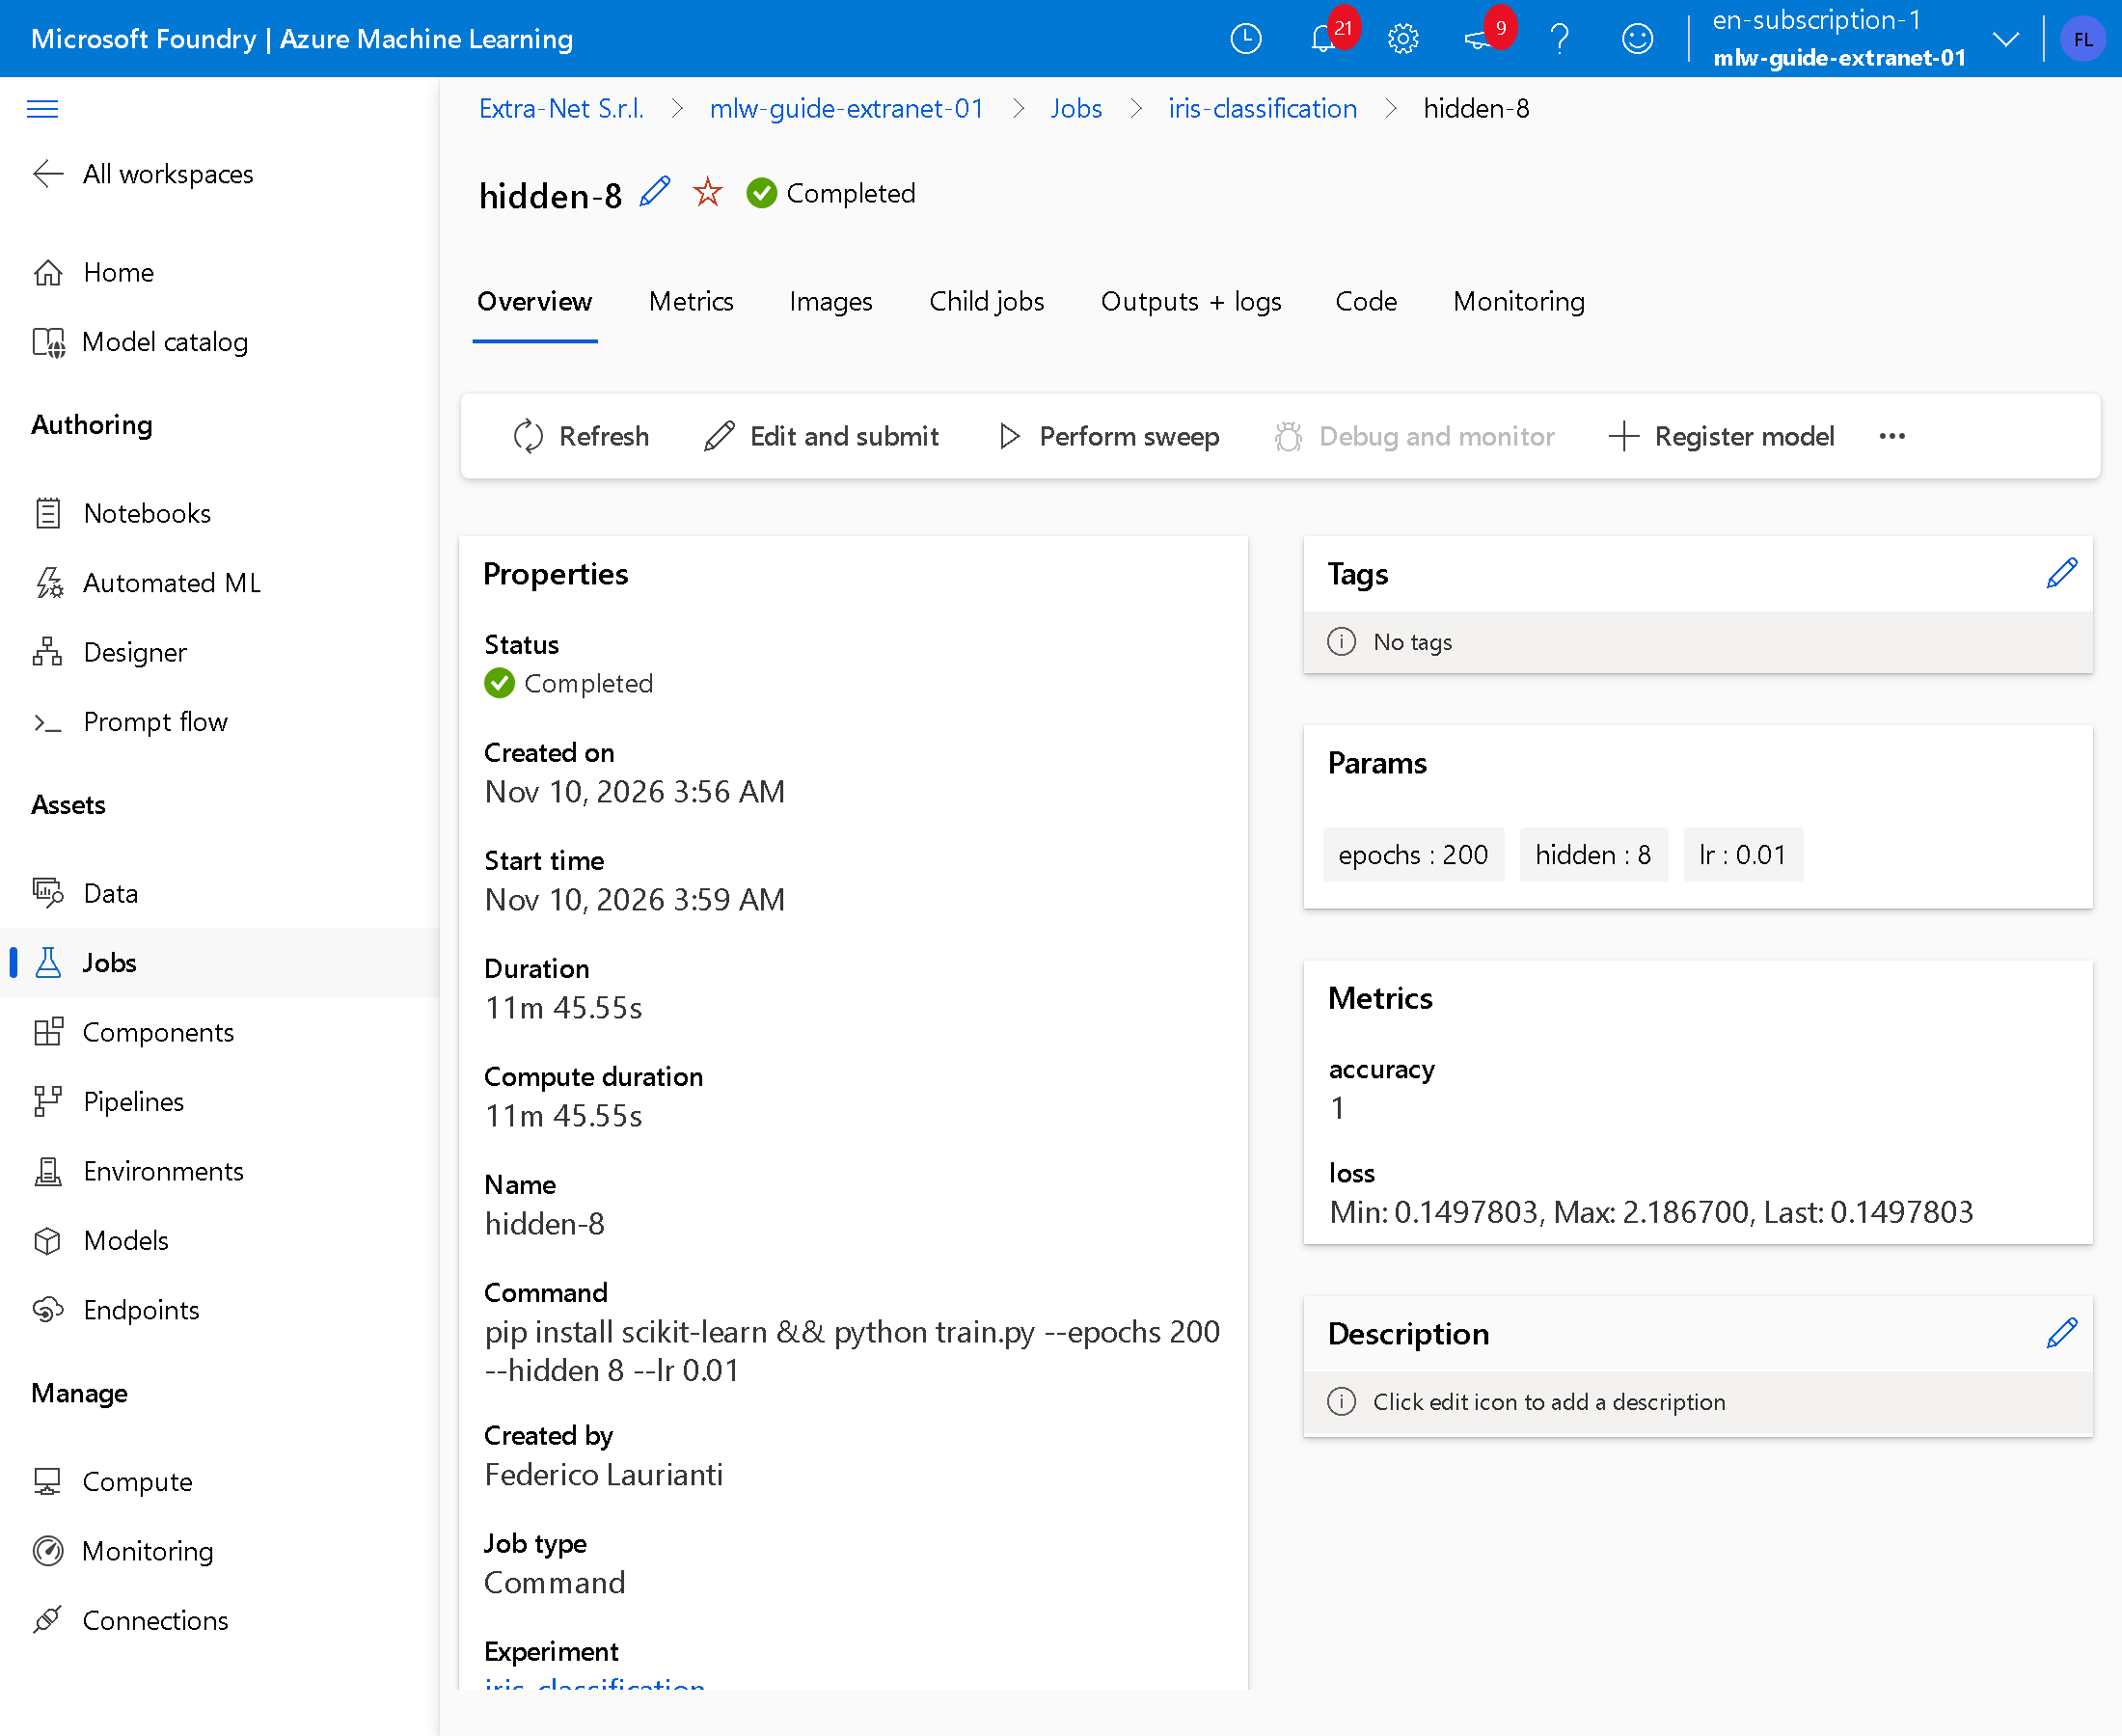
In this run the job stayed queued a little over two minutes and ran for twelve, most of it preparing the machine and the environment. At the end the status is Completed and the parameters and metrics appear on the right: accuracy 1, meaning all 45 test flowers recognised.
7. Compare a second training run
Repeat steps 4 and 5 with Job name hidden-2, iris-classification again in New experiment name, so the studio adds it to the same experiment, and this command, which uses a smaller network and a shorter training:
pip install scikit-learn && python train.py --epochs 30 --hidden 2 --lr 0.001When it has finished, open the iris-classification experiment, press Columns, add accuracy and hidden and press Save. The two columns are added at the end of the table: scroll it to the right.
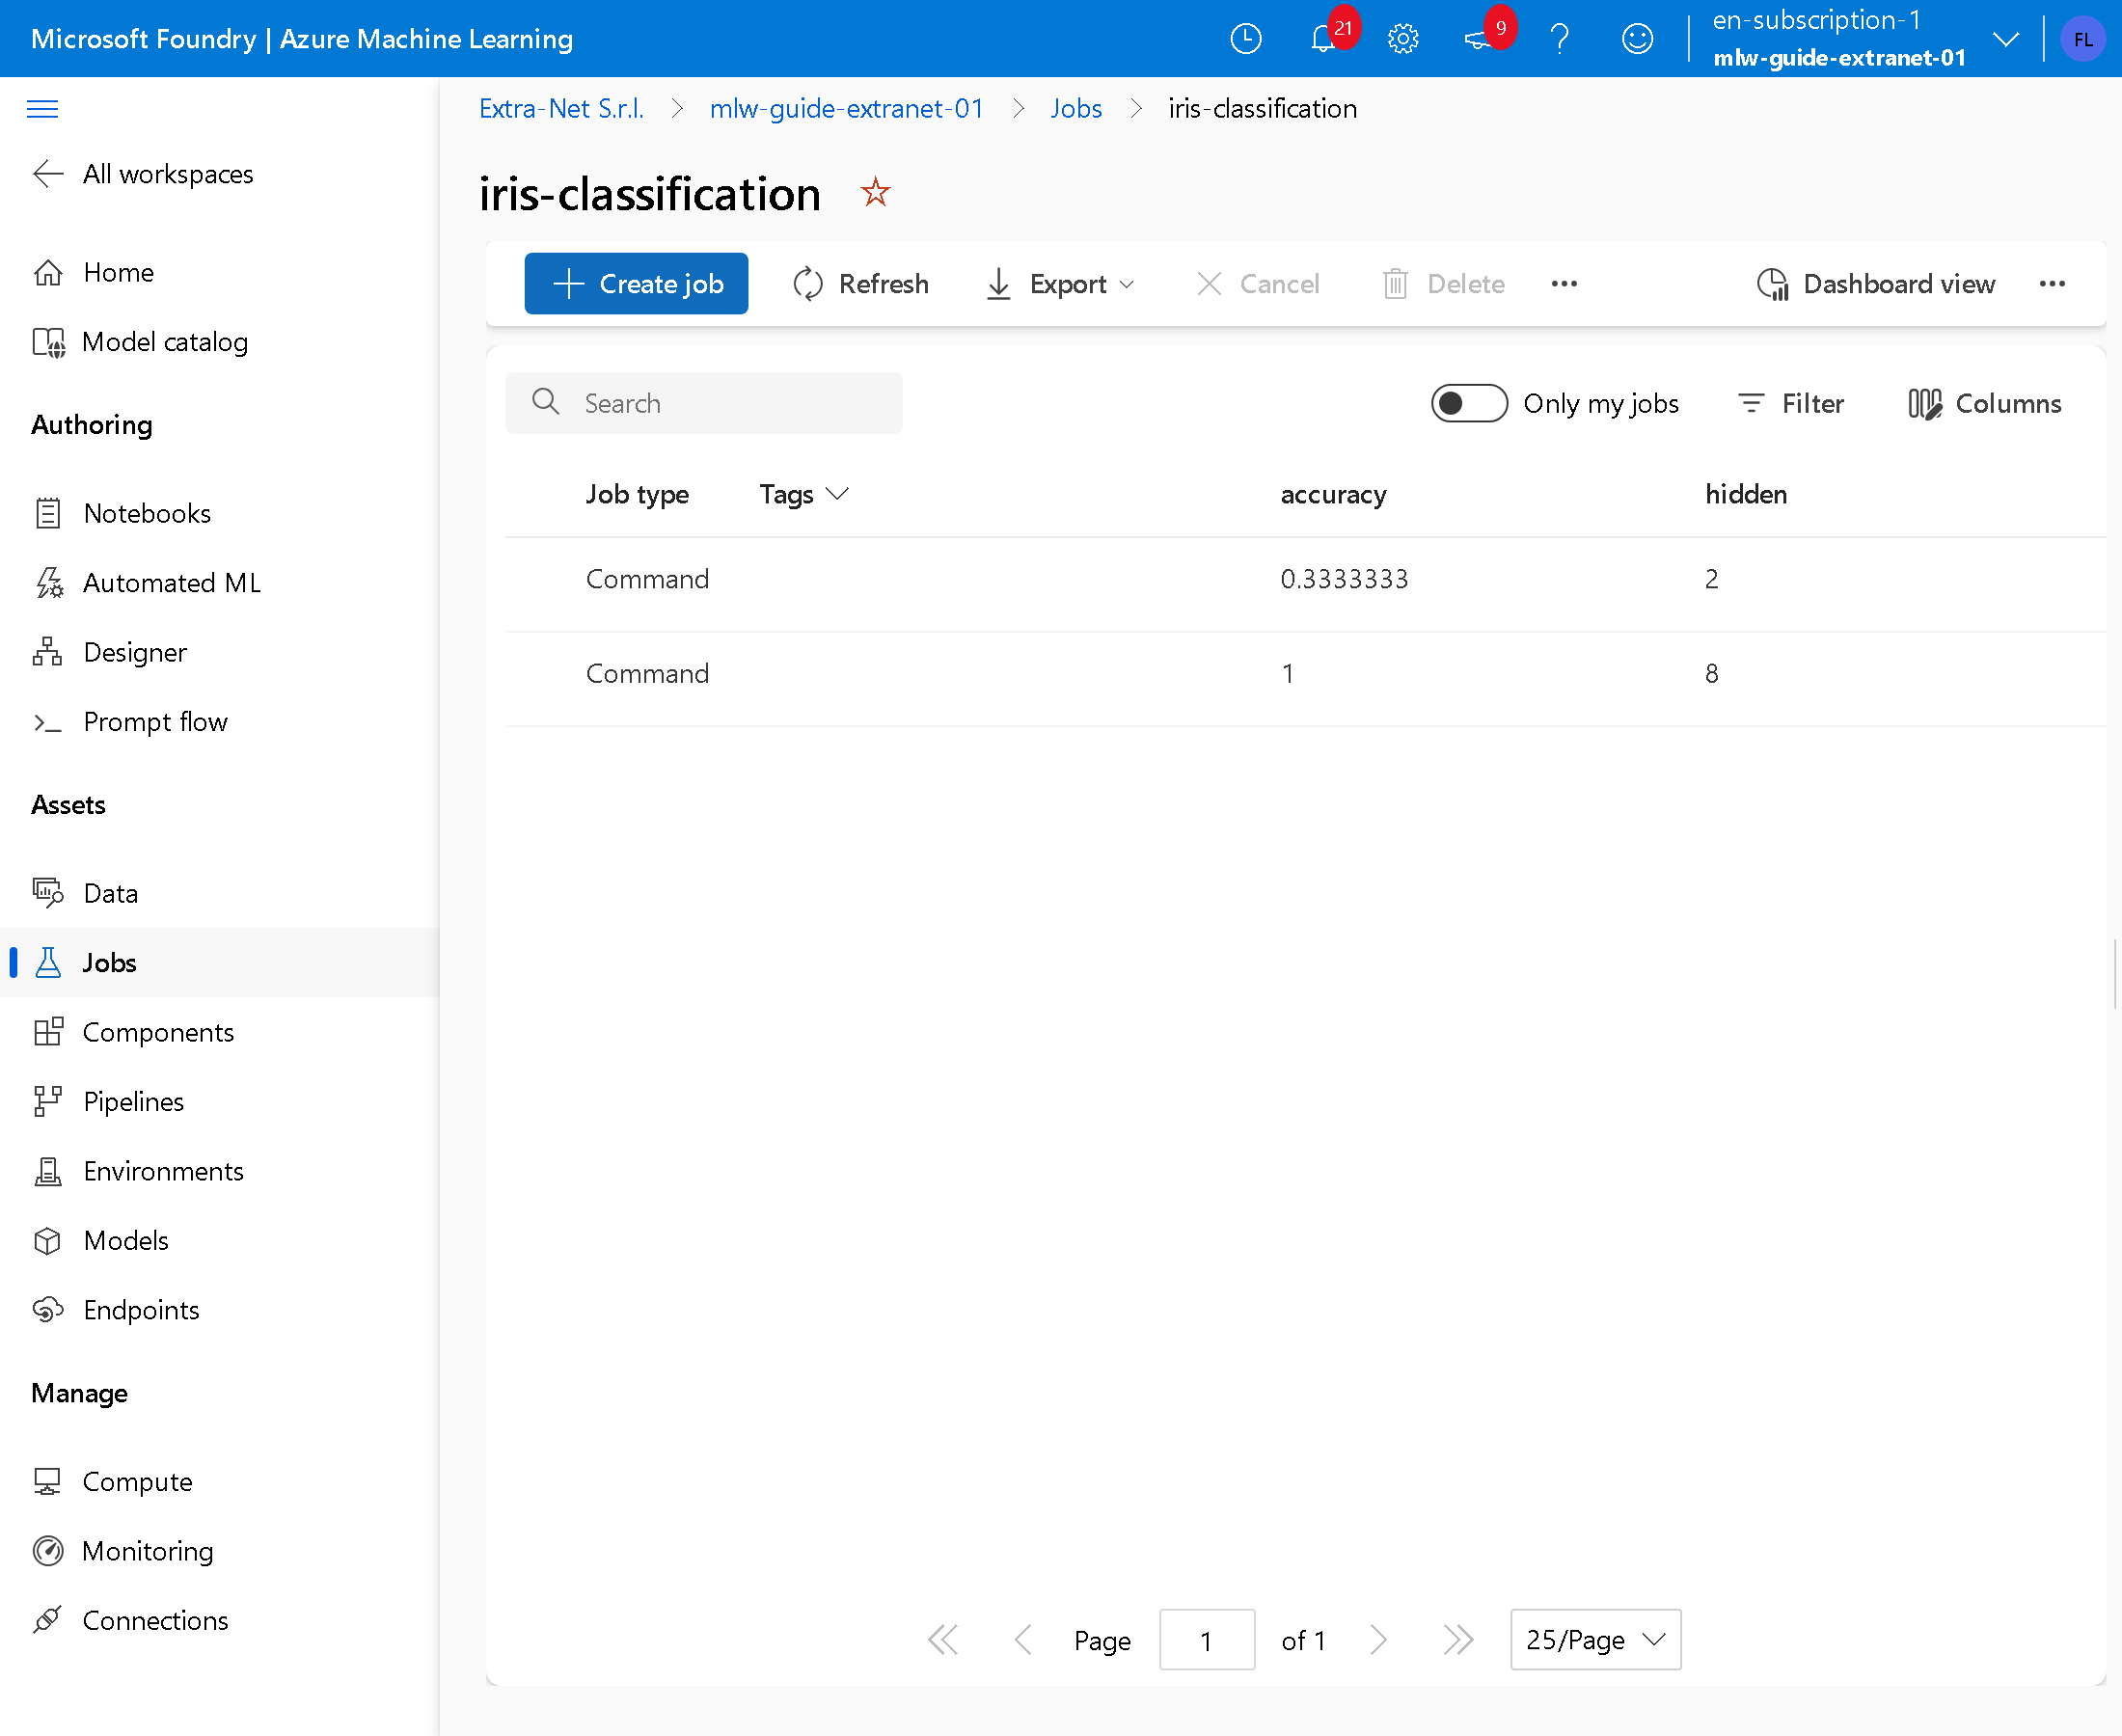
The network with 2 neurons recognises one flower in three, like guessing at random; the one with 8 recognises them all.
The model
8. Register the two versions
Open the hidden-2 run and press Register model. The studio finds the model folder in MLflow format by itself.
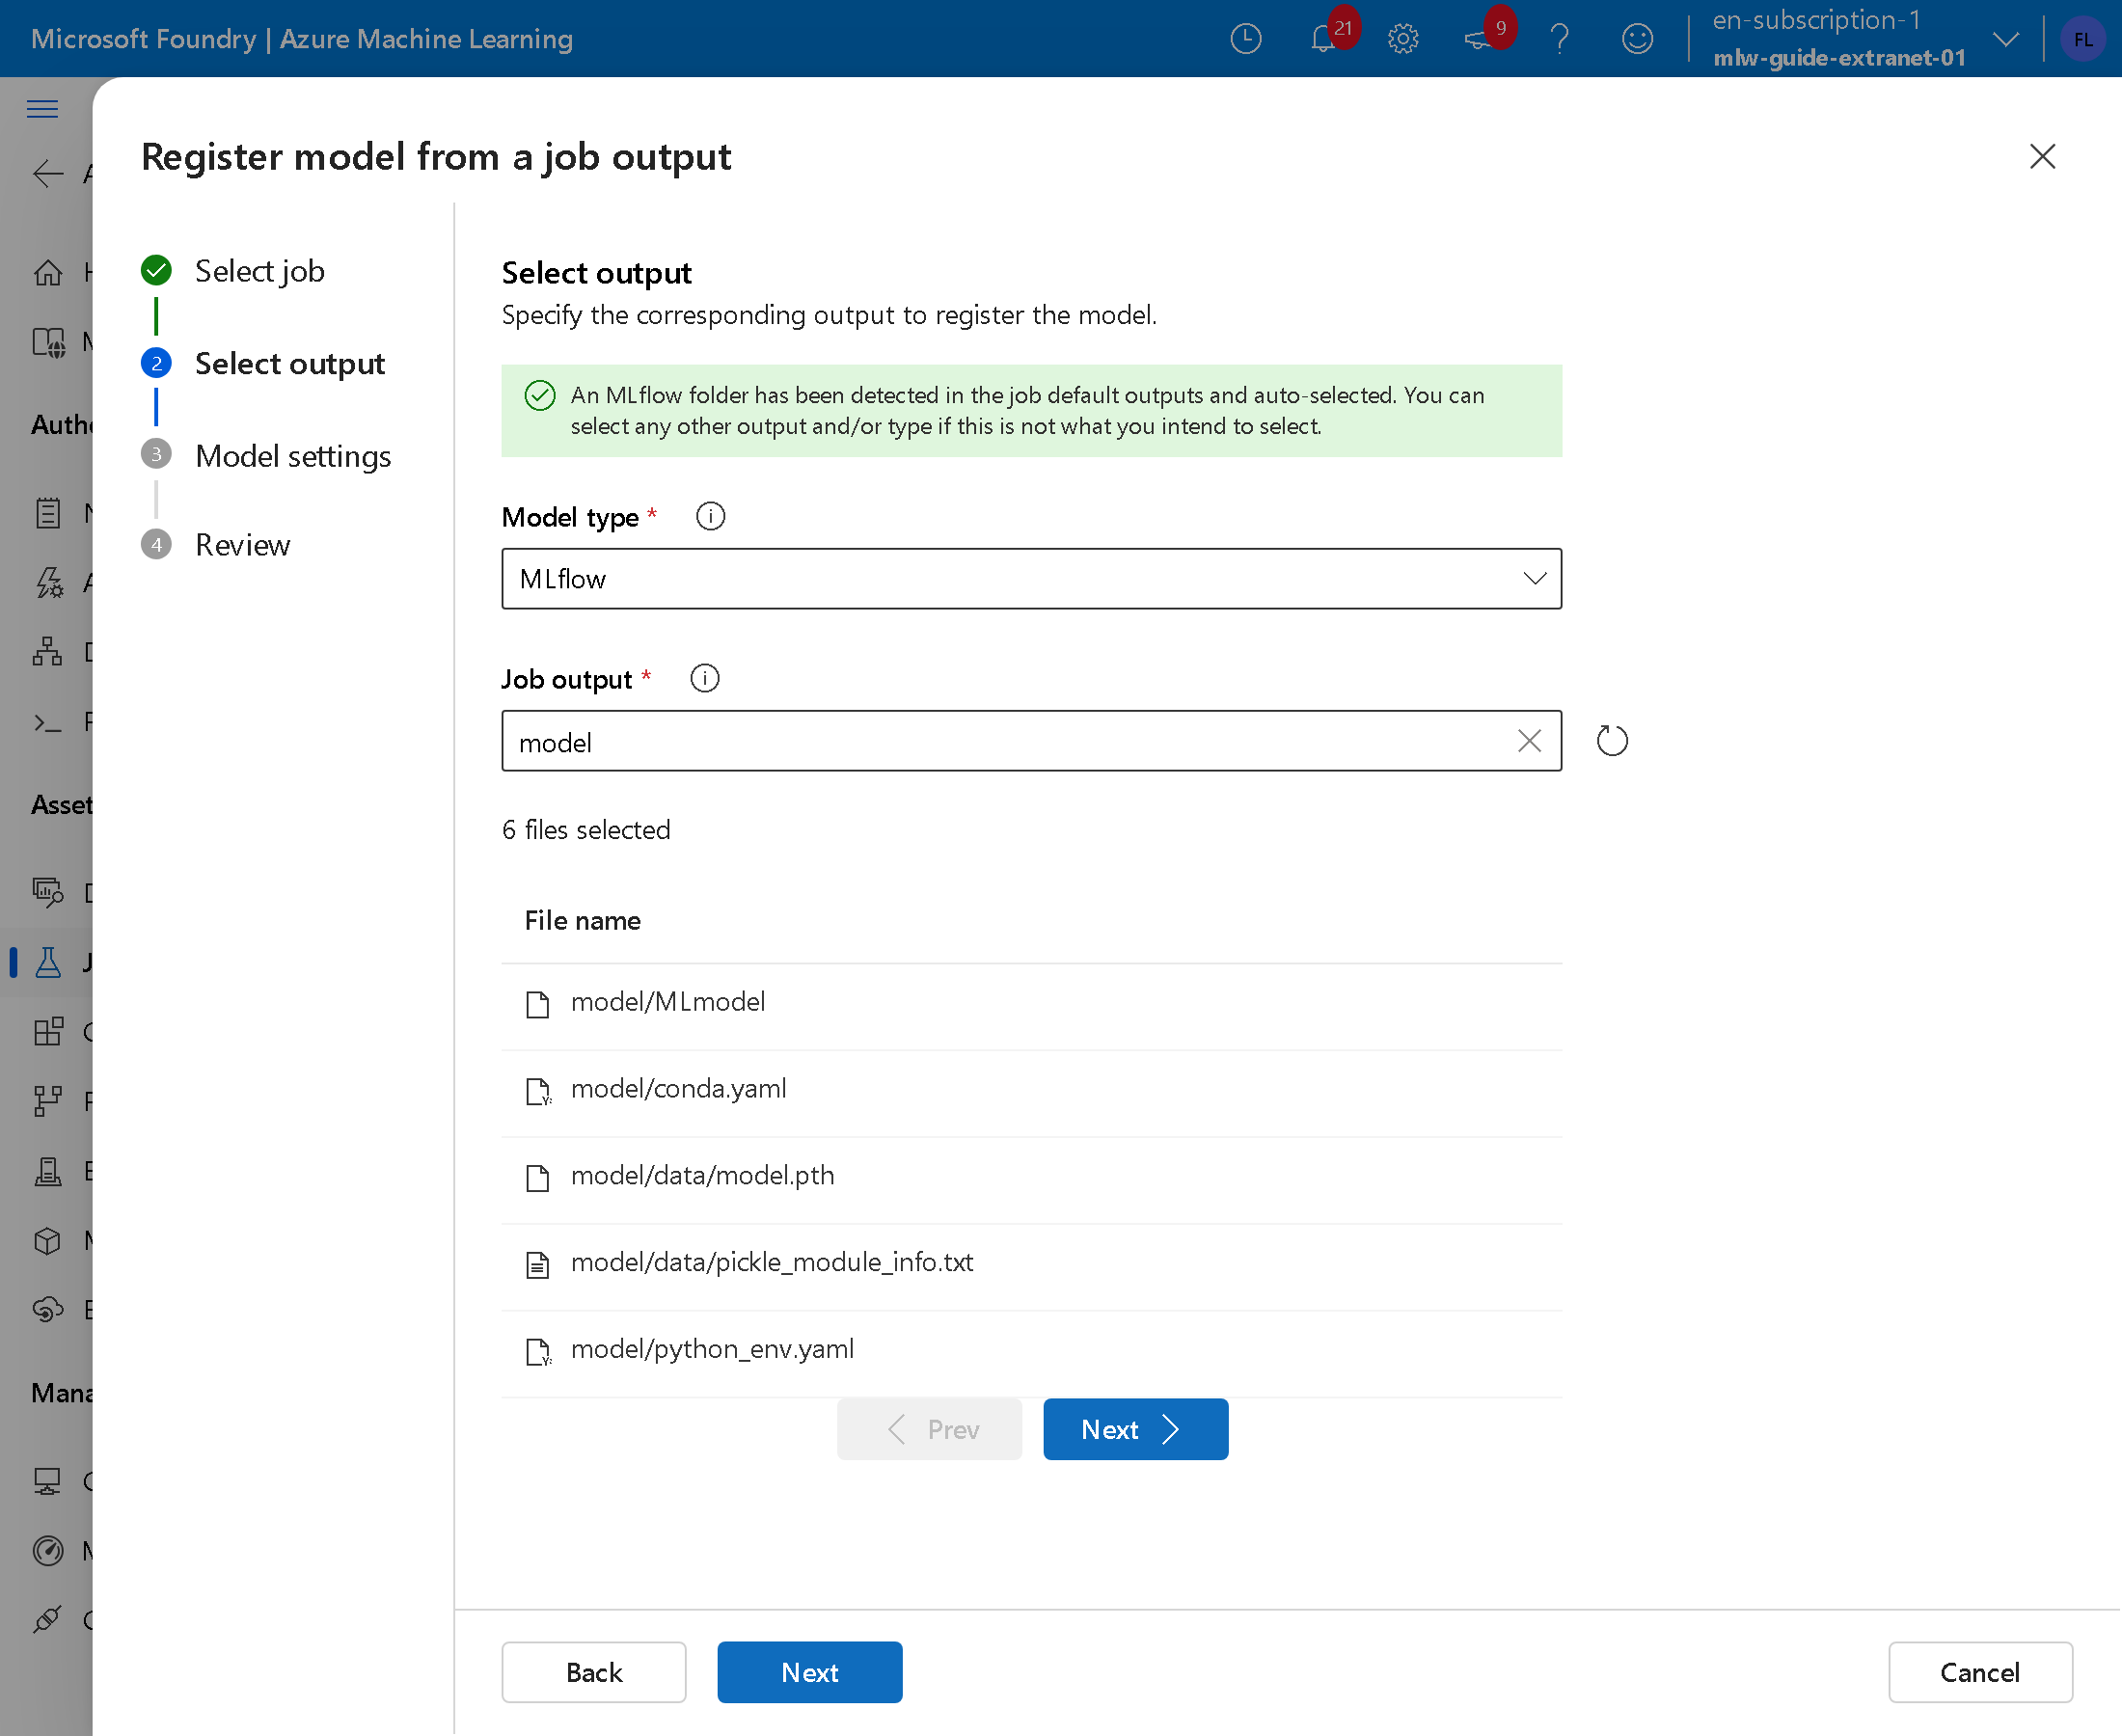
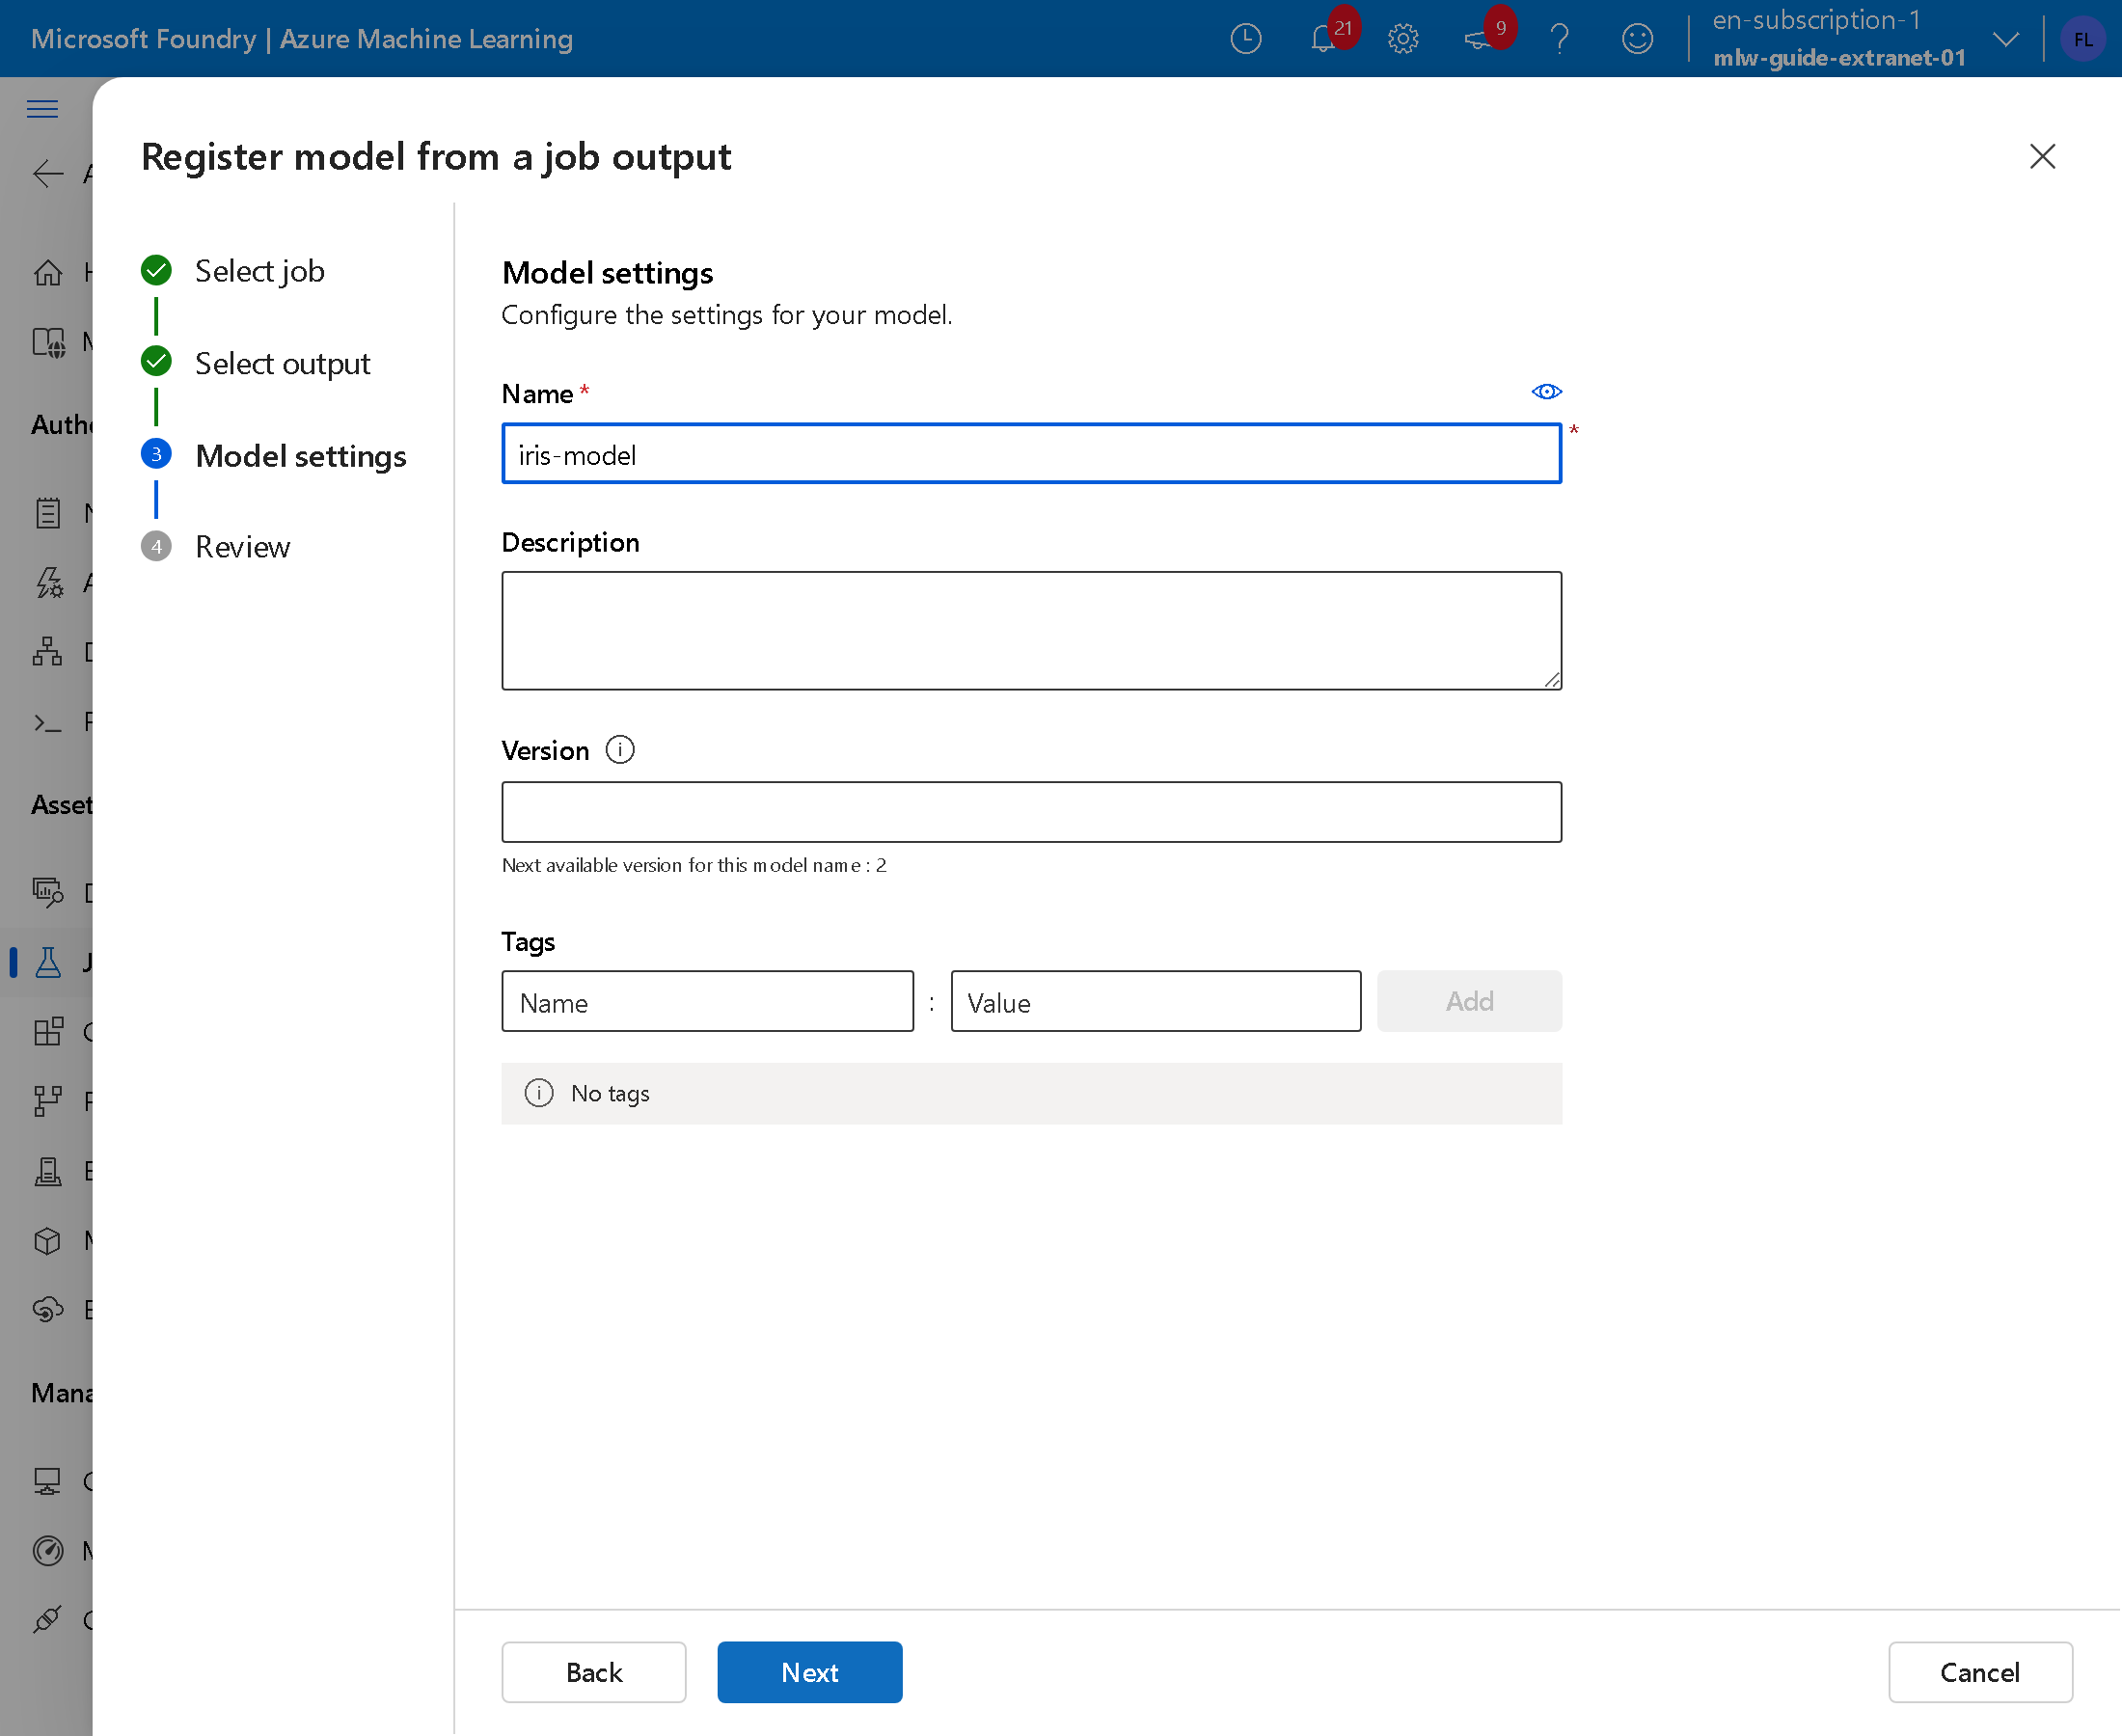
Press Next, write iris-model in Name, press Next and Register: this is version 1.
Repeat from the hidden-8 run with the same name: the studio proposes version 2.
Deployment
9. Deploy version 2
Open Models > iris-model, version 2, and press Use this model > Real-time endpoint. The studio states that the scoring script and the environment are generated automatically.
Fill in:
- Instance count:
1. The procedure proposes 3, and in this run the subscription quota was not enough. - Virtual machine:
Standard_D2as_v4 - Endpoint name: a name of your own, unique in the region, here
iris-guide-extranet-01
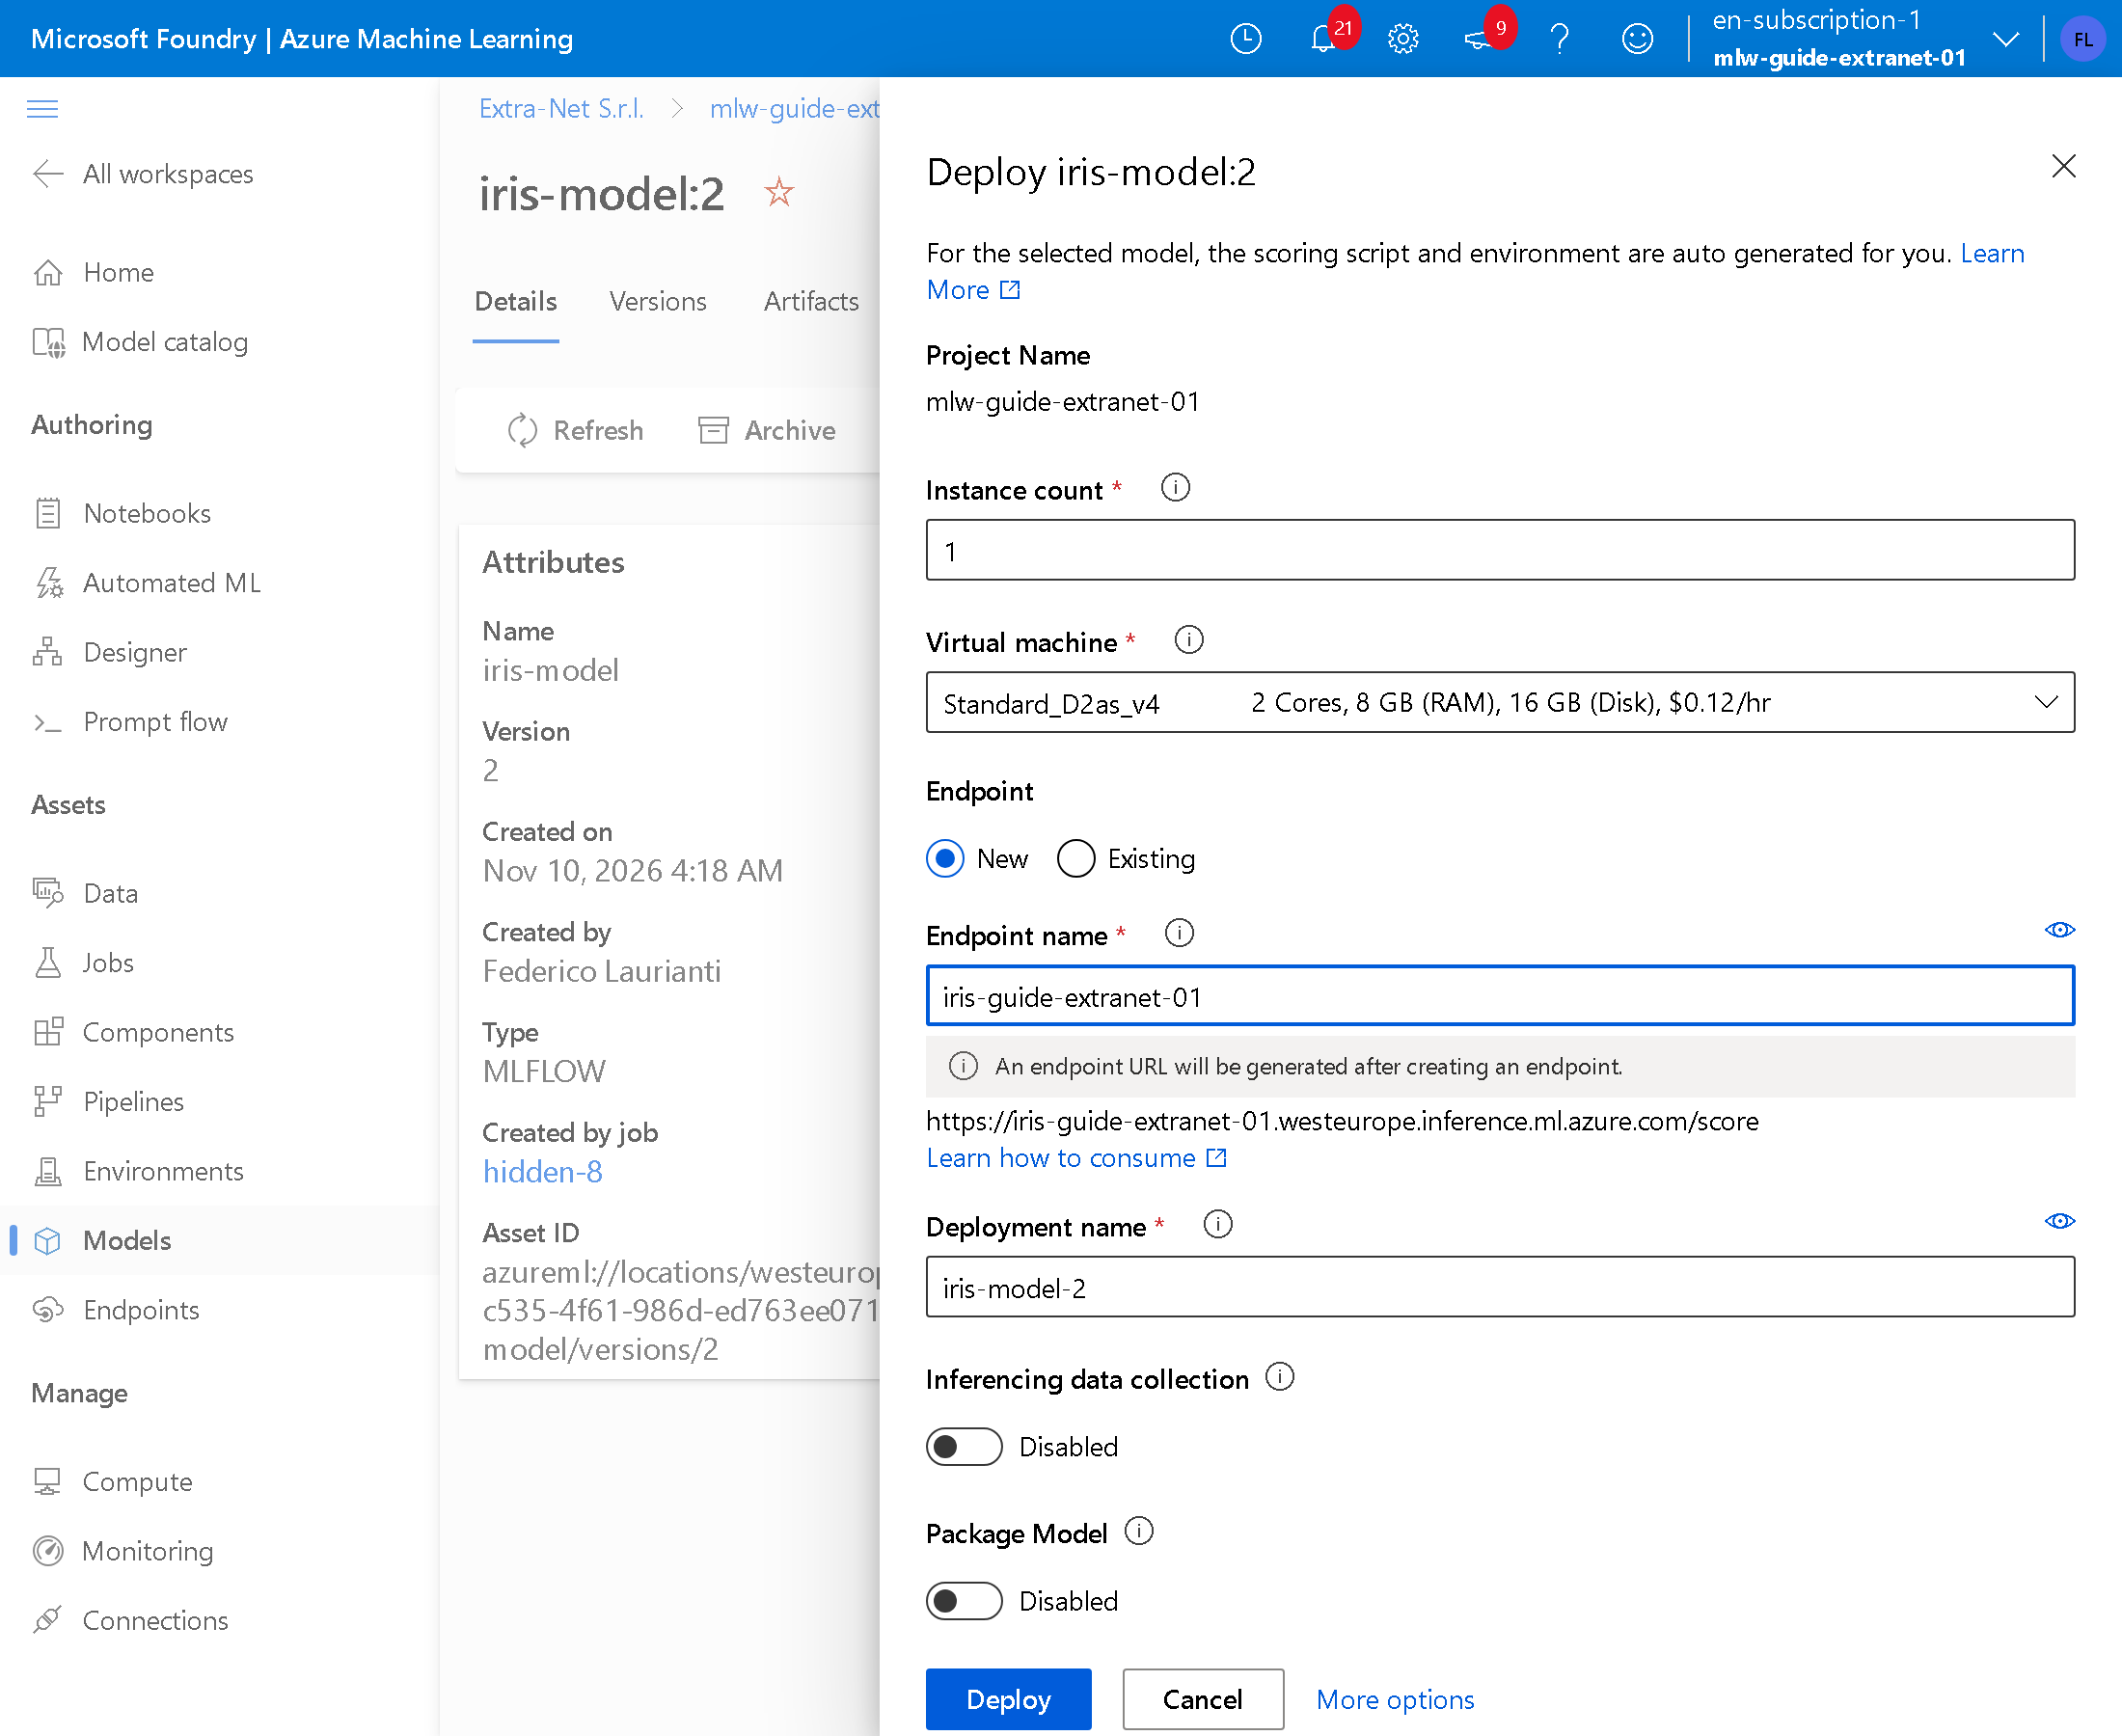
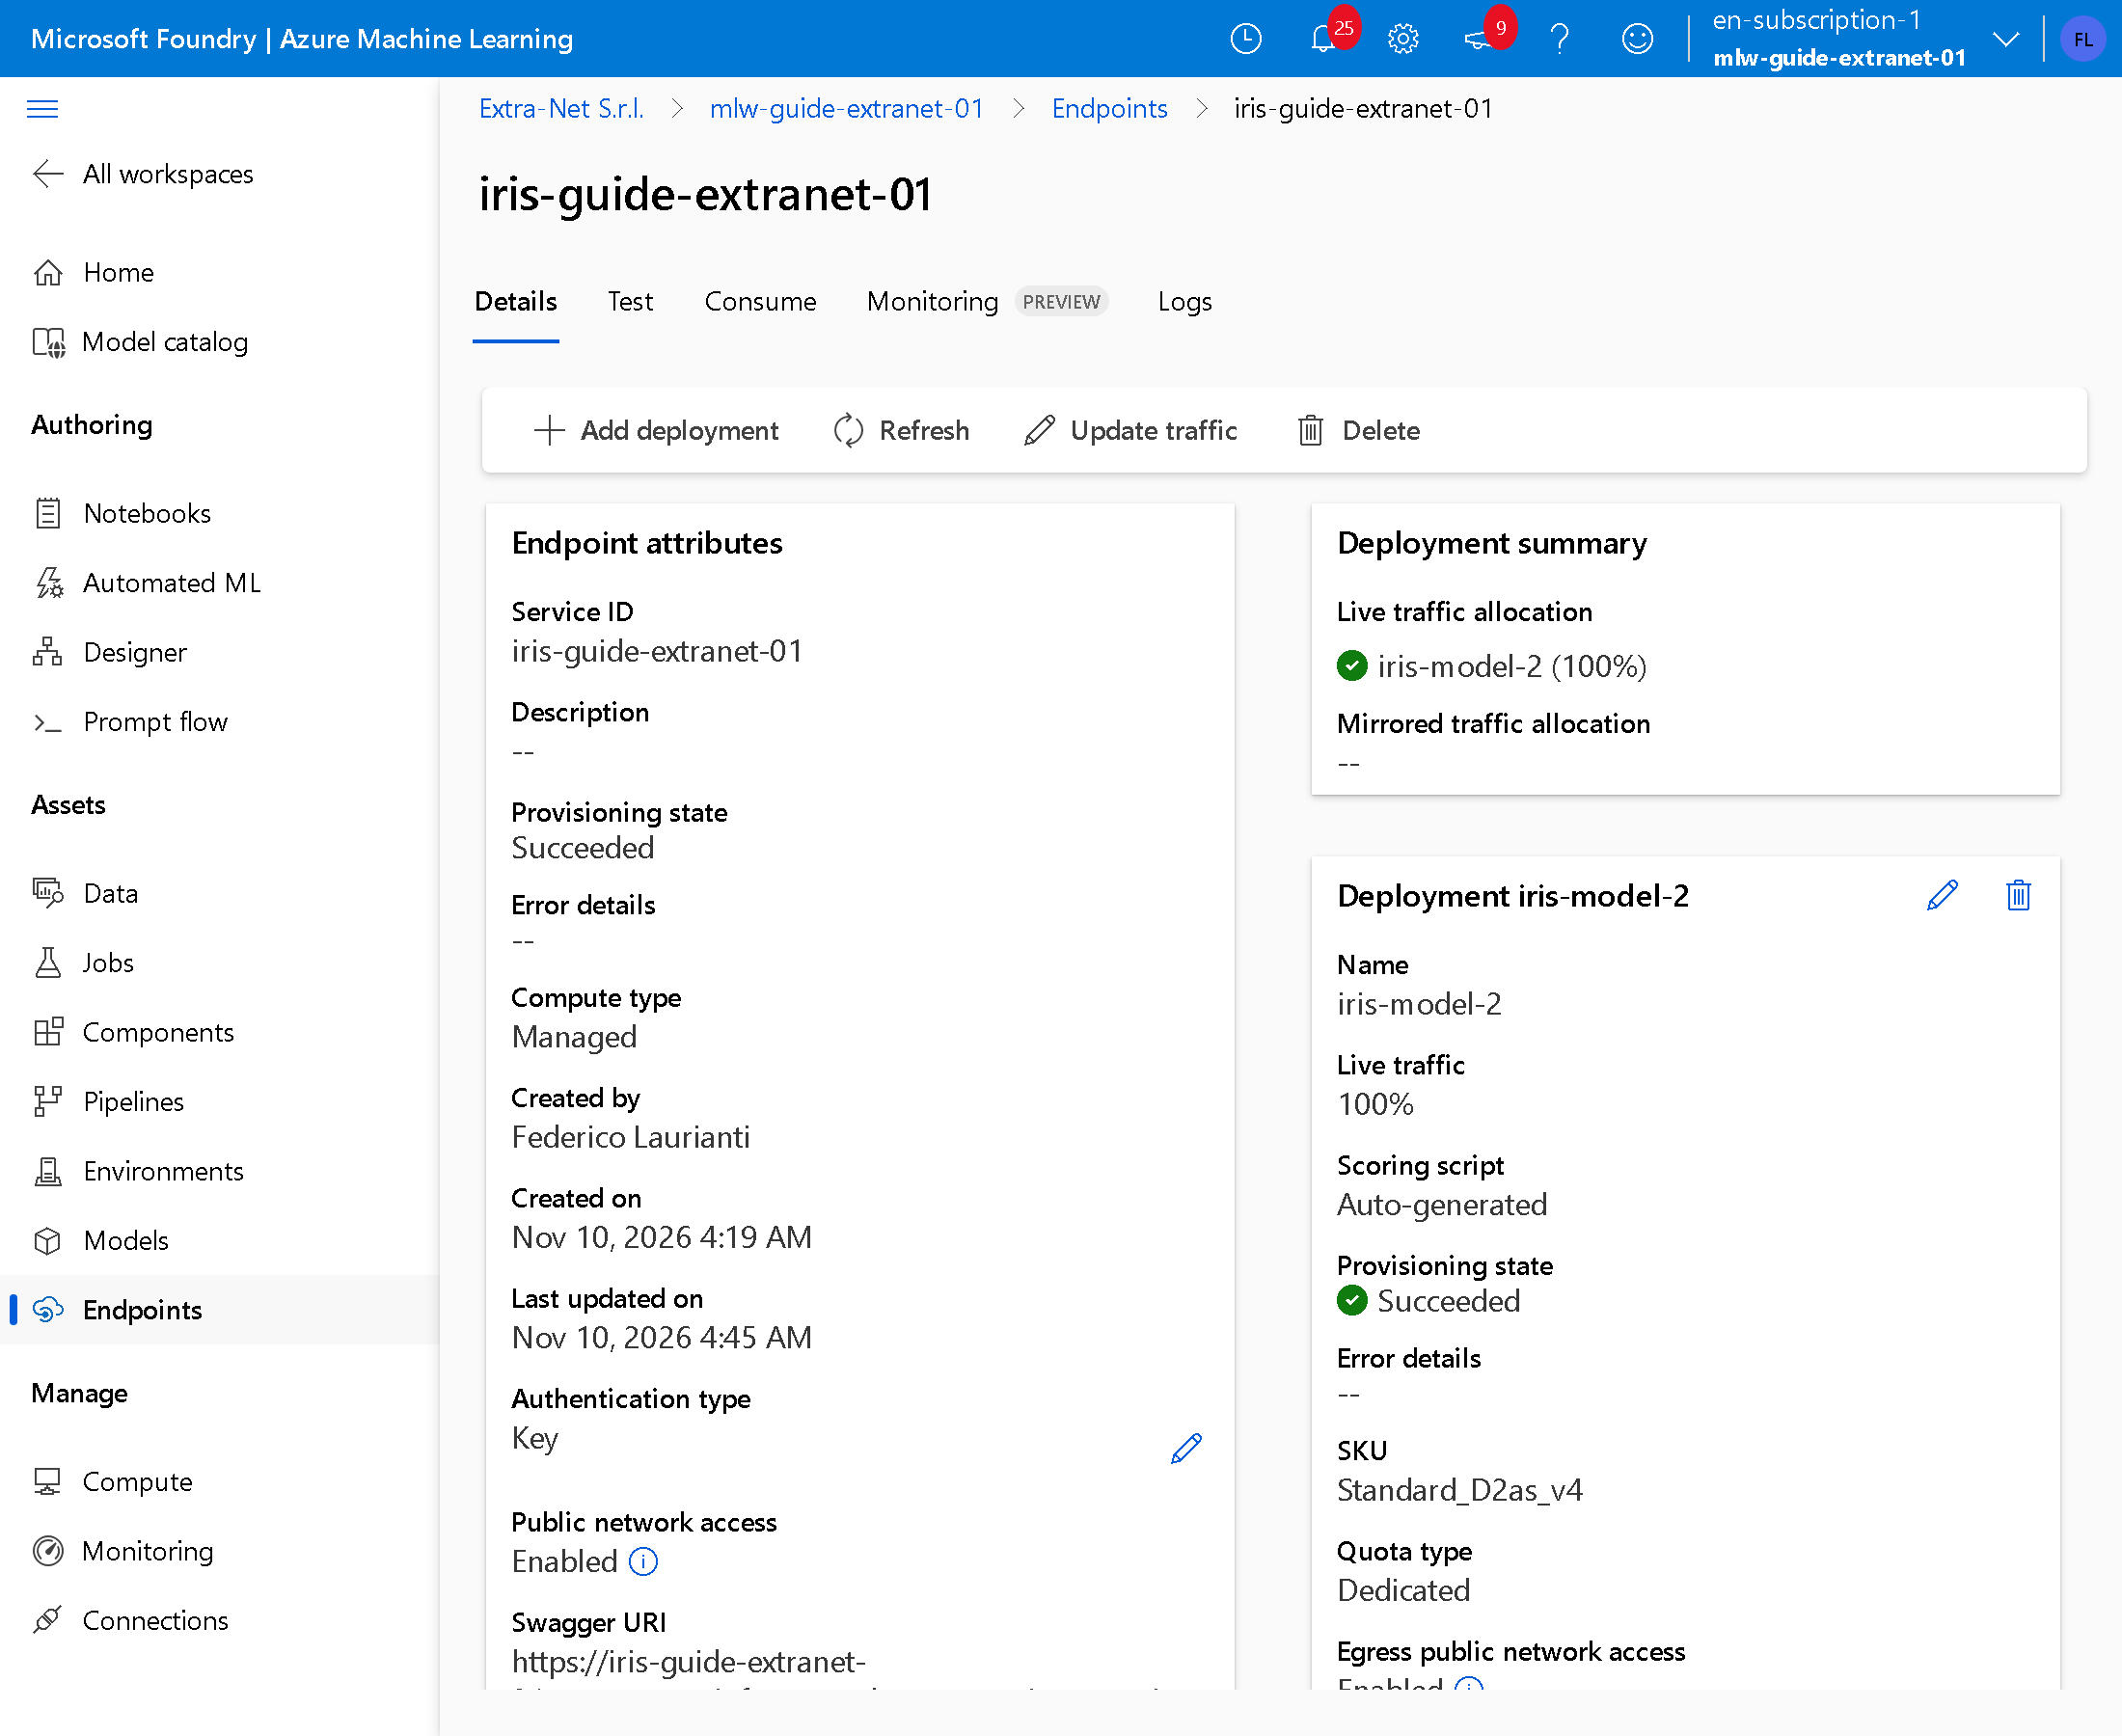
Press Deploy. In this run the deployment took 23 minutes, because Azure builds the image with the packages listed in the model. When it finishes, iris-model-2 gets 100% of the traffic.
10. Test from the studio
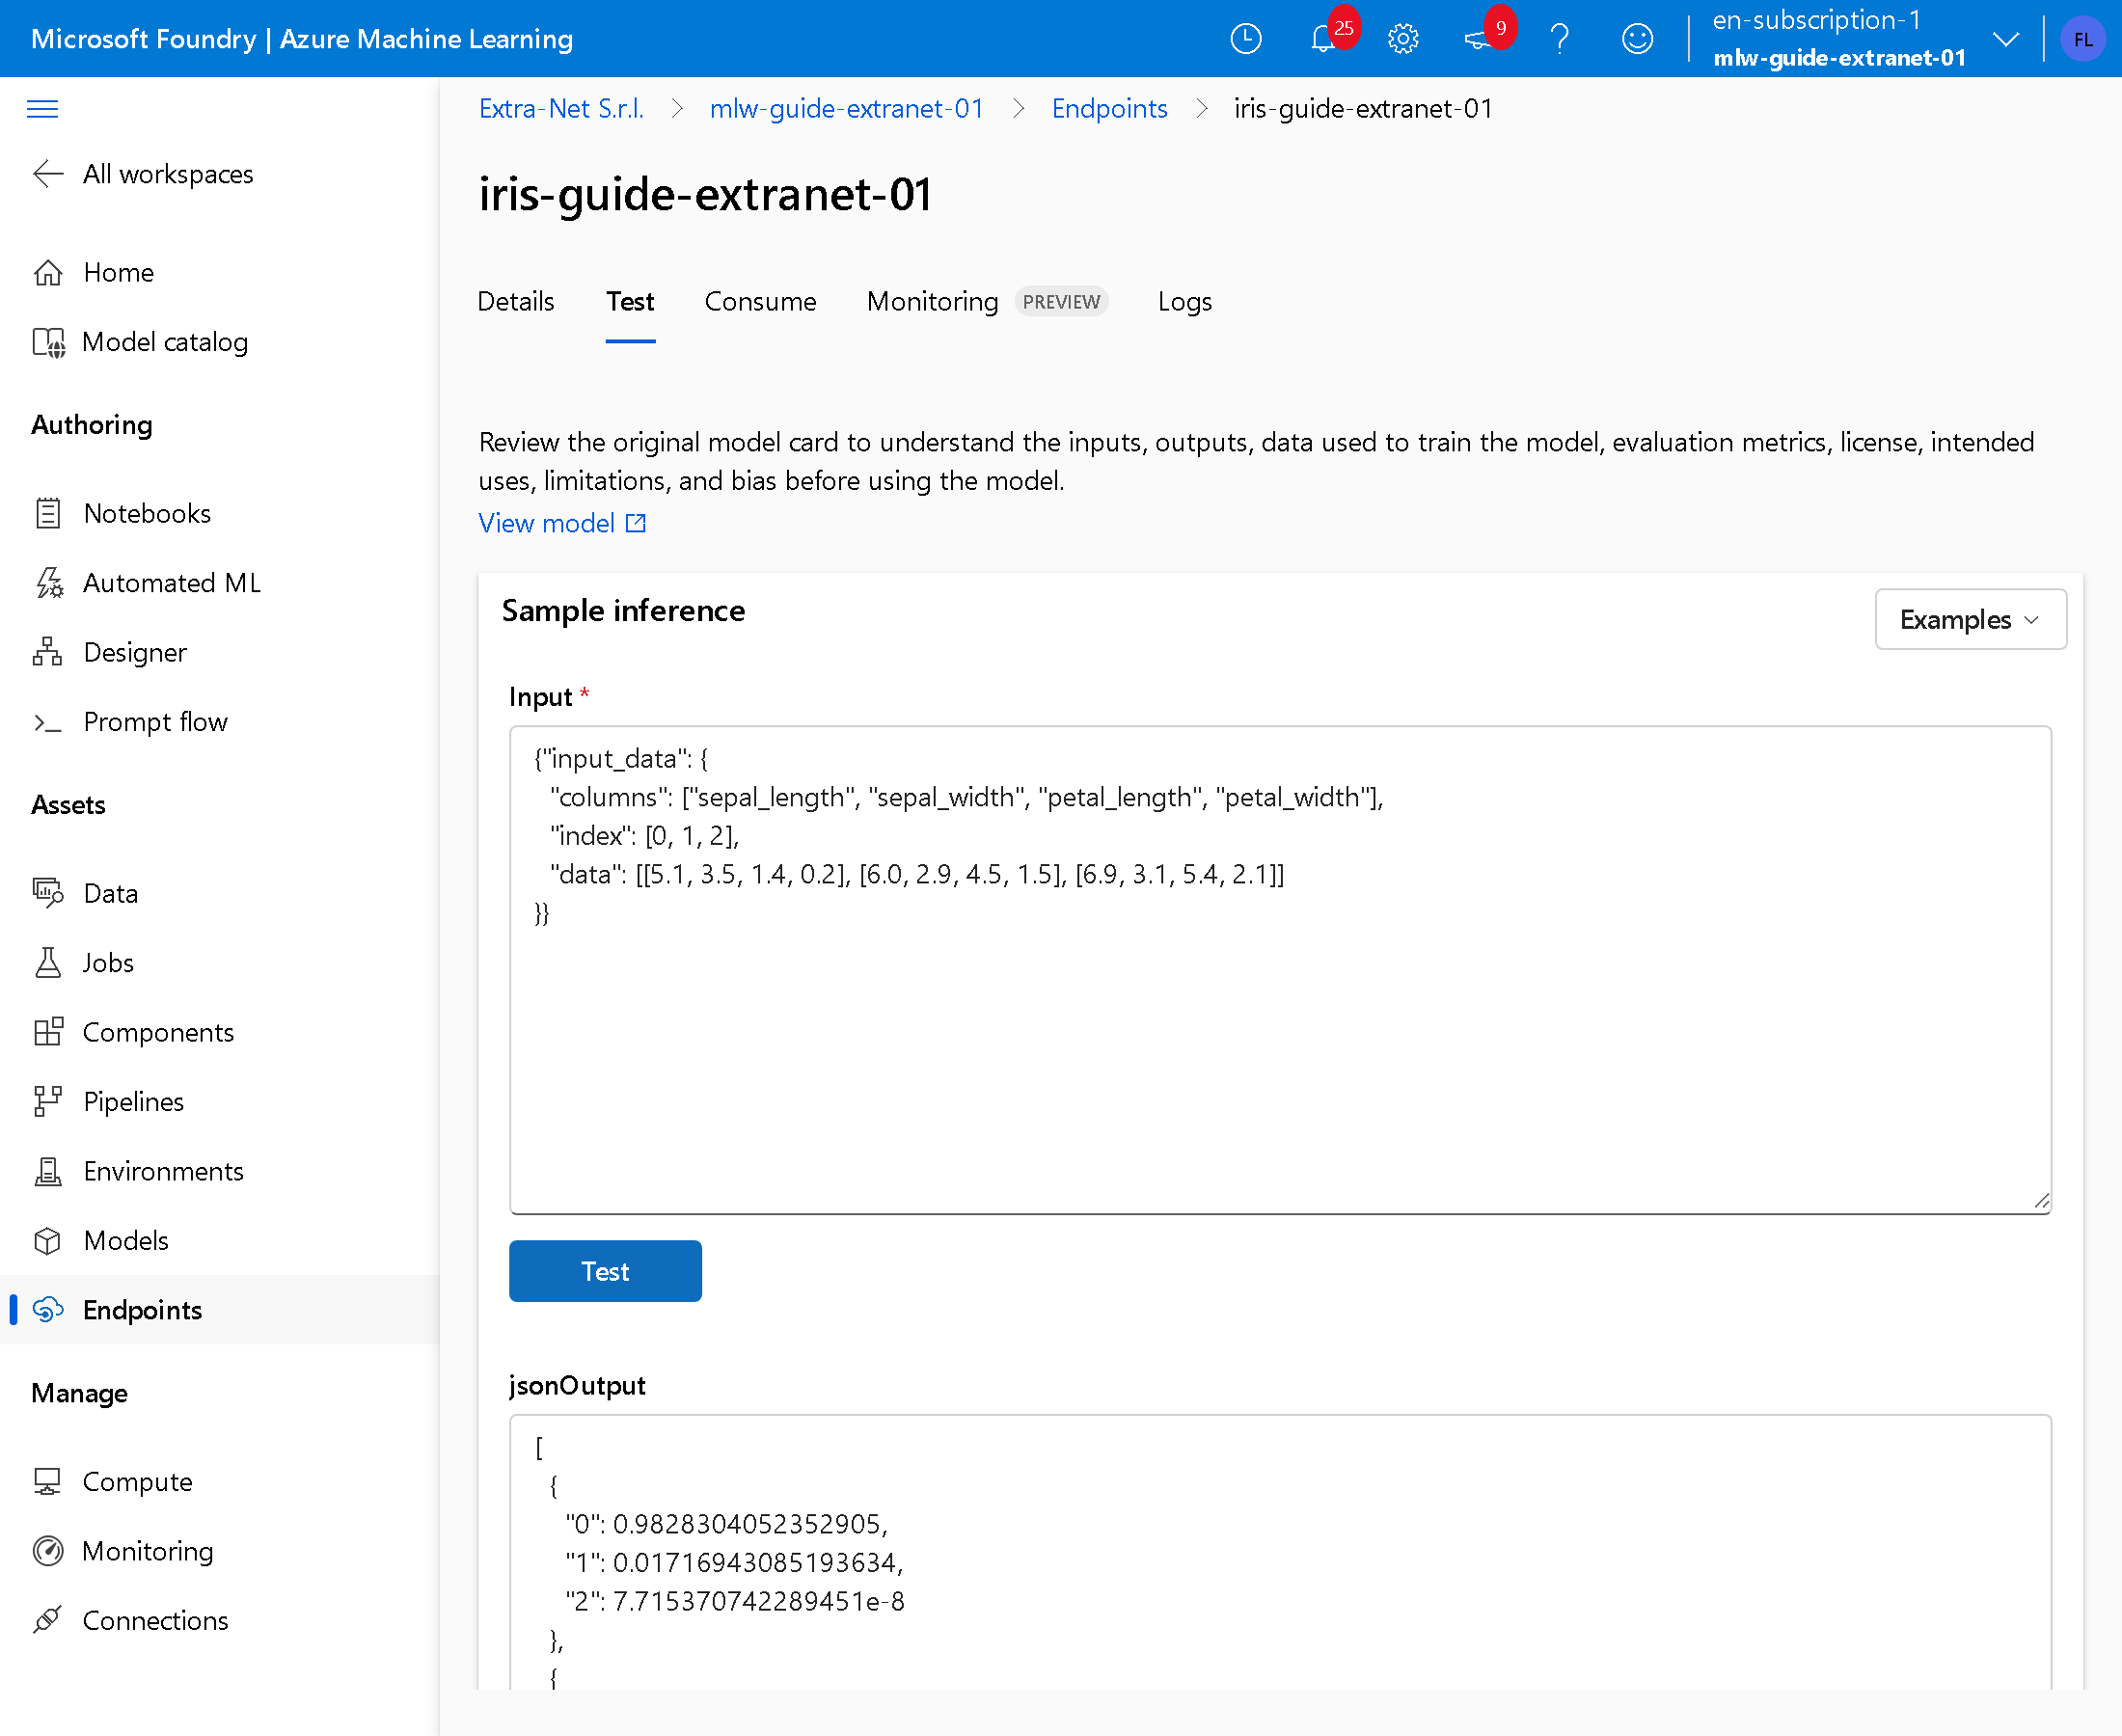
On the Test tab paste into Input:
{"input_data": {
  "columns": ["sepal_length", "sepal_width", "petal_length", "petal_width"],
  "index": [0, 1, 2],
  "data": [[5.1, 3.5, 1.4, 0.2], [6.0, 2.9, 4.5, 1.5], [6.9, 3.1, 5.4, 2.1]]
}}
Press Test. For each flower the answer gives the probability of the three species: 0 setosa, 1 versicolor, 2 virginica.
11. Copy the address and the key
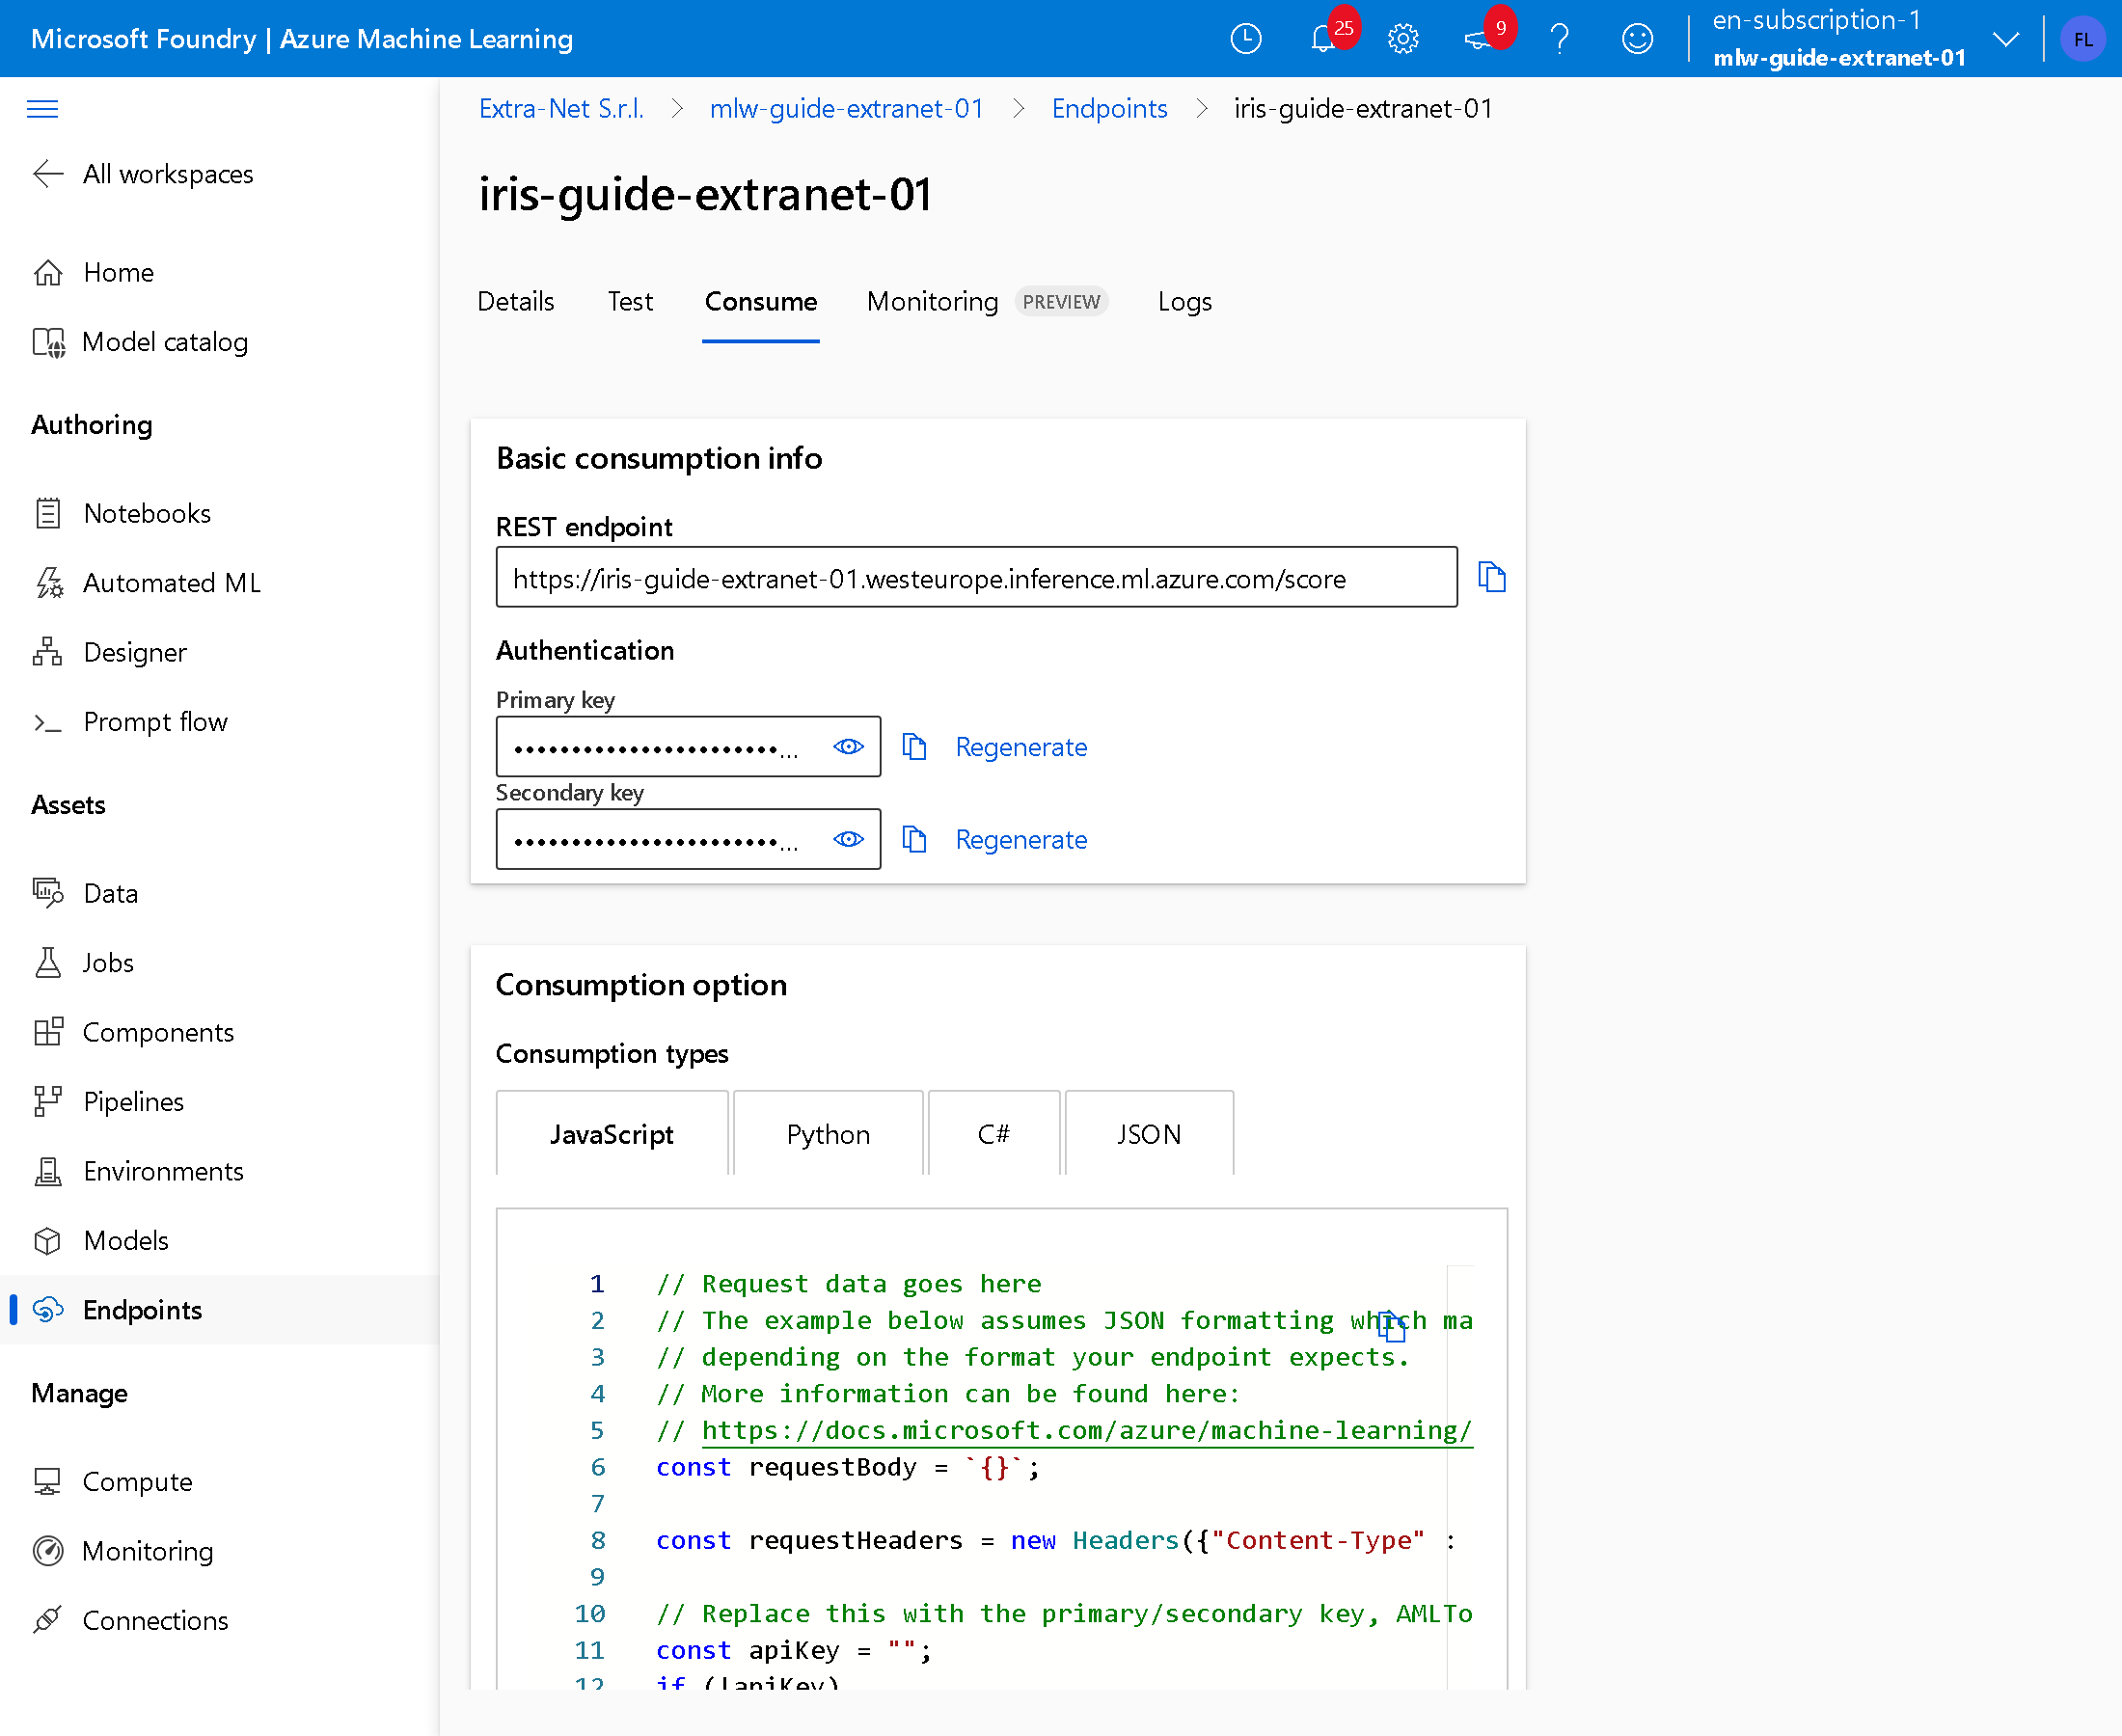
On the Consume tab copy REST endpoint and Primary key. The key grants access to the model: do not write it in the code and do not publish it.
The .NET program
12. Call the endpoint from .NET
dotnet new console -n iris-client
cd iris-client
It replaces Program.cs:
using System.Net.Http.Headers;
using System.Net.Http.Json;

string scoringUri = Environment.GetEnvironmentVariable("SCORING_URI")!;
string key = Environment.GetEnvironmentVariable("ENDPOINT_KEY")!;

var request = new
{
    input_data = new
    {
        columns = new[] { "sepal_length", "sepal_width", "petal_length", "petal_width" },
        index = new[] { 0, 1, 2 },
        data = new[]
        {
            new[] { 5.1, 3.5, 1.4, 0.2 },
            new[] { 6.0, 2.9, 4.5, 1.5 },
            new[] { 6.9, 3.1, 5.4, 2.1 },
        },
    },
};

using HttpClient http = new();
http.DefaultRequestHeaders.Authorization = new AuthenticationHeaderValue("Bearer", key);

HttpResponseMessage response = await http.PostAsJsonAsync(scoringUri, request);
Console.WriteLine($"HTTP {(int)response.StatusCode}");
Console.WriteLine(await response.Content.ReadAsStringAsync());
Set the two variables with the copied values and run:
export SCORING_URI=https://iris-guide-extranet-01.westeurope.inference.ml.azure.com/score
export ENDPOINT_KEY=<key>
dotnet run
In PowerShell the first two lines are $env:SCORING_URI = "..." and $env:ENDPOINT_KEY = "...". In this run:
HTTP 200
[{"0": 0.9828304052352905, "1": 0.01716943085193634, "2": 7.715370742289451e-08}, {"0": 0.006401201244443655, "1": 0.7643778324127197, "2": 0.22922086715698242}, {"0": 0.00015558379527647048, "1": 0.21182303130626678, "2": 0.7880213856697083}]
The first flower is a setosa at 98%, the second a versicolor at 76%, the third a virginica at 79%. With a wrong key the endpoint answers HTTP 401.
Delete the resources
13. Delete the group
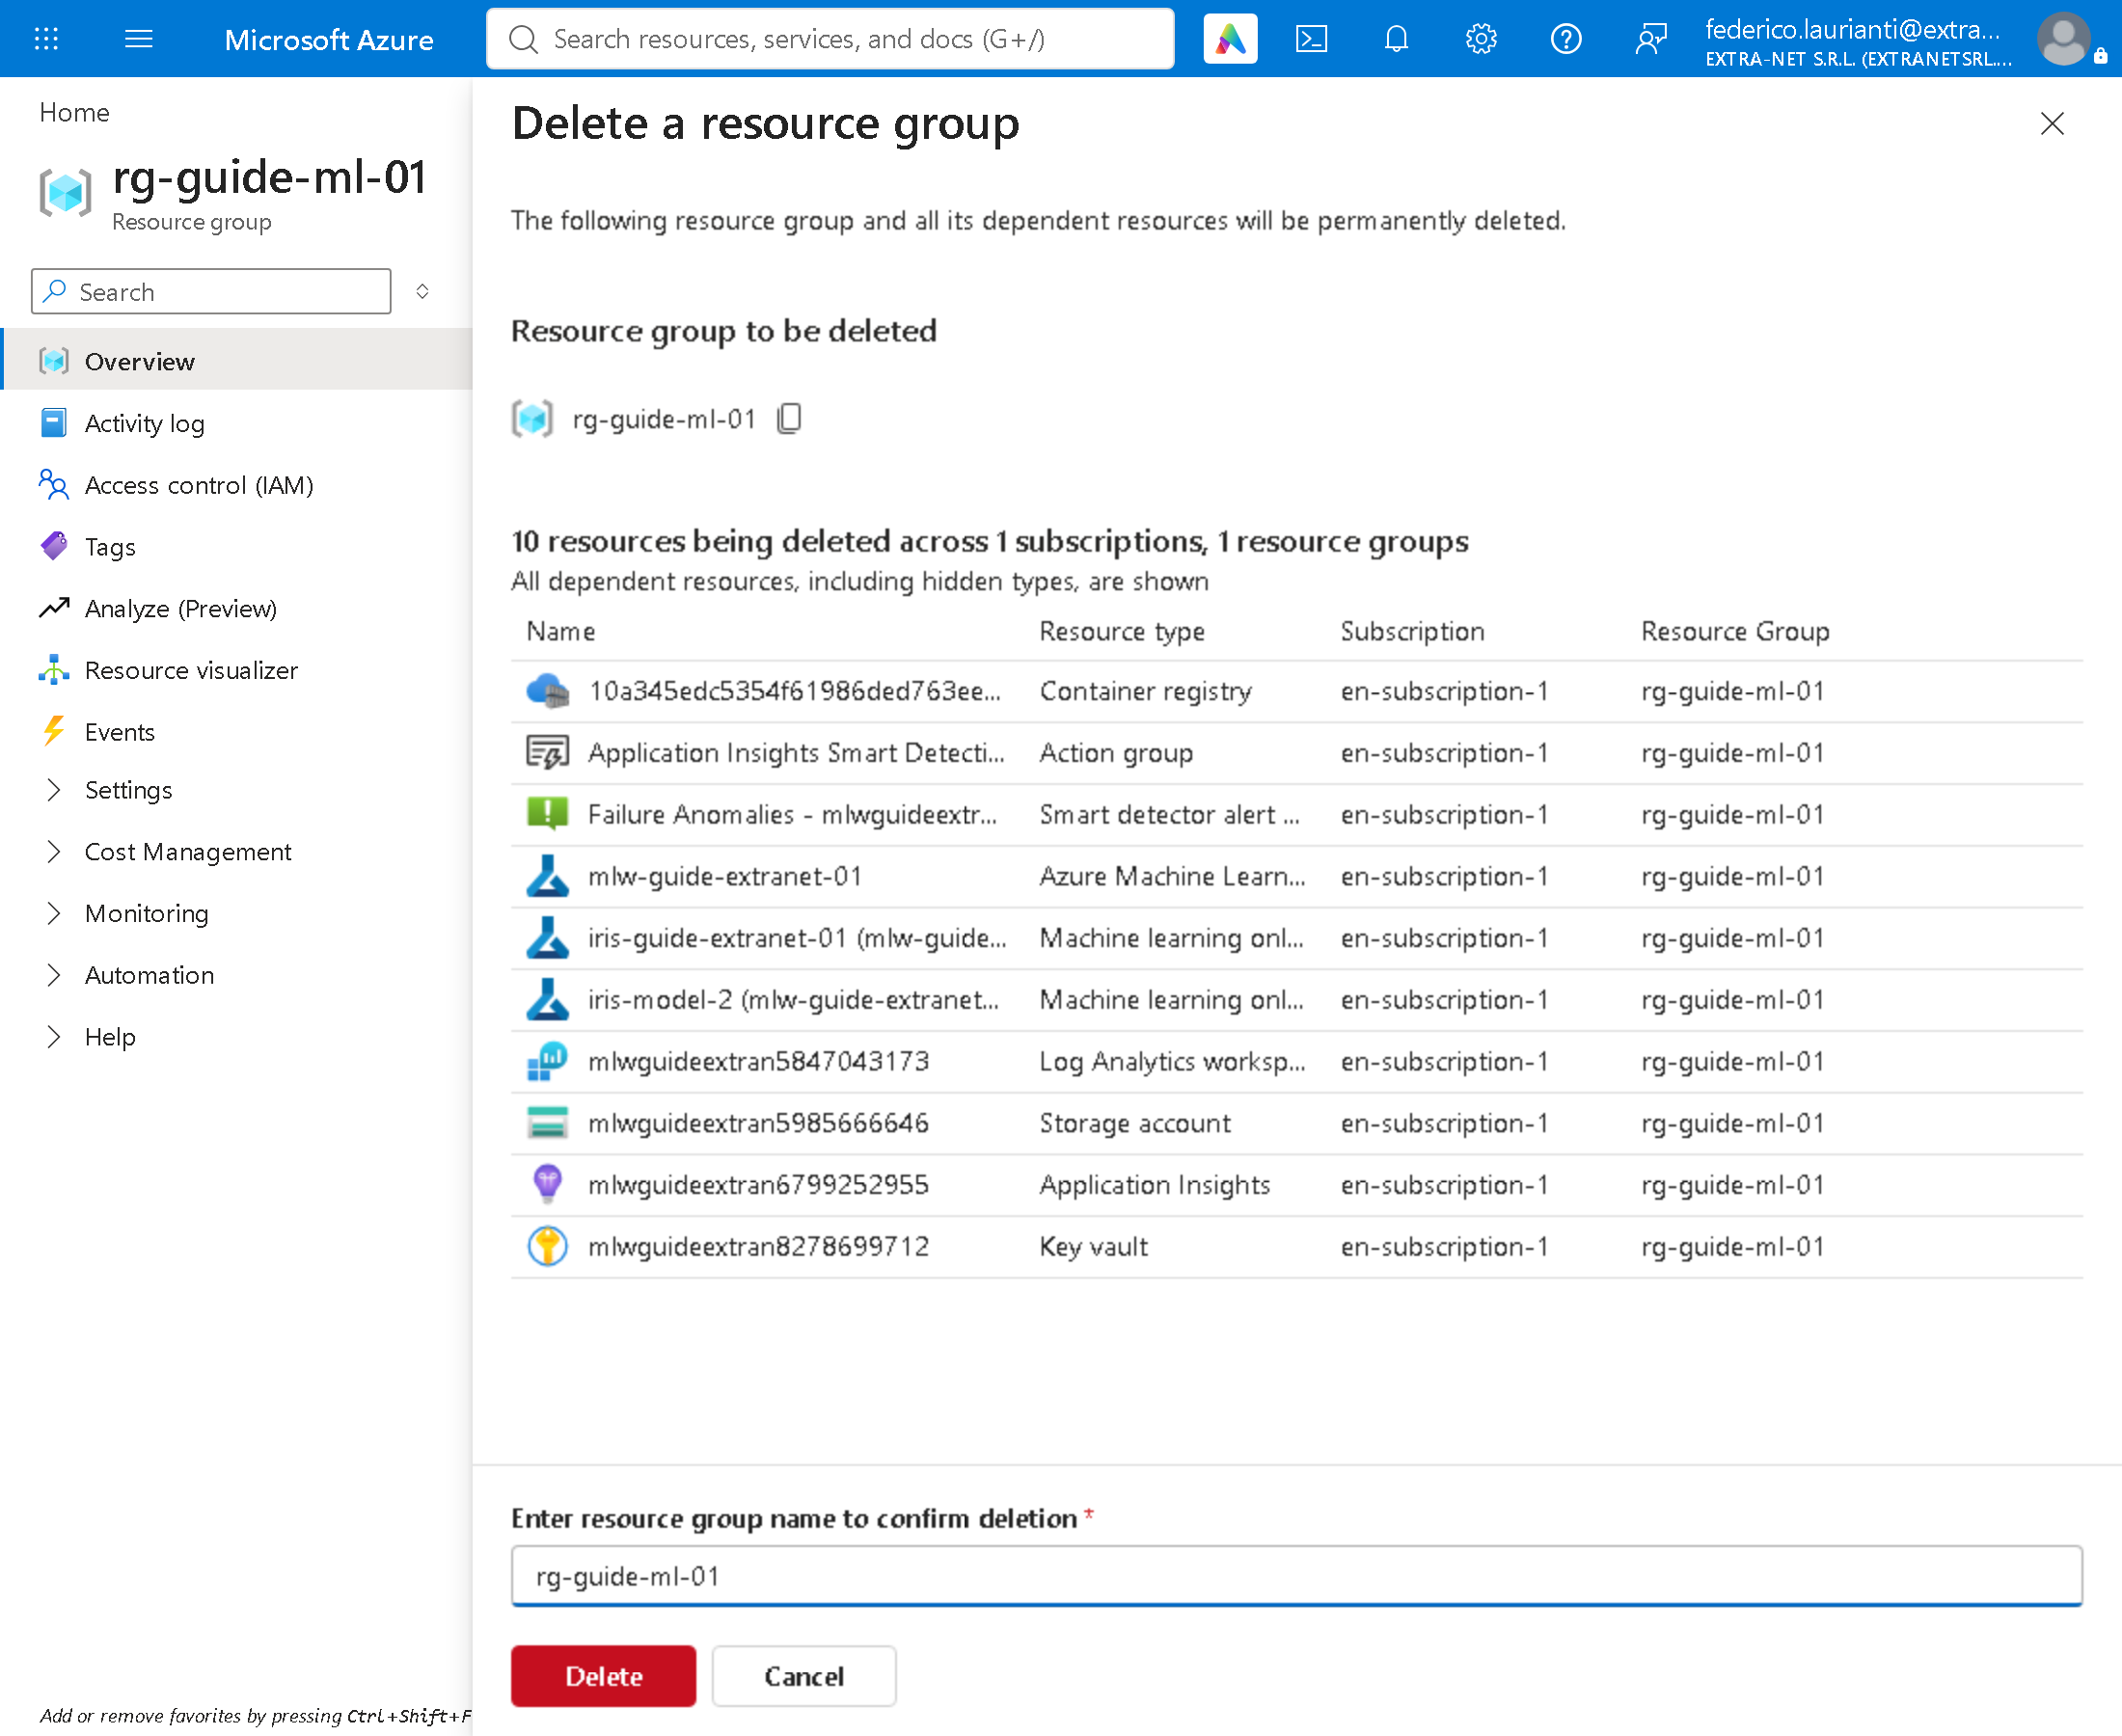
Open the rg-guide-ml-01 group. Besides the resources created in step 1 it holds the endpoint, its deployment and a container registry that Azure created by itself for the endpoint image.
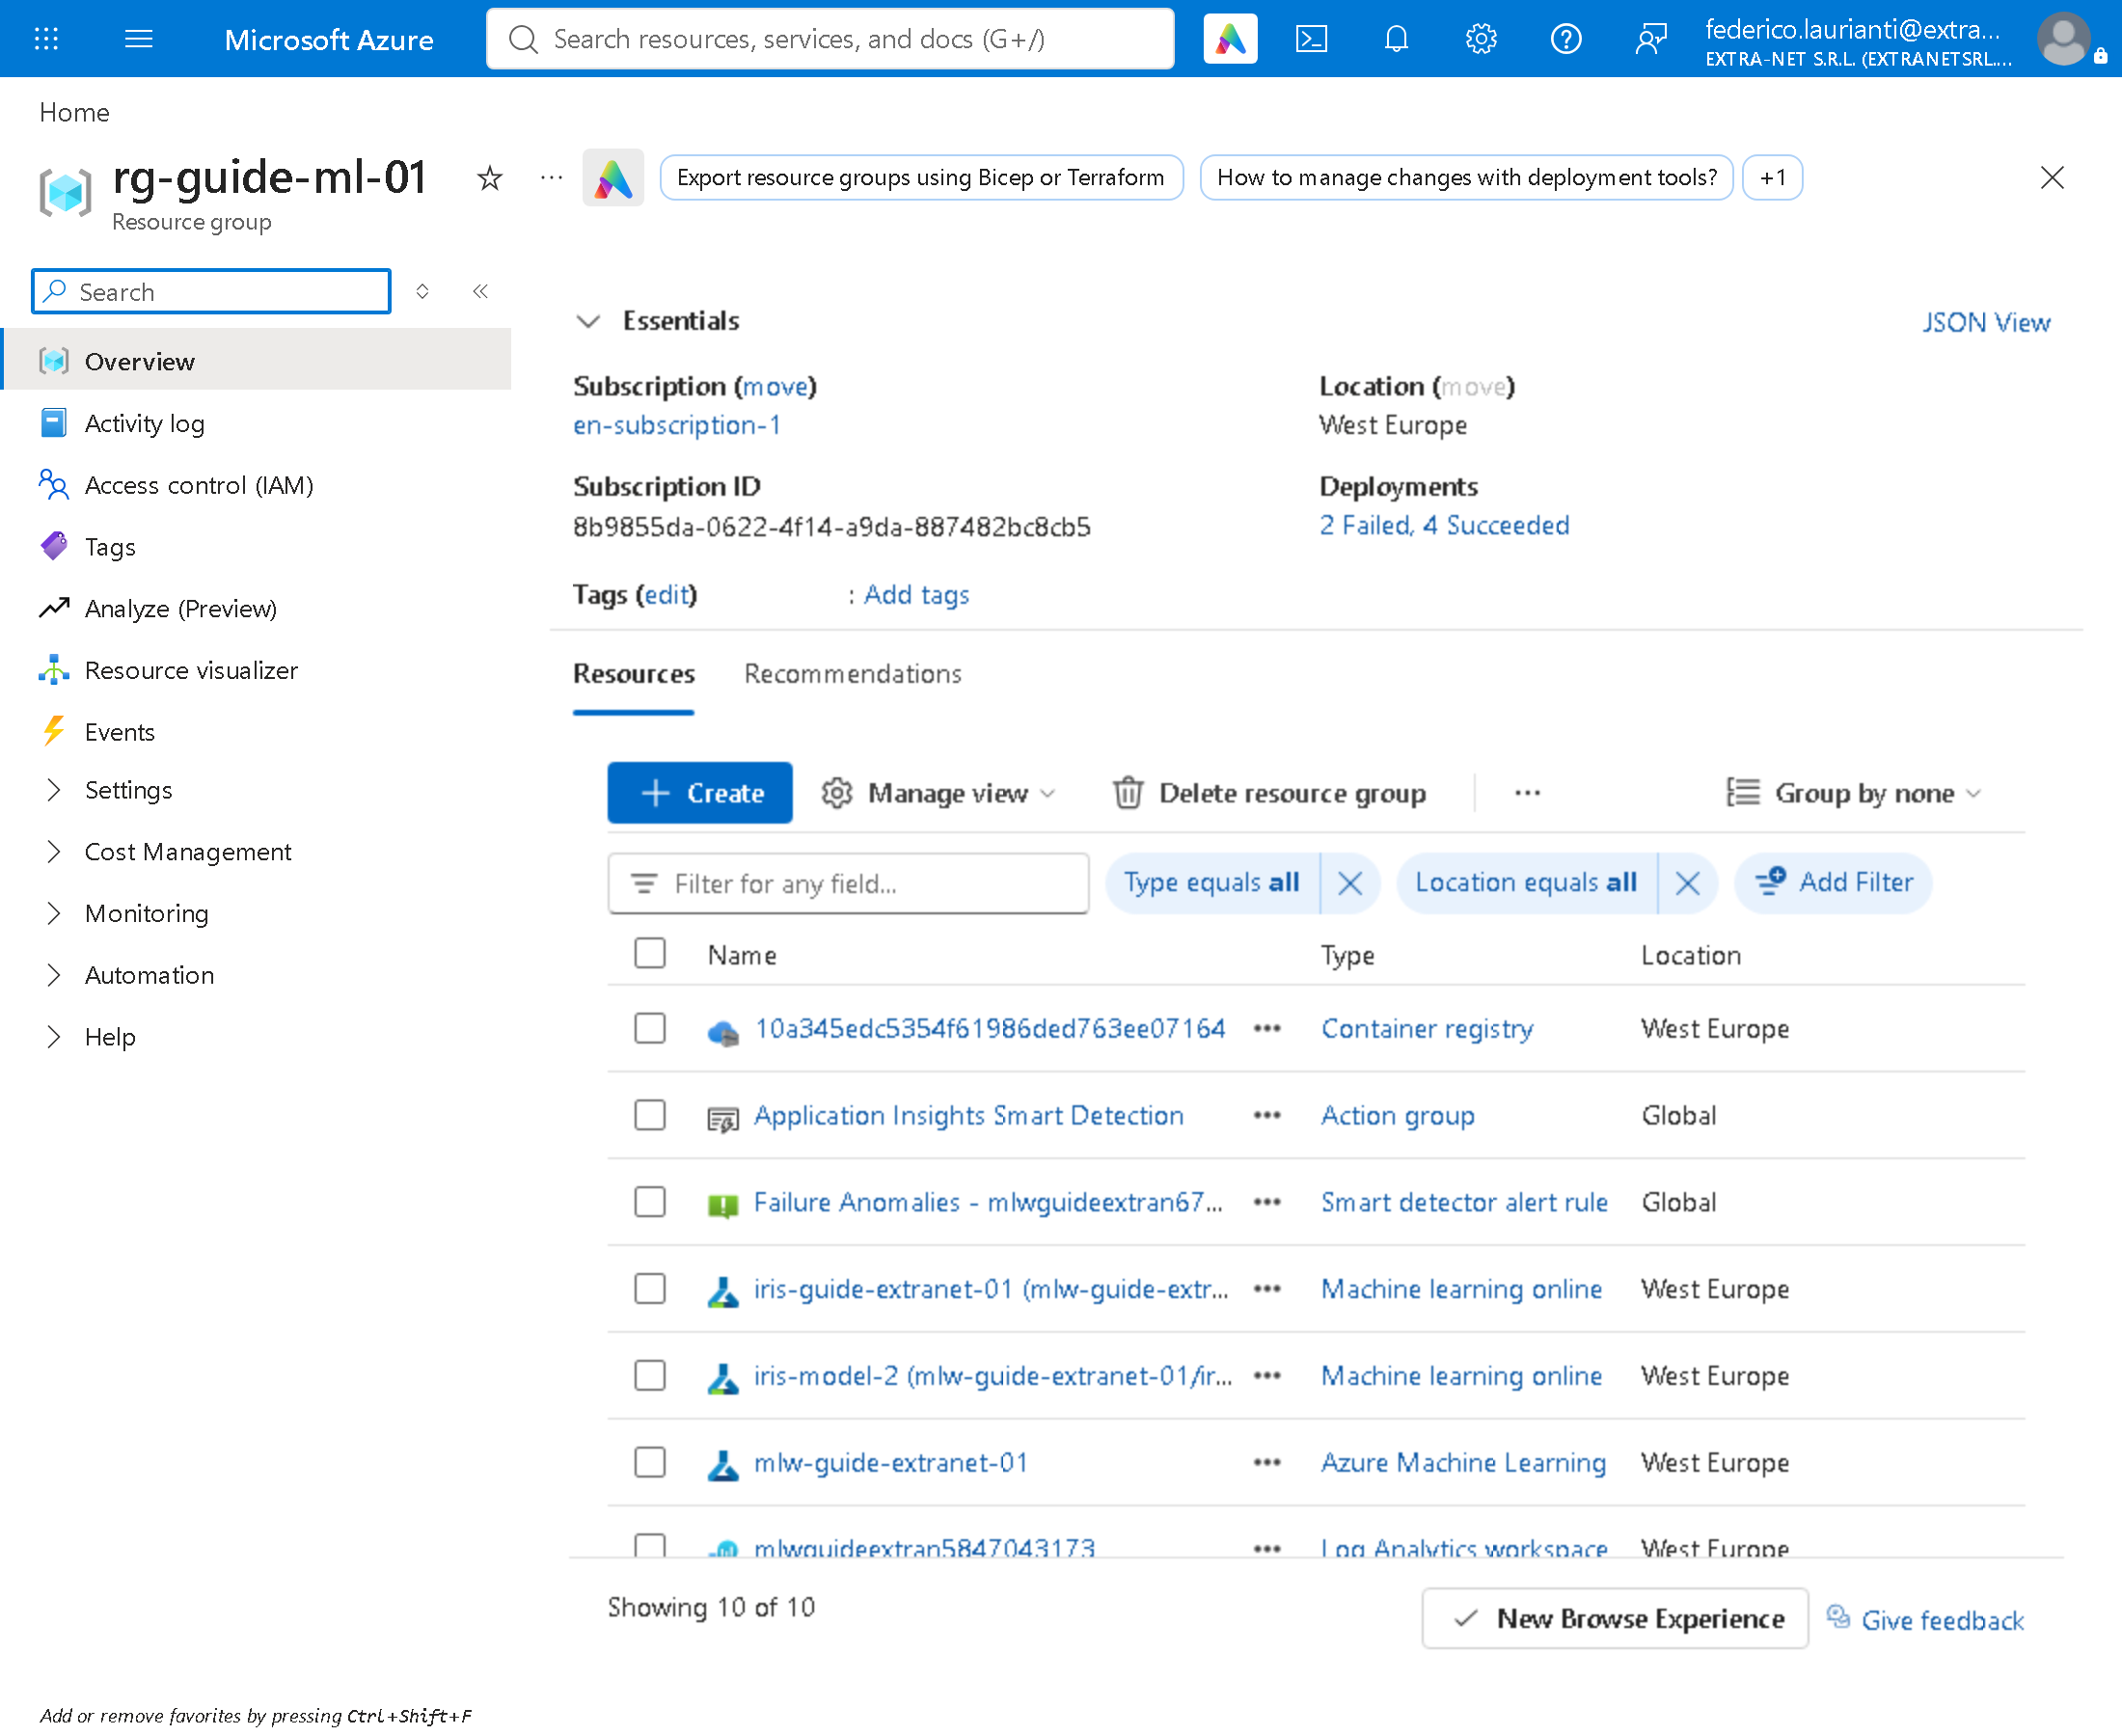
Press Delete resource group, type the group name to confirm, press Delete and, in the window that follows, Delete again.
14. Permanently delete the workspace
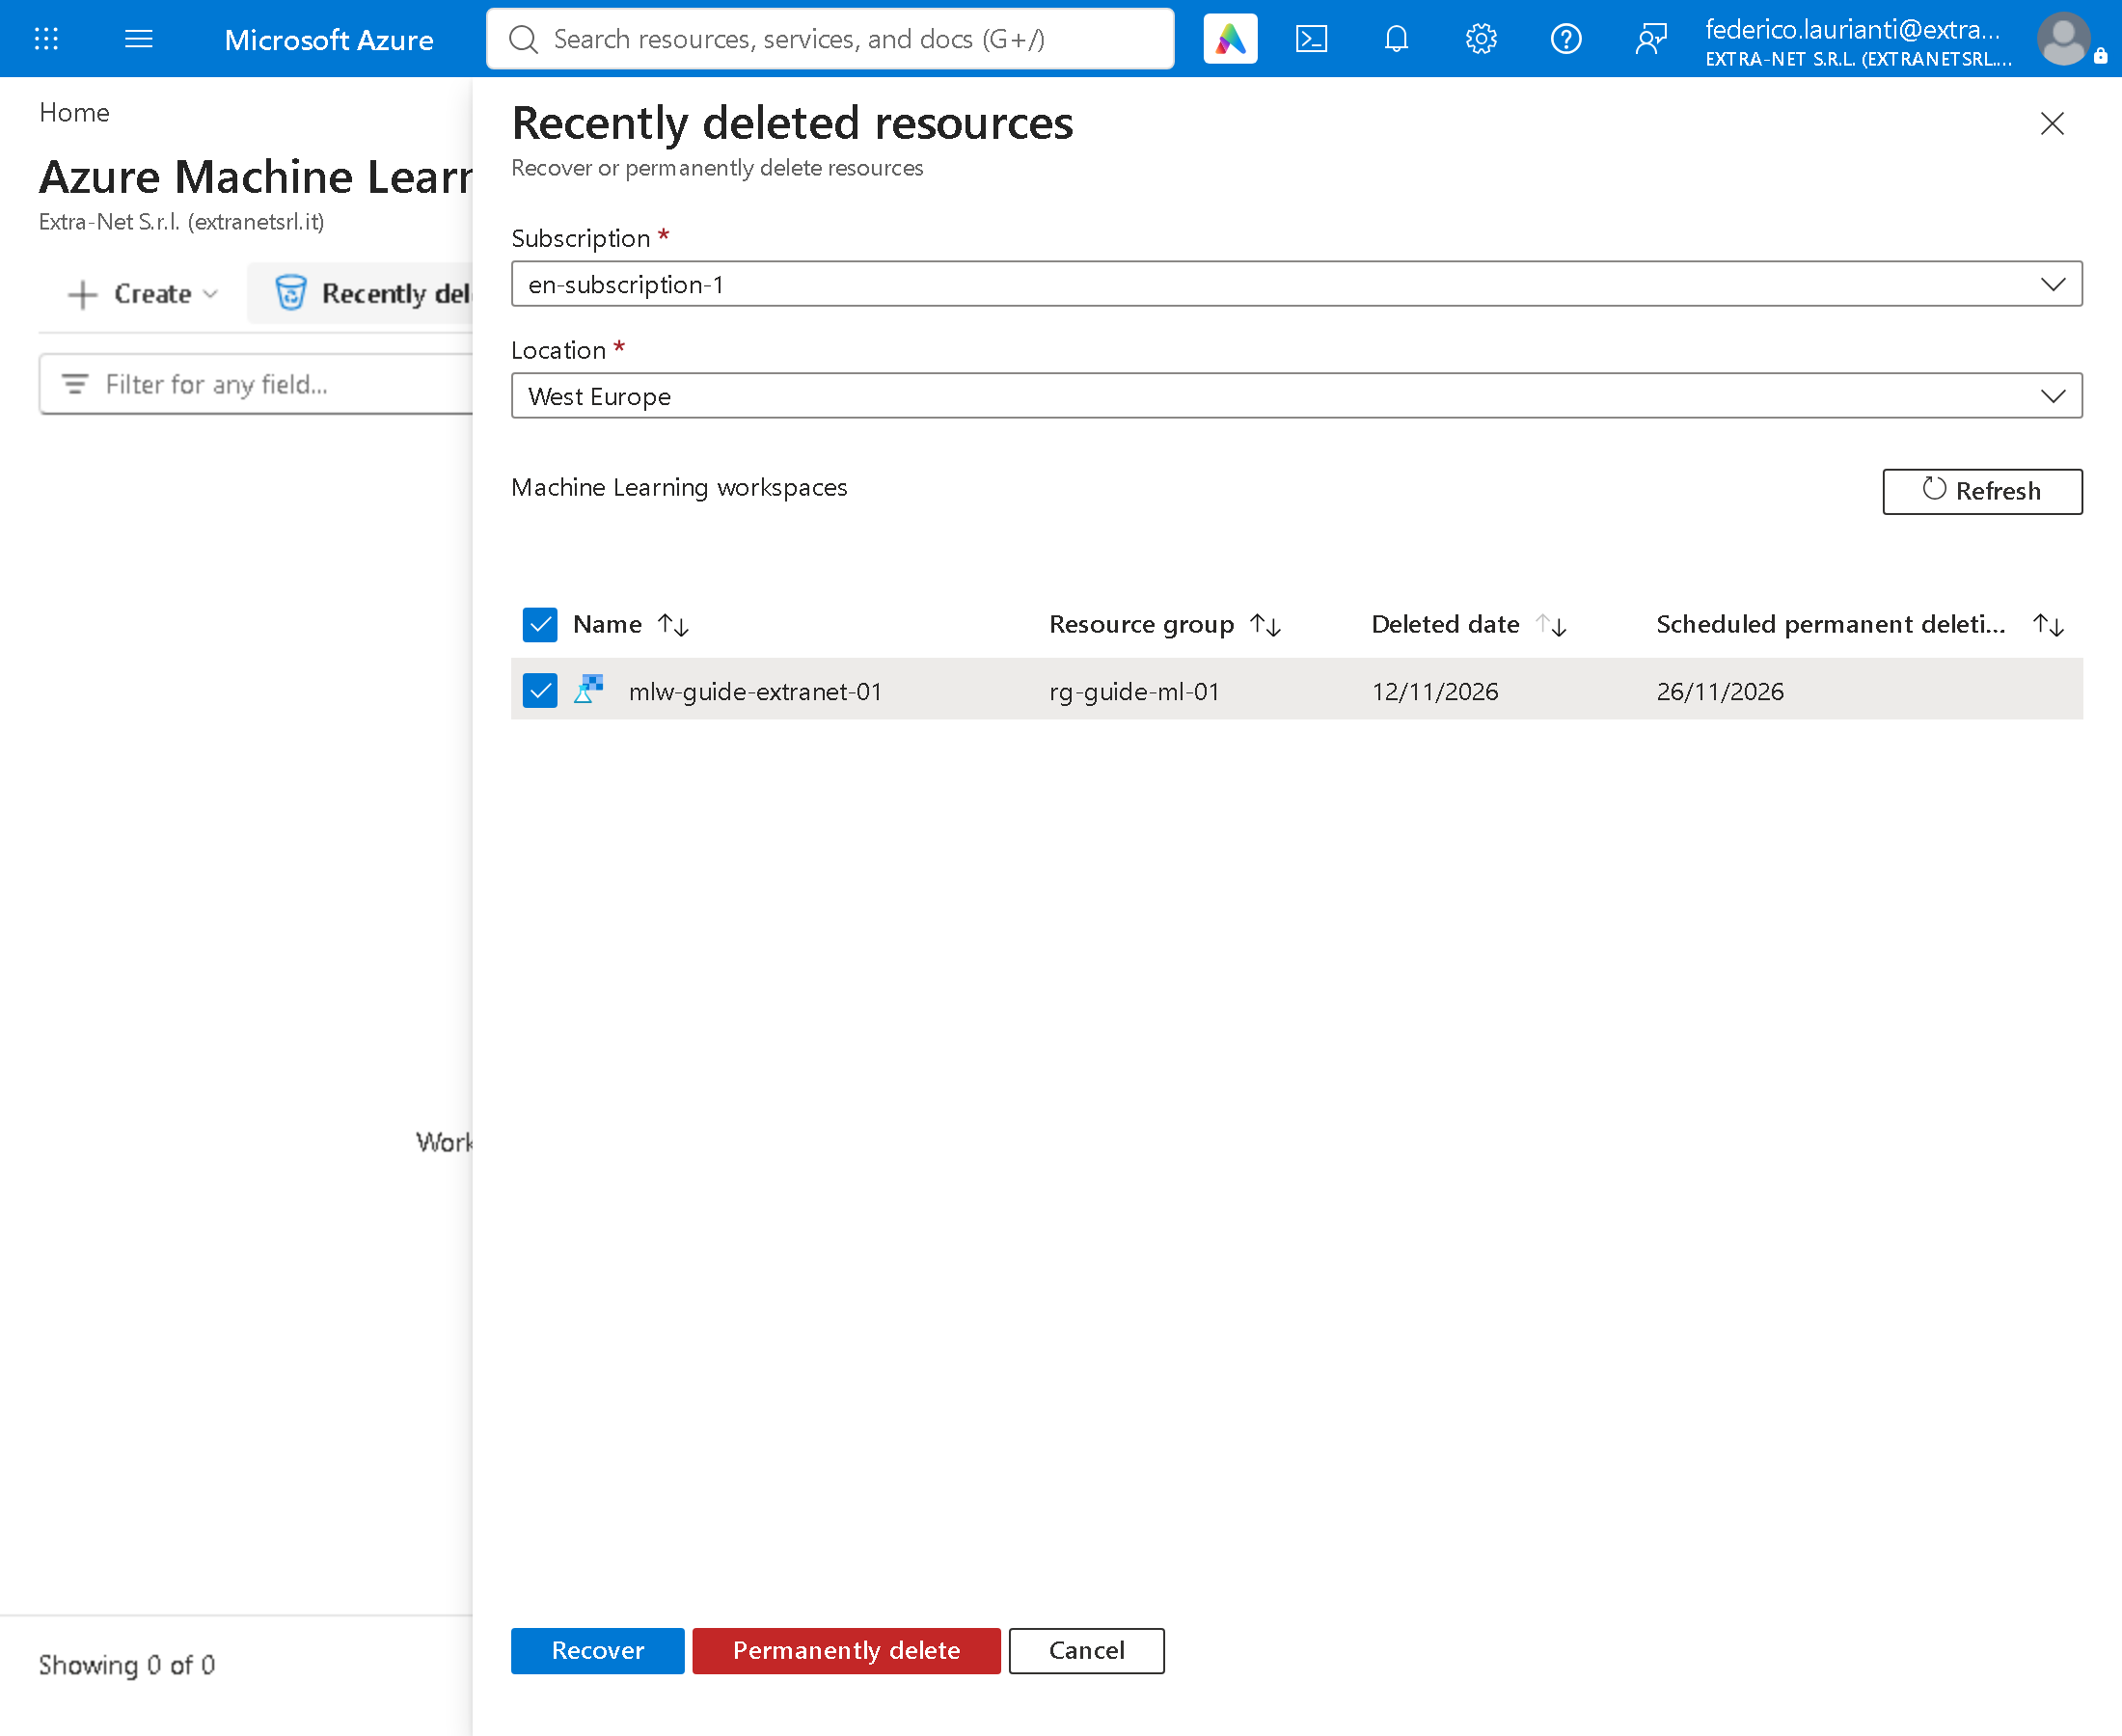
Once the group is deleted, Azure keeps the workspace among the deleted ones for 14 days. While it stays there, creating a new workspace with the same name fails with Soft-deleted workspace exists. Please purge or recover it.
In the portal search for Azure Machine Learning, press Recently deleted, choose the subscription and, in Location, West Europe. Tick mlw-guide-extranet-01 and press Permanently delete.
Command names, screenshots and answers recorded on 10 November 2026, West Europe region, with the acpt-pytorch-2.8-cuda12.6 environment version 21 (PyTorch 2.13.0, MLflow 3.15.0) and .NET 10.0.401; step 14 on 12 November 2026.