


Procedure to read a secret from Azure Key Vault in a .NET application without writing any password, in the code or in the configuration. The same program runs first on your computer, with your own account, and then on Container Apps, with the application's managed identity. Resources are created and deleted from the Azure portal; your computer is used to write the program and build the image.
You need: an Azure account with an active subscription and the Owner role on it, .NET 10 and the Azure command-line interface on your computer. Time: about an hour, most of it waiting for the Container Apps environment. Cost: a few cents, if you delete the resources at the end. The Basic registry is billed as long as it exists.
The portal in the screenshots is in English: command names are written as they appear on screen.
The secret
1. Create the Key Vault
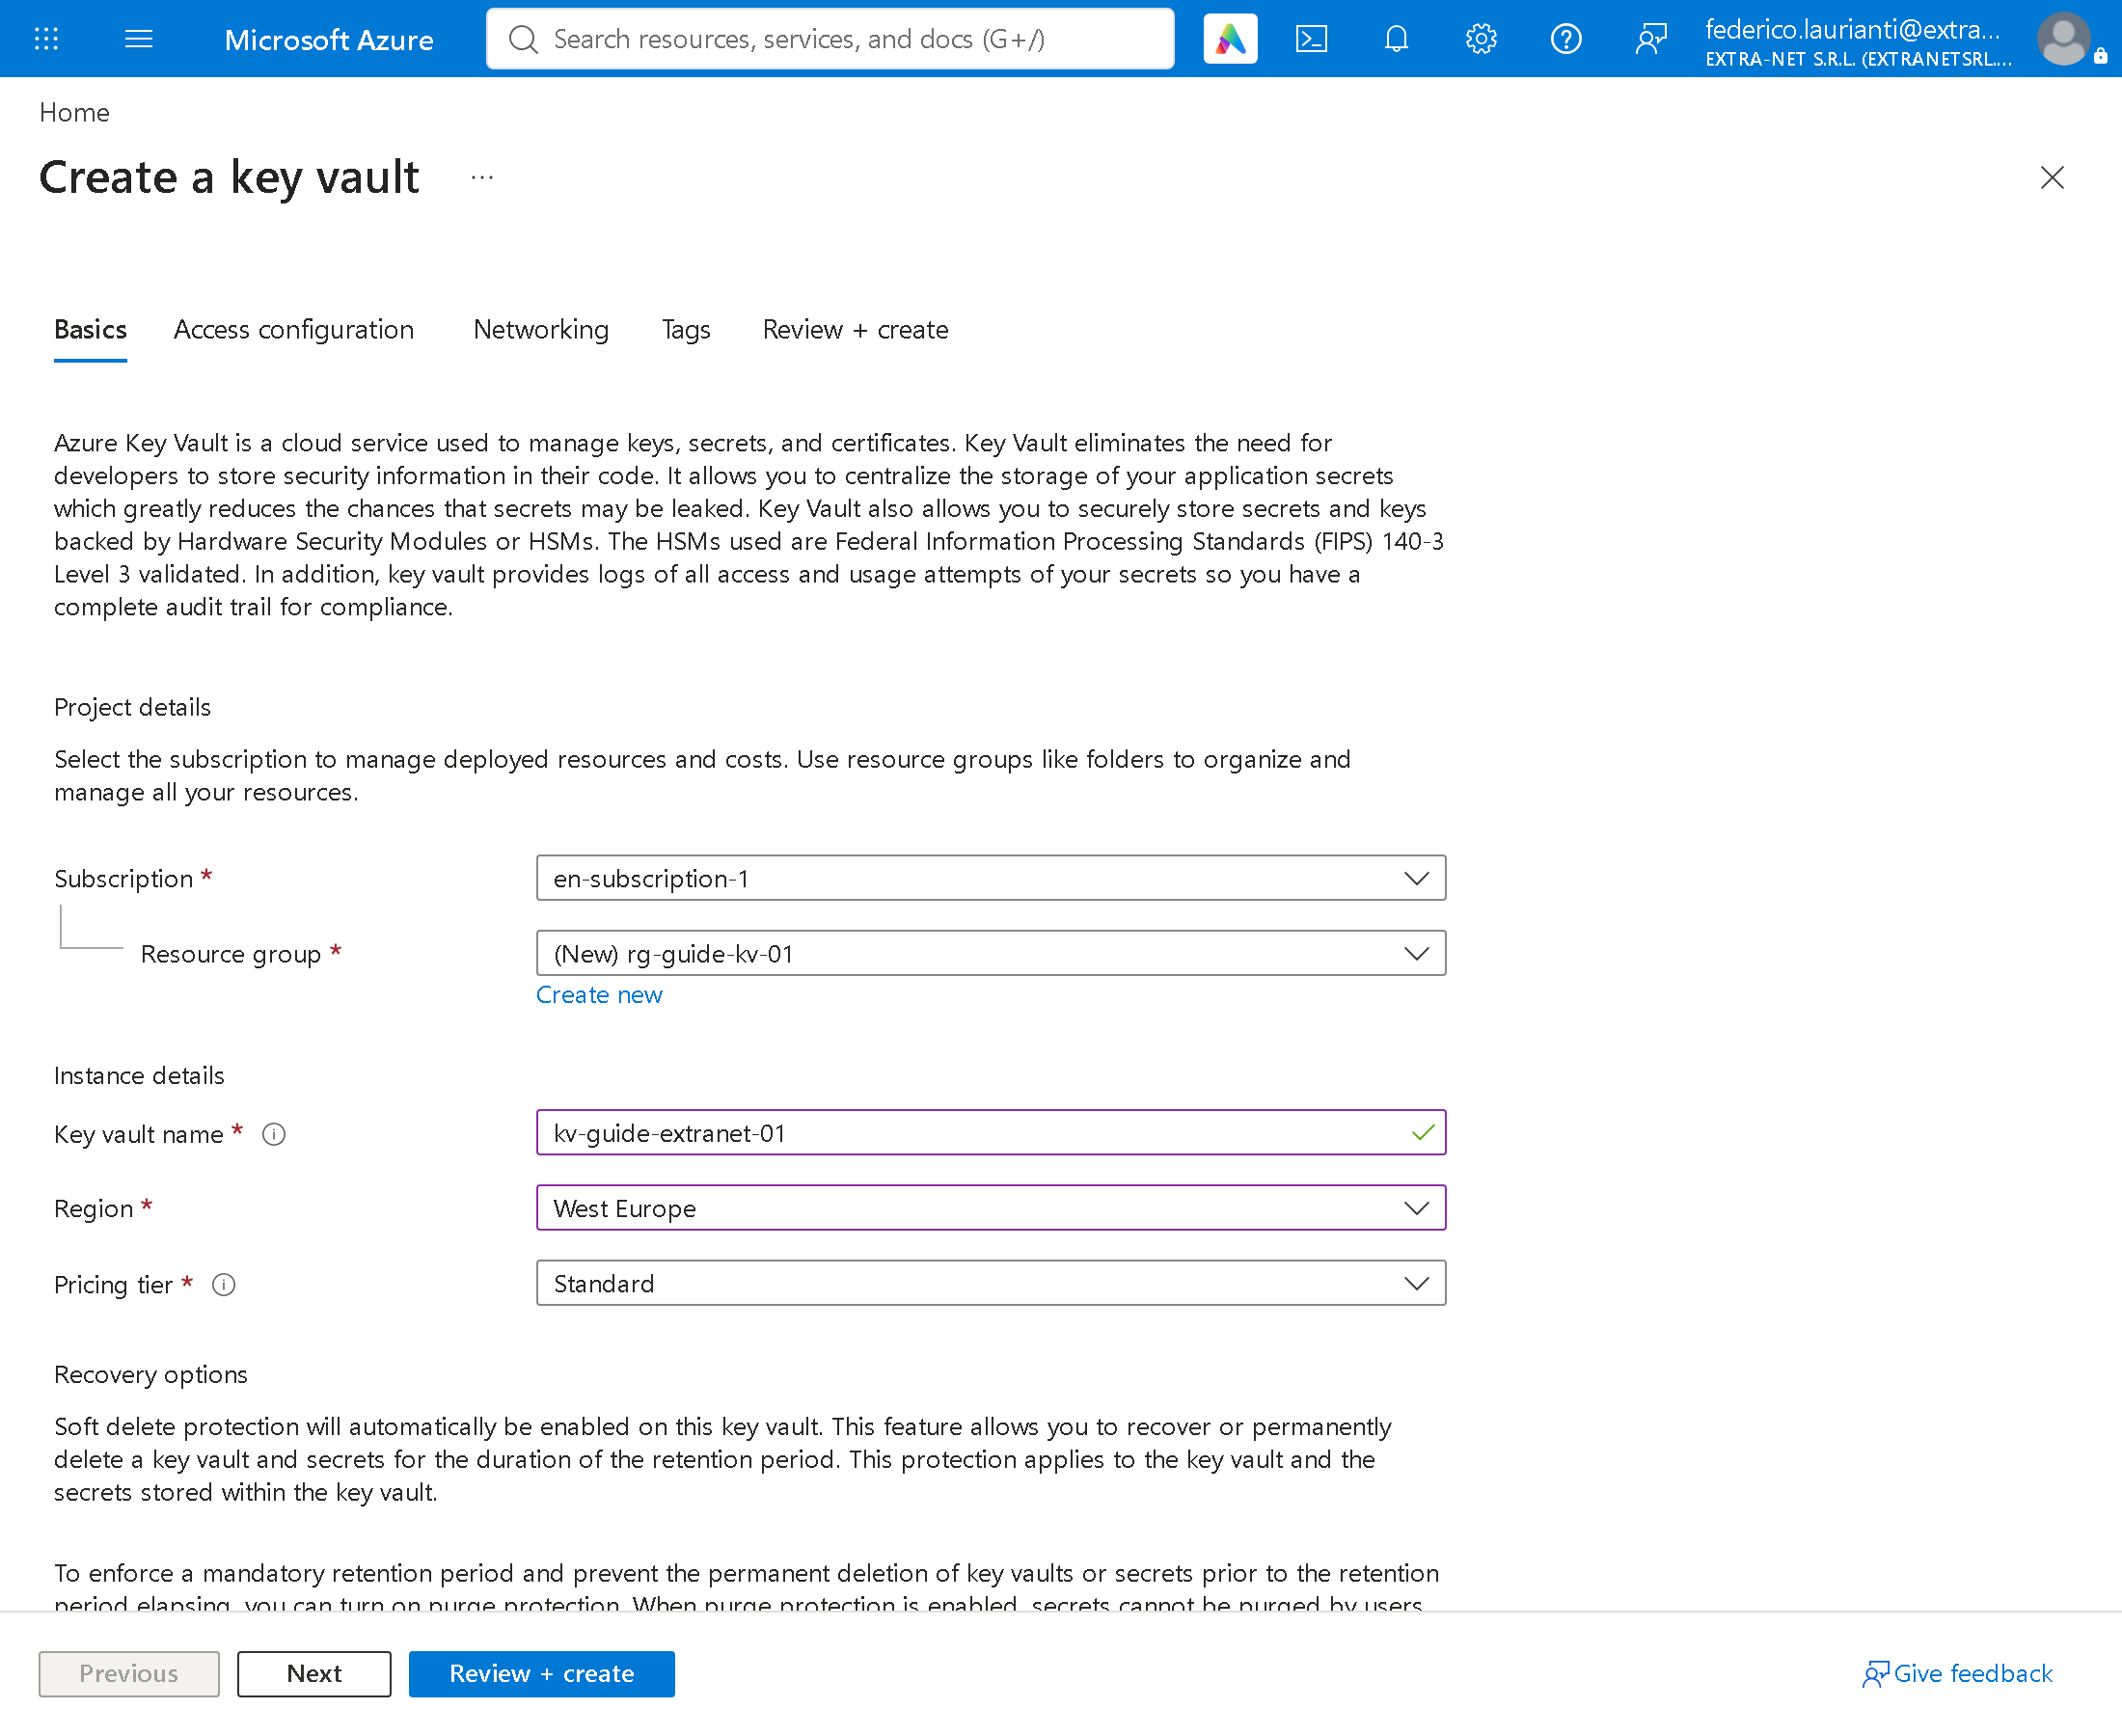
Open https://portal.azure.com/#create/Microsoft.KeyVault and fill in:
- Resource group: Create new,
rg-guide-kv-01, OK - Key vault name: a name of your own, unique across Azure, here
kv-guide-extranet-01 - Region: West Europe
- Pricing tier: Standard
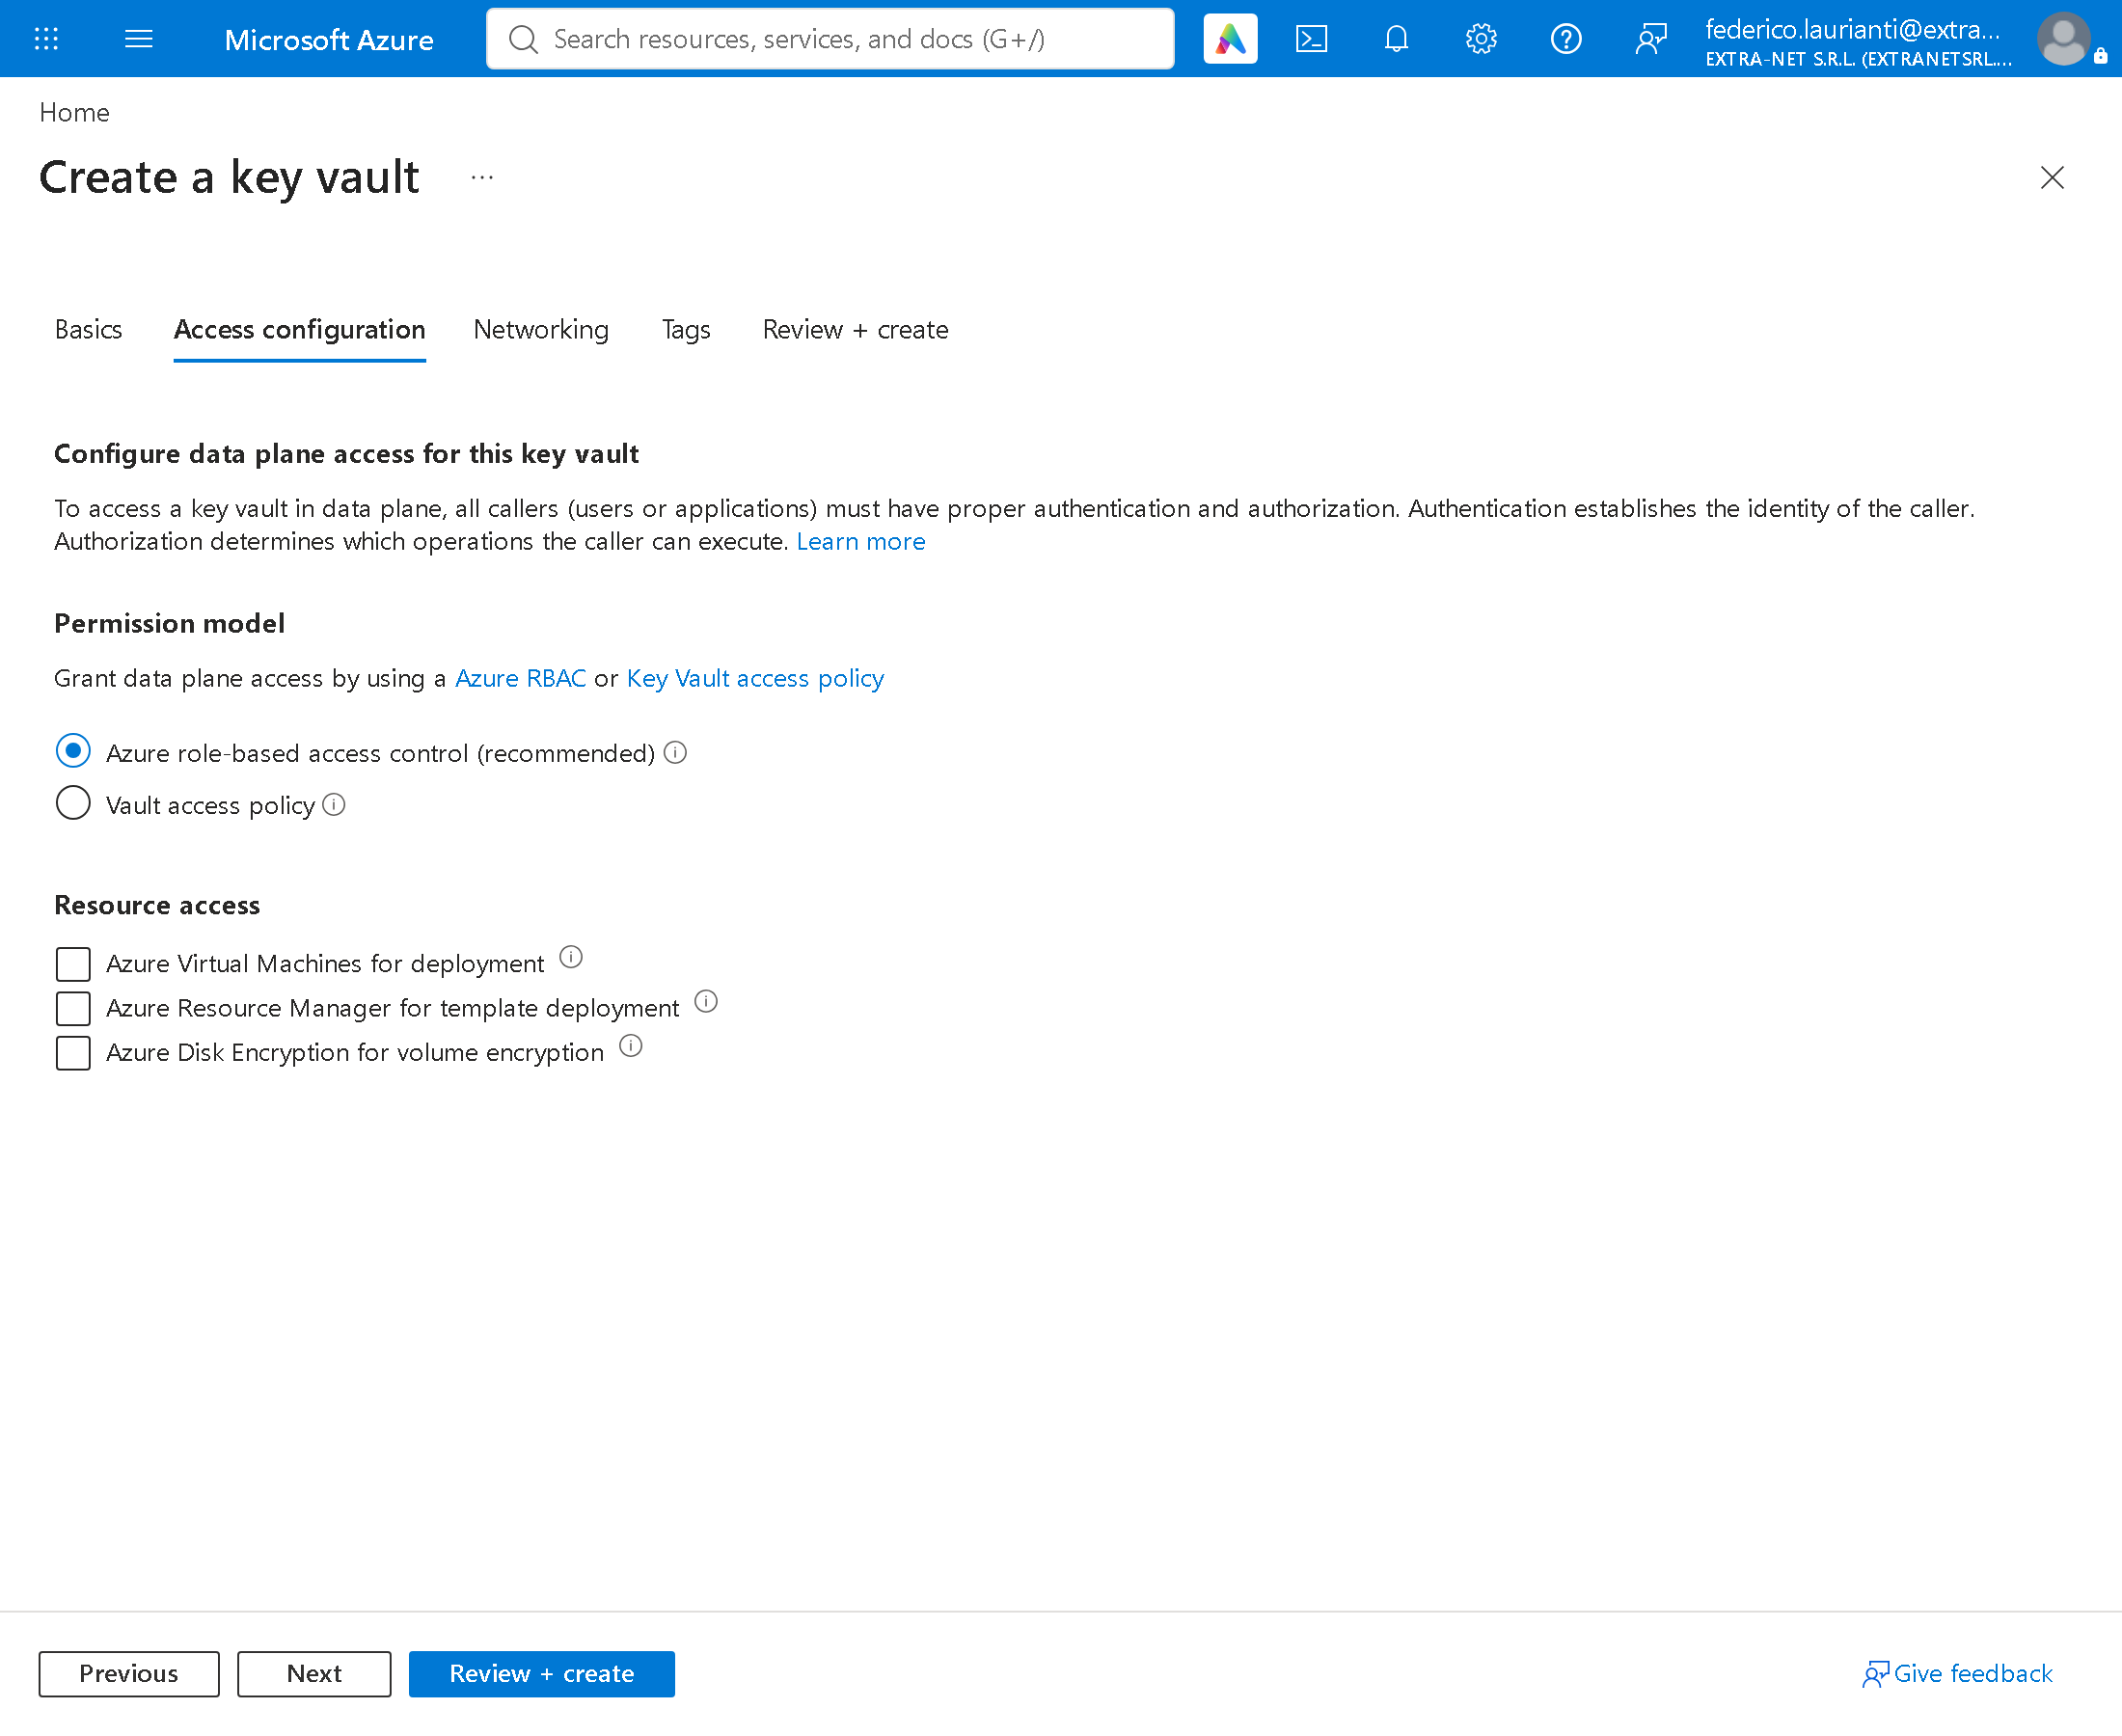
On the Access configuration tab leave Azure role-based access control: Azure roles will decide who gets access.
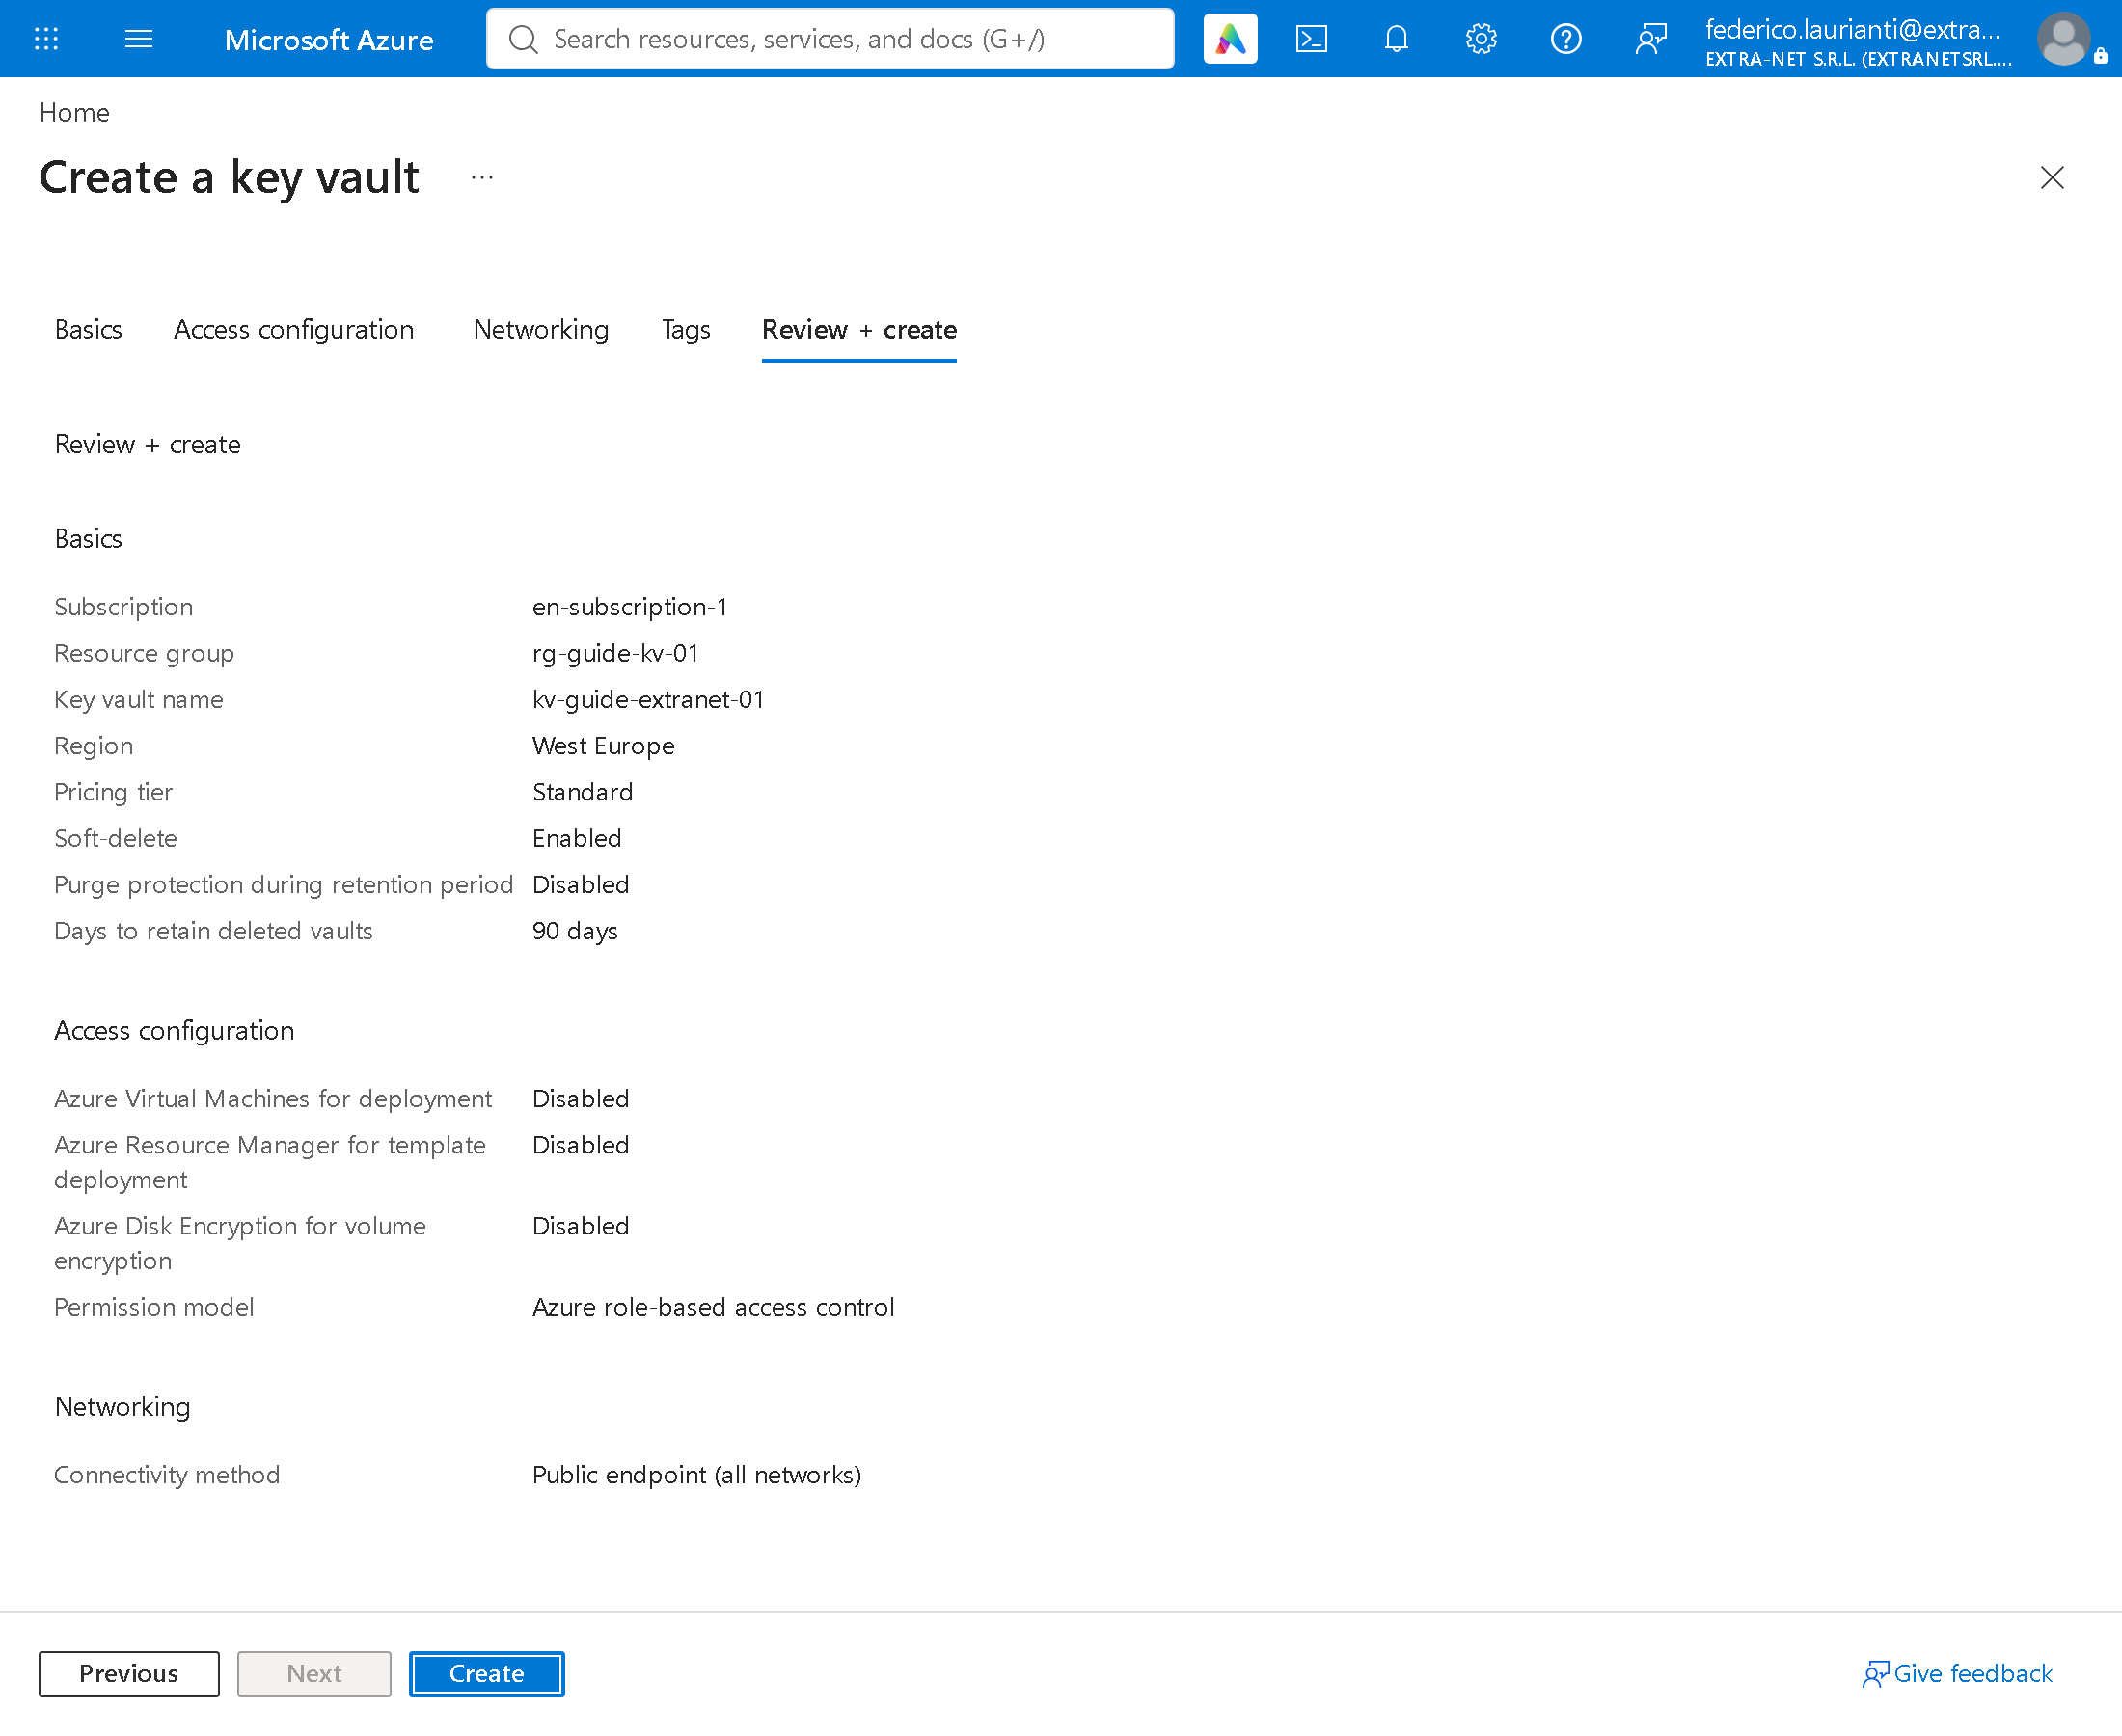
Press Review + create, then Create, and wait for it to finish.
2. Give yourself permission
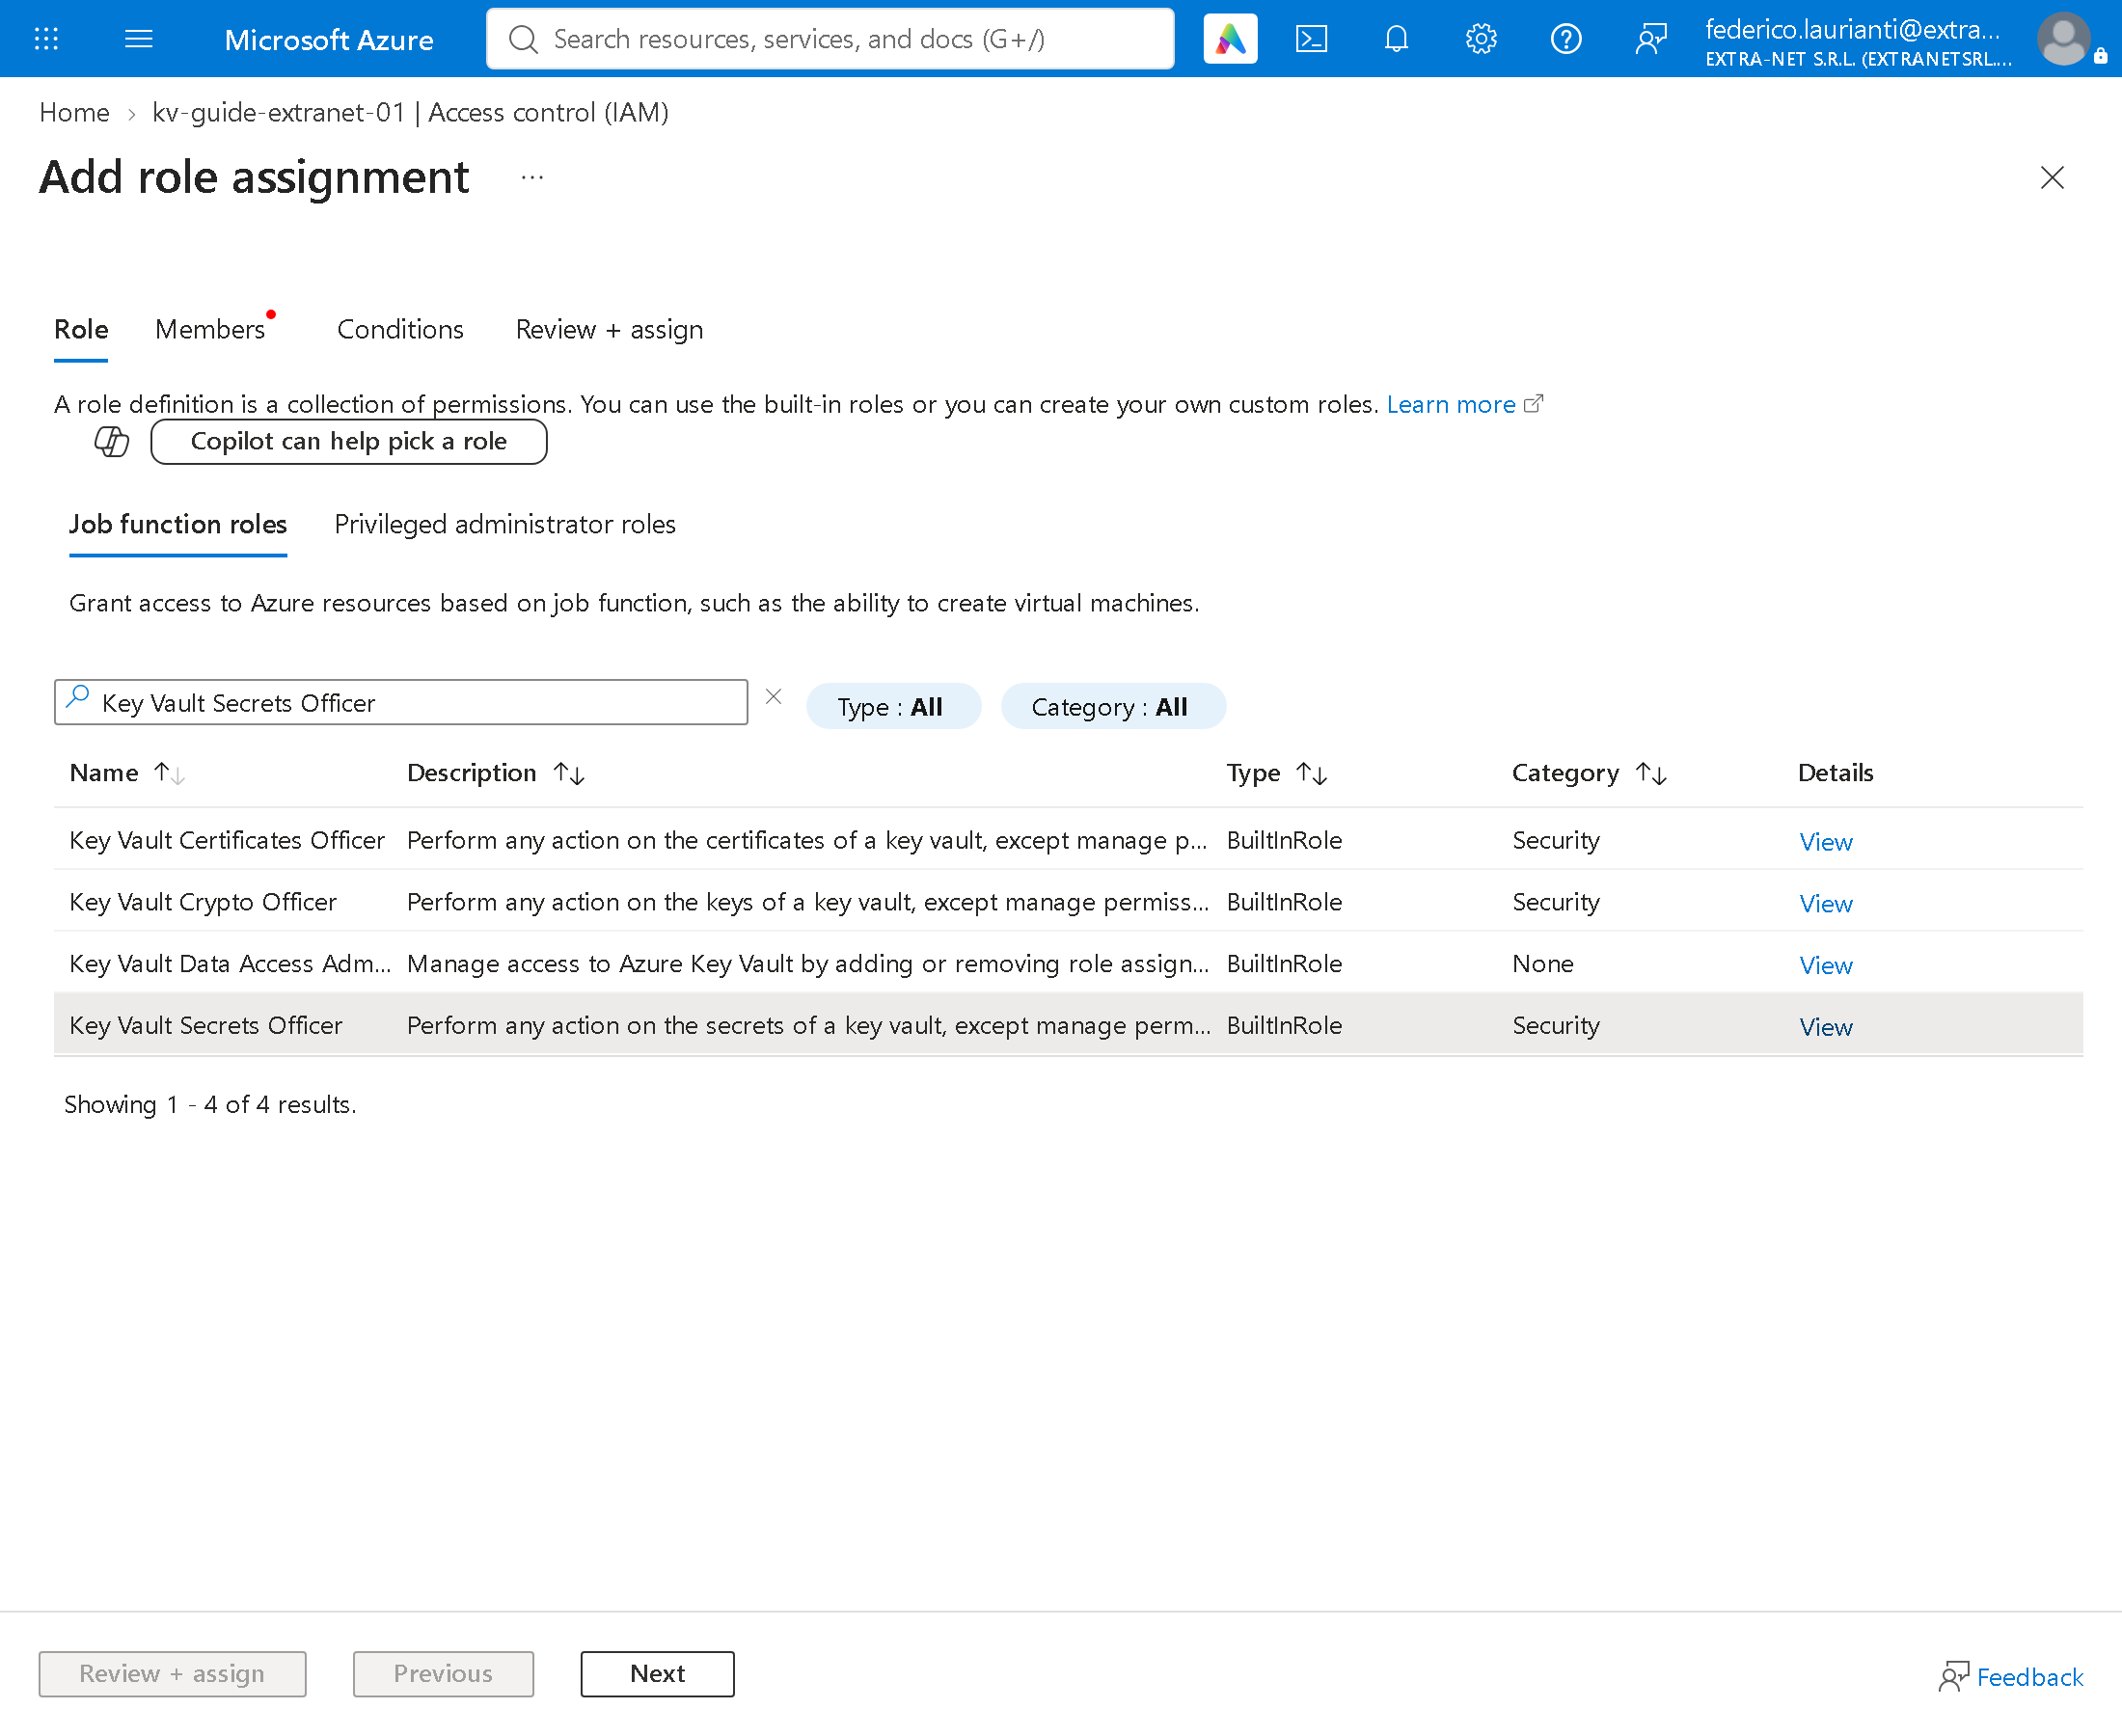
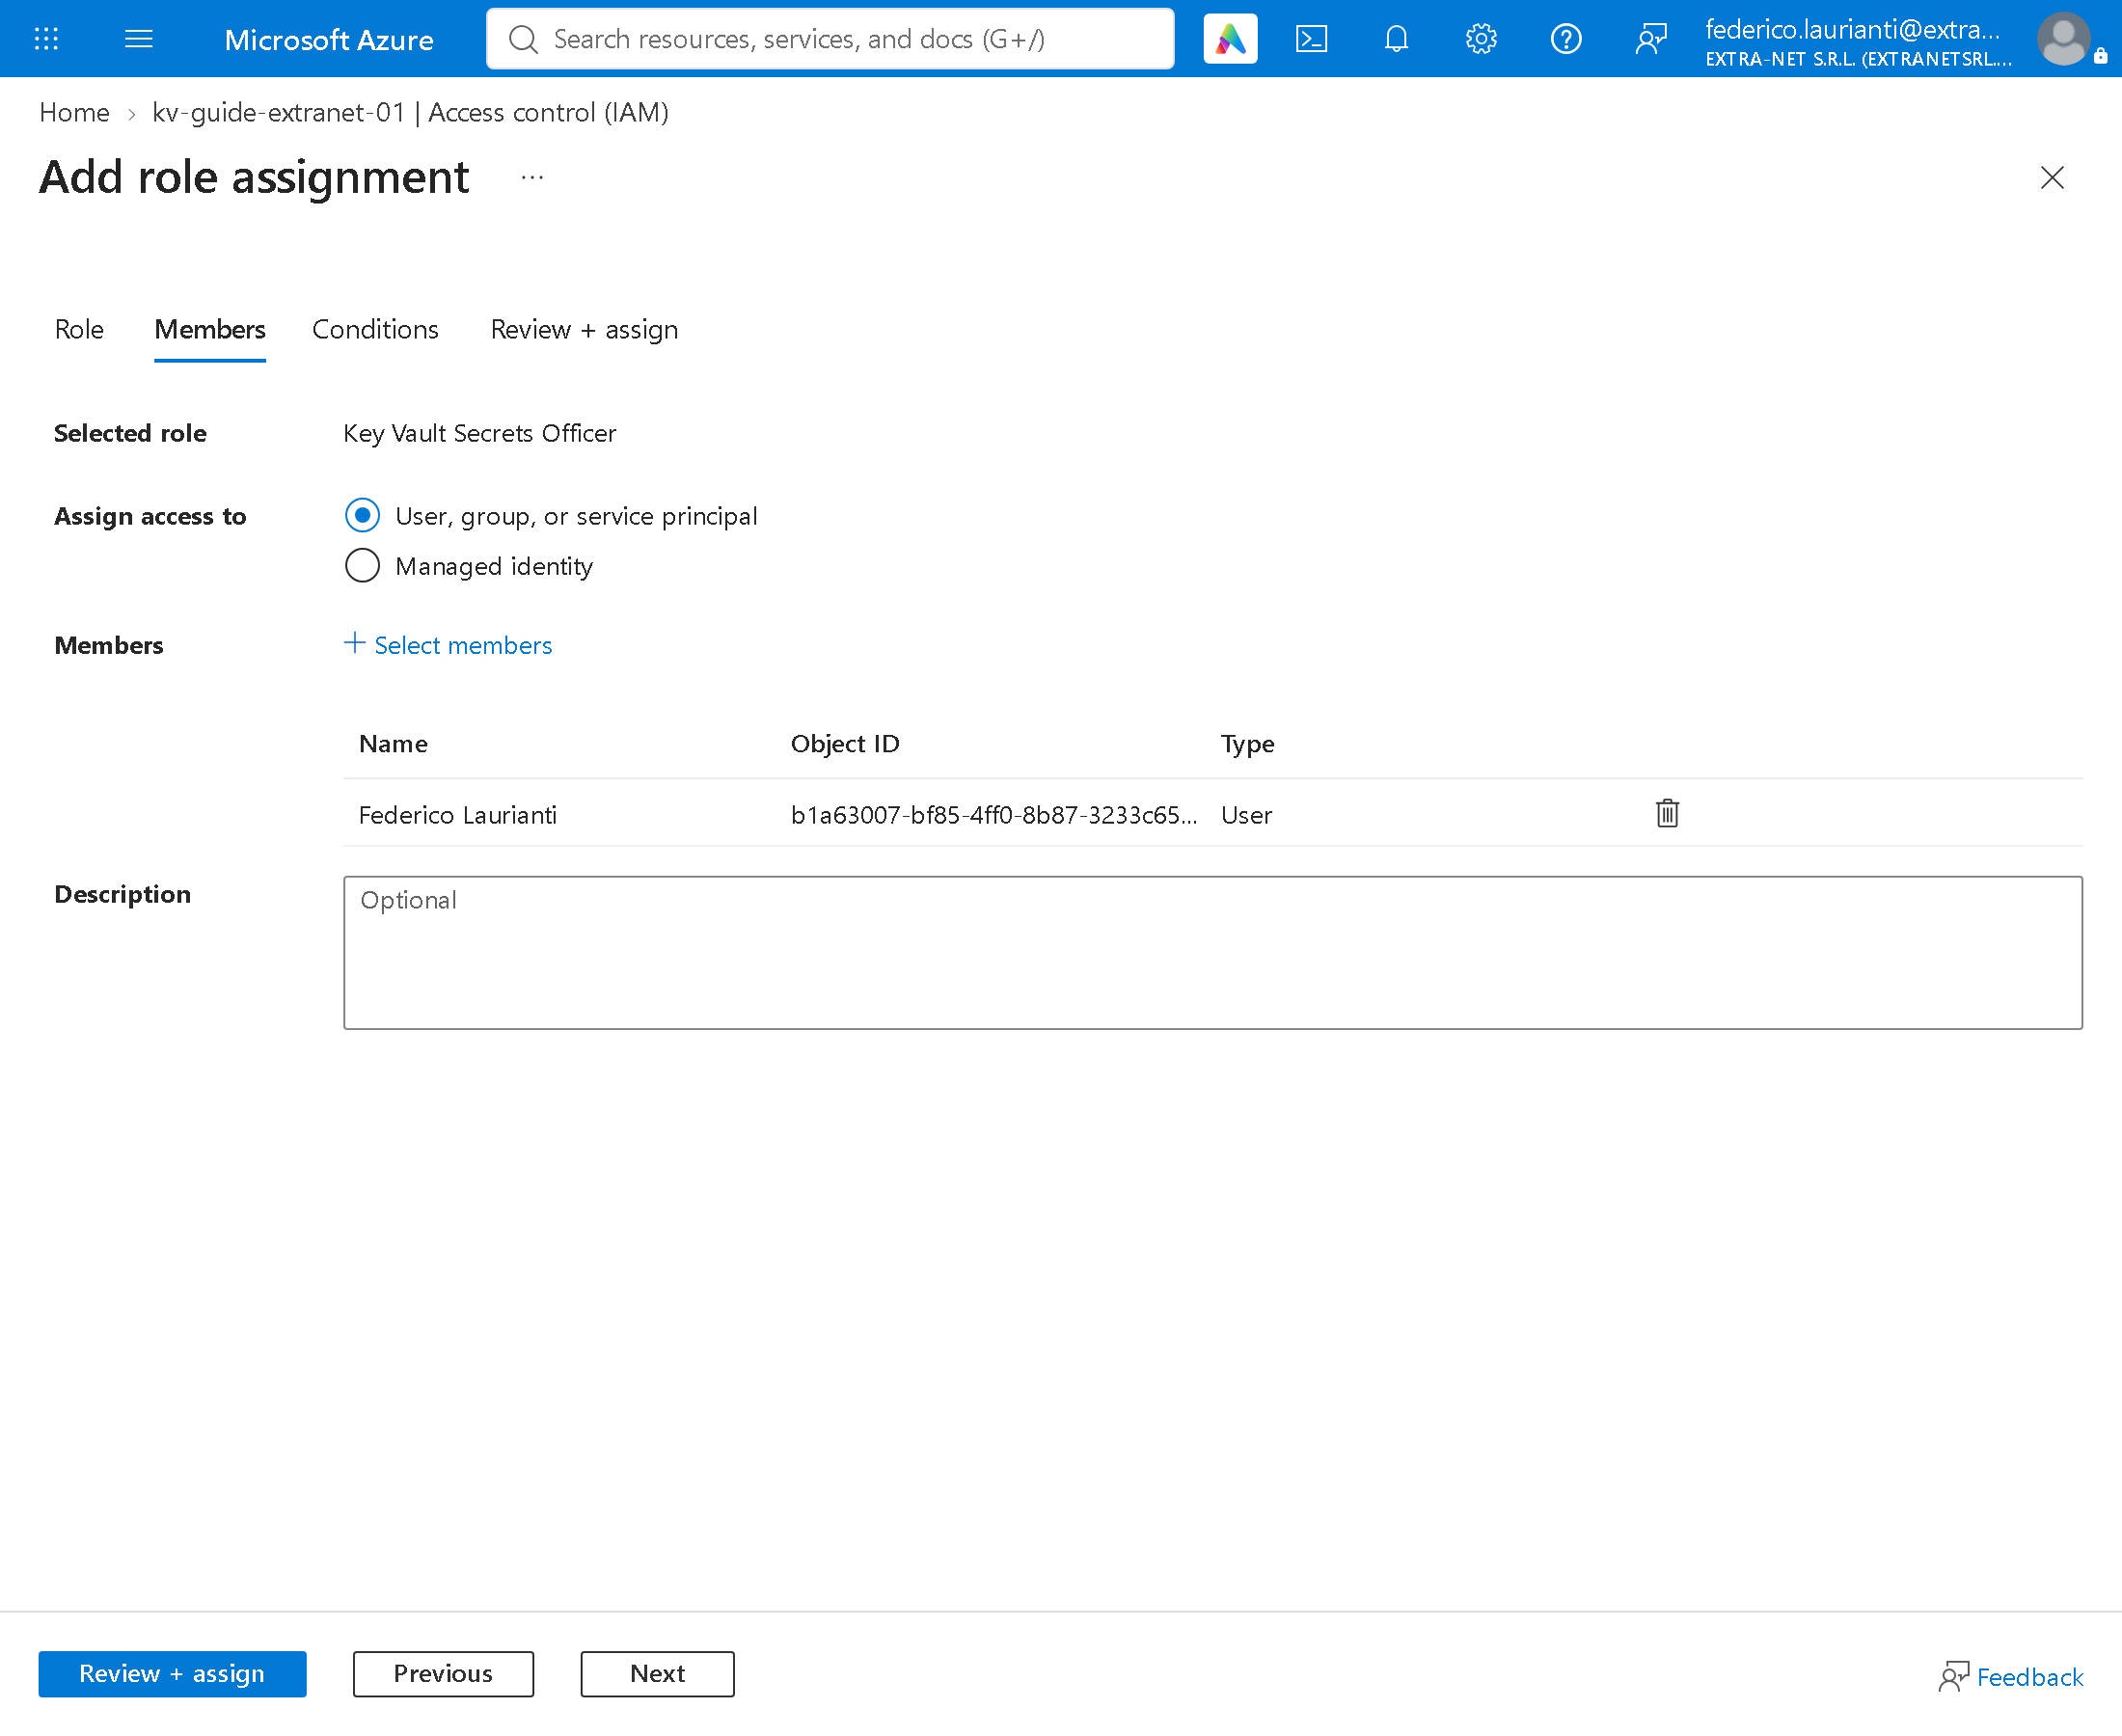
Whoever creates the Key Vault cannot read its secrets until they have a role. In the Key Vault open Access control (IAM), press Add > Add role assignment, search for Key Vault Secrets Officer, select it and press Next.
Press Select members, search for your account, select it and press Select. Then press Review + assign twice.
3. Create the secret
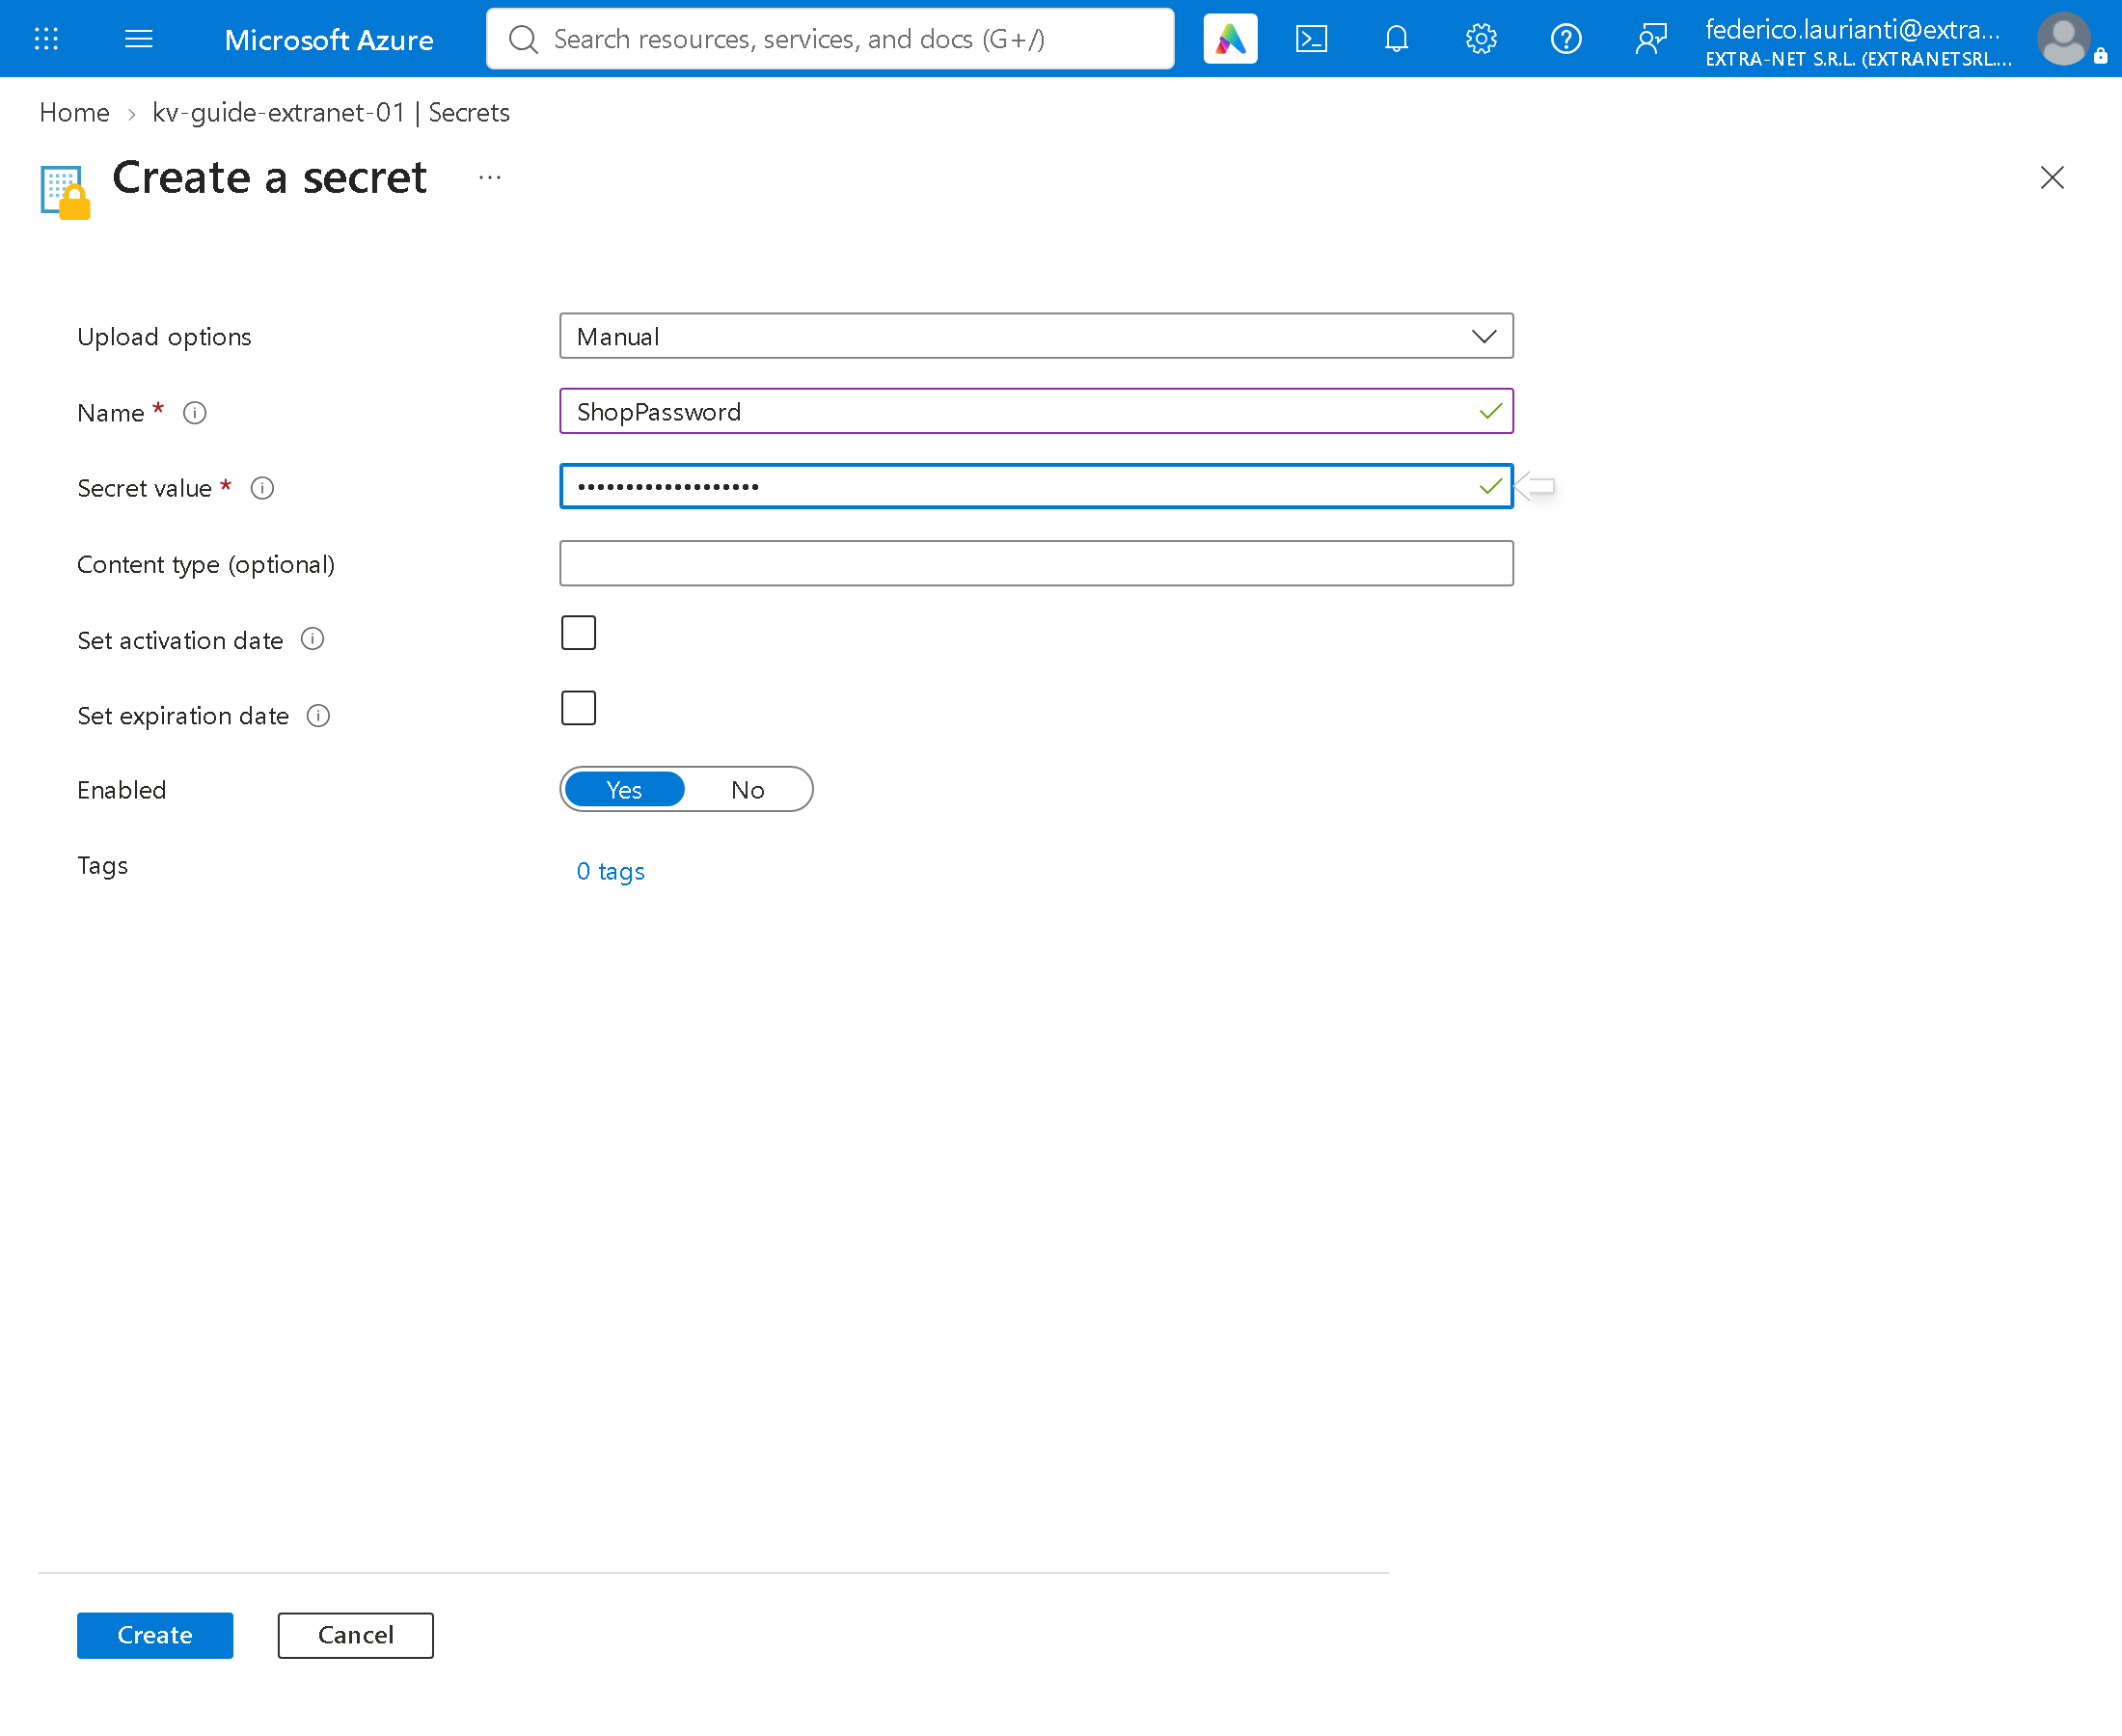
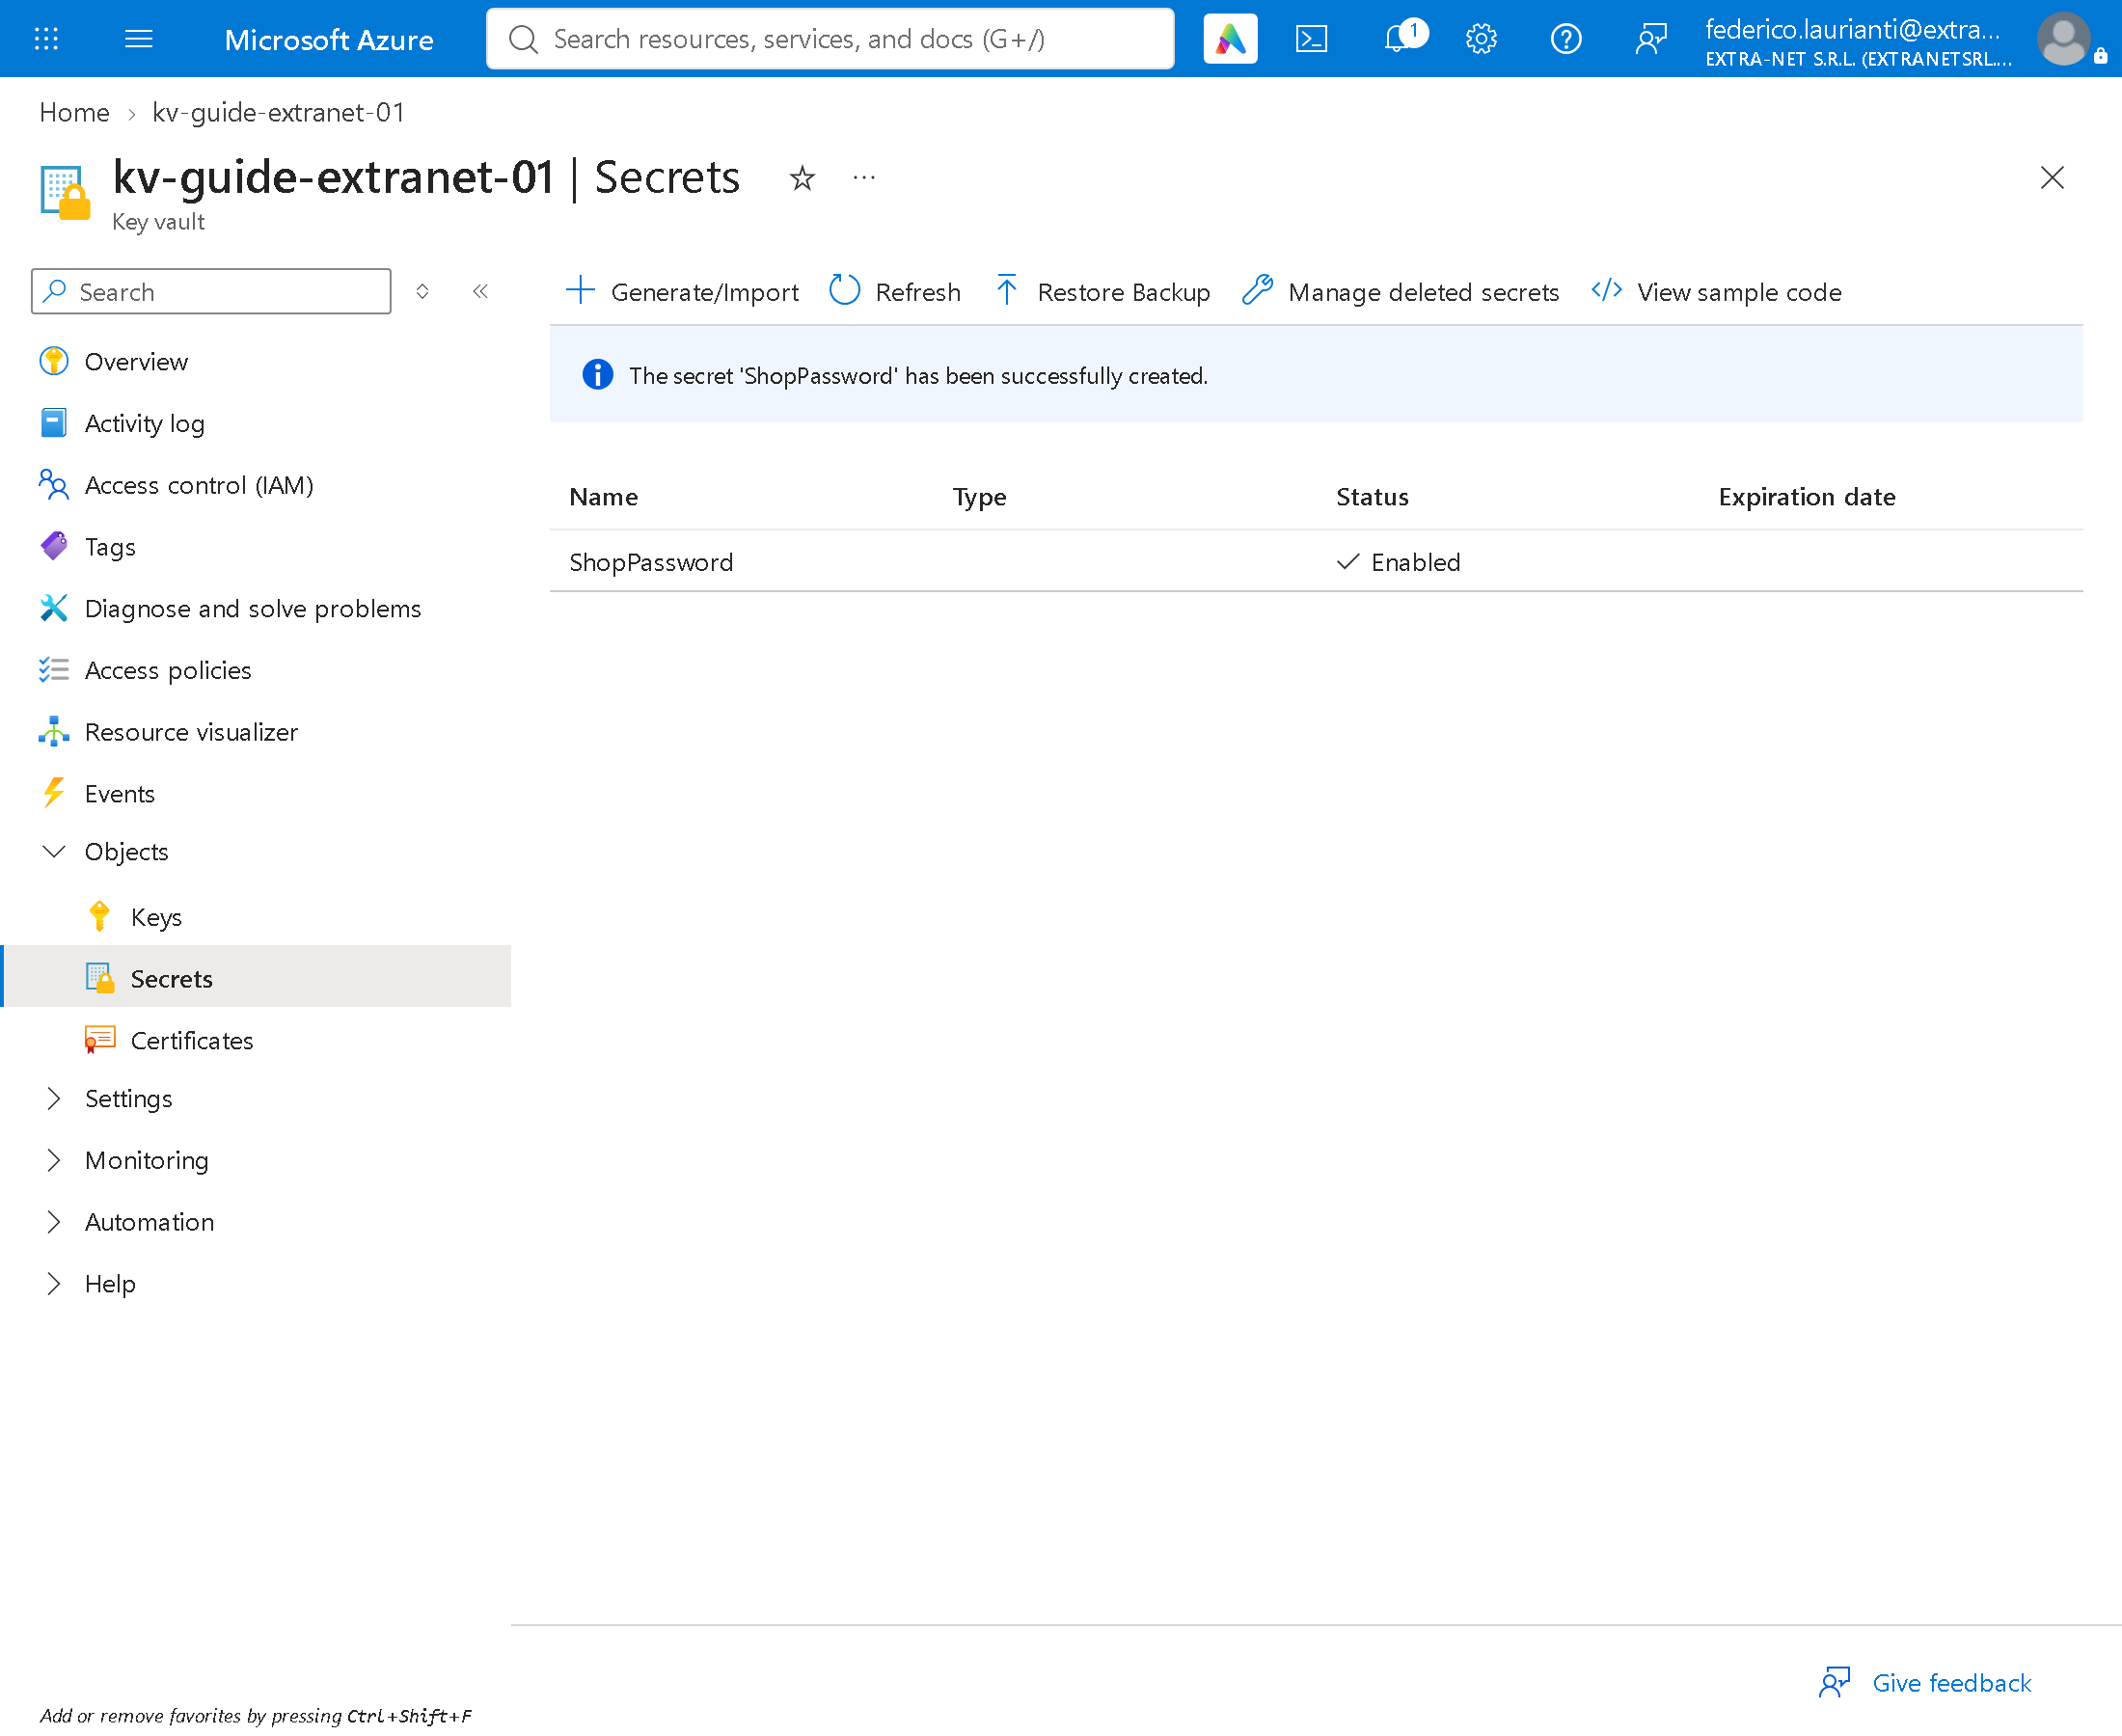
Wait a couple of minutes for the role to become active. In the Key Vault open Objects > Secrets, press Generate/Import and set Name to ShopPassword and Secret value to not-a-real-password. Press Create.
The program
4. Create the project
dotnet new web -n vault-demo
cd vault-demo
dotnet add package Azure.Identity --version 1.21.0
dotnet add package Azure.Security.KeyVault.Secrets --version 4.12.0
5. Write the code
It replaces Program.cs:
using Azure;
using Azure.Identity;
using Azure.Security.KeyVault.Secrets;

var builder = WebApplication.CreateBuilder(args);
var app = builder.Build();

string vaultUrl = builder.Configuration["VAULT_URL"]!;
SecretClient secrets = new(new Uri(vaultUrl), new DefaultAzureCredential());

app.MapGet("/secret", async () =>
{
    try
    {
        KeyVaultSecret secret = await secrets.GetSecretAsync("ShopPassword");
        return Results.Ok($"Secret read: {secret.Value.Length} characters.");
    }
    catch (RequestFailedException e)
    {
        return Results.Ok($"Refused: HTTP {e.Status}, {e.ErrorCode}");
    }
});

app.Run();
The program only shows the length of the secret: a secret is neither printed nor returned. DefaultAzureCredential tries the available identities by itself: on your computer it finds the az login session, on Container Apps it finds the managed identity. The code is the same in both cases.
6. Try it on your computer
export VAULT_URL=https://kv-guide-extranet-01.vault.azure.net/
dotnet run --urls http://localhost:5077
In PowerShell the first line is $env:VAULT_URL = "https://kv-guide-extranet-01.vault.azure.net/". Open http://localhost:5077/secret:
"Secret read: 19 characters."On Azure, with the managed identity
7. Create the registry
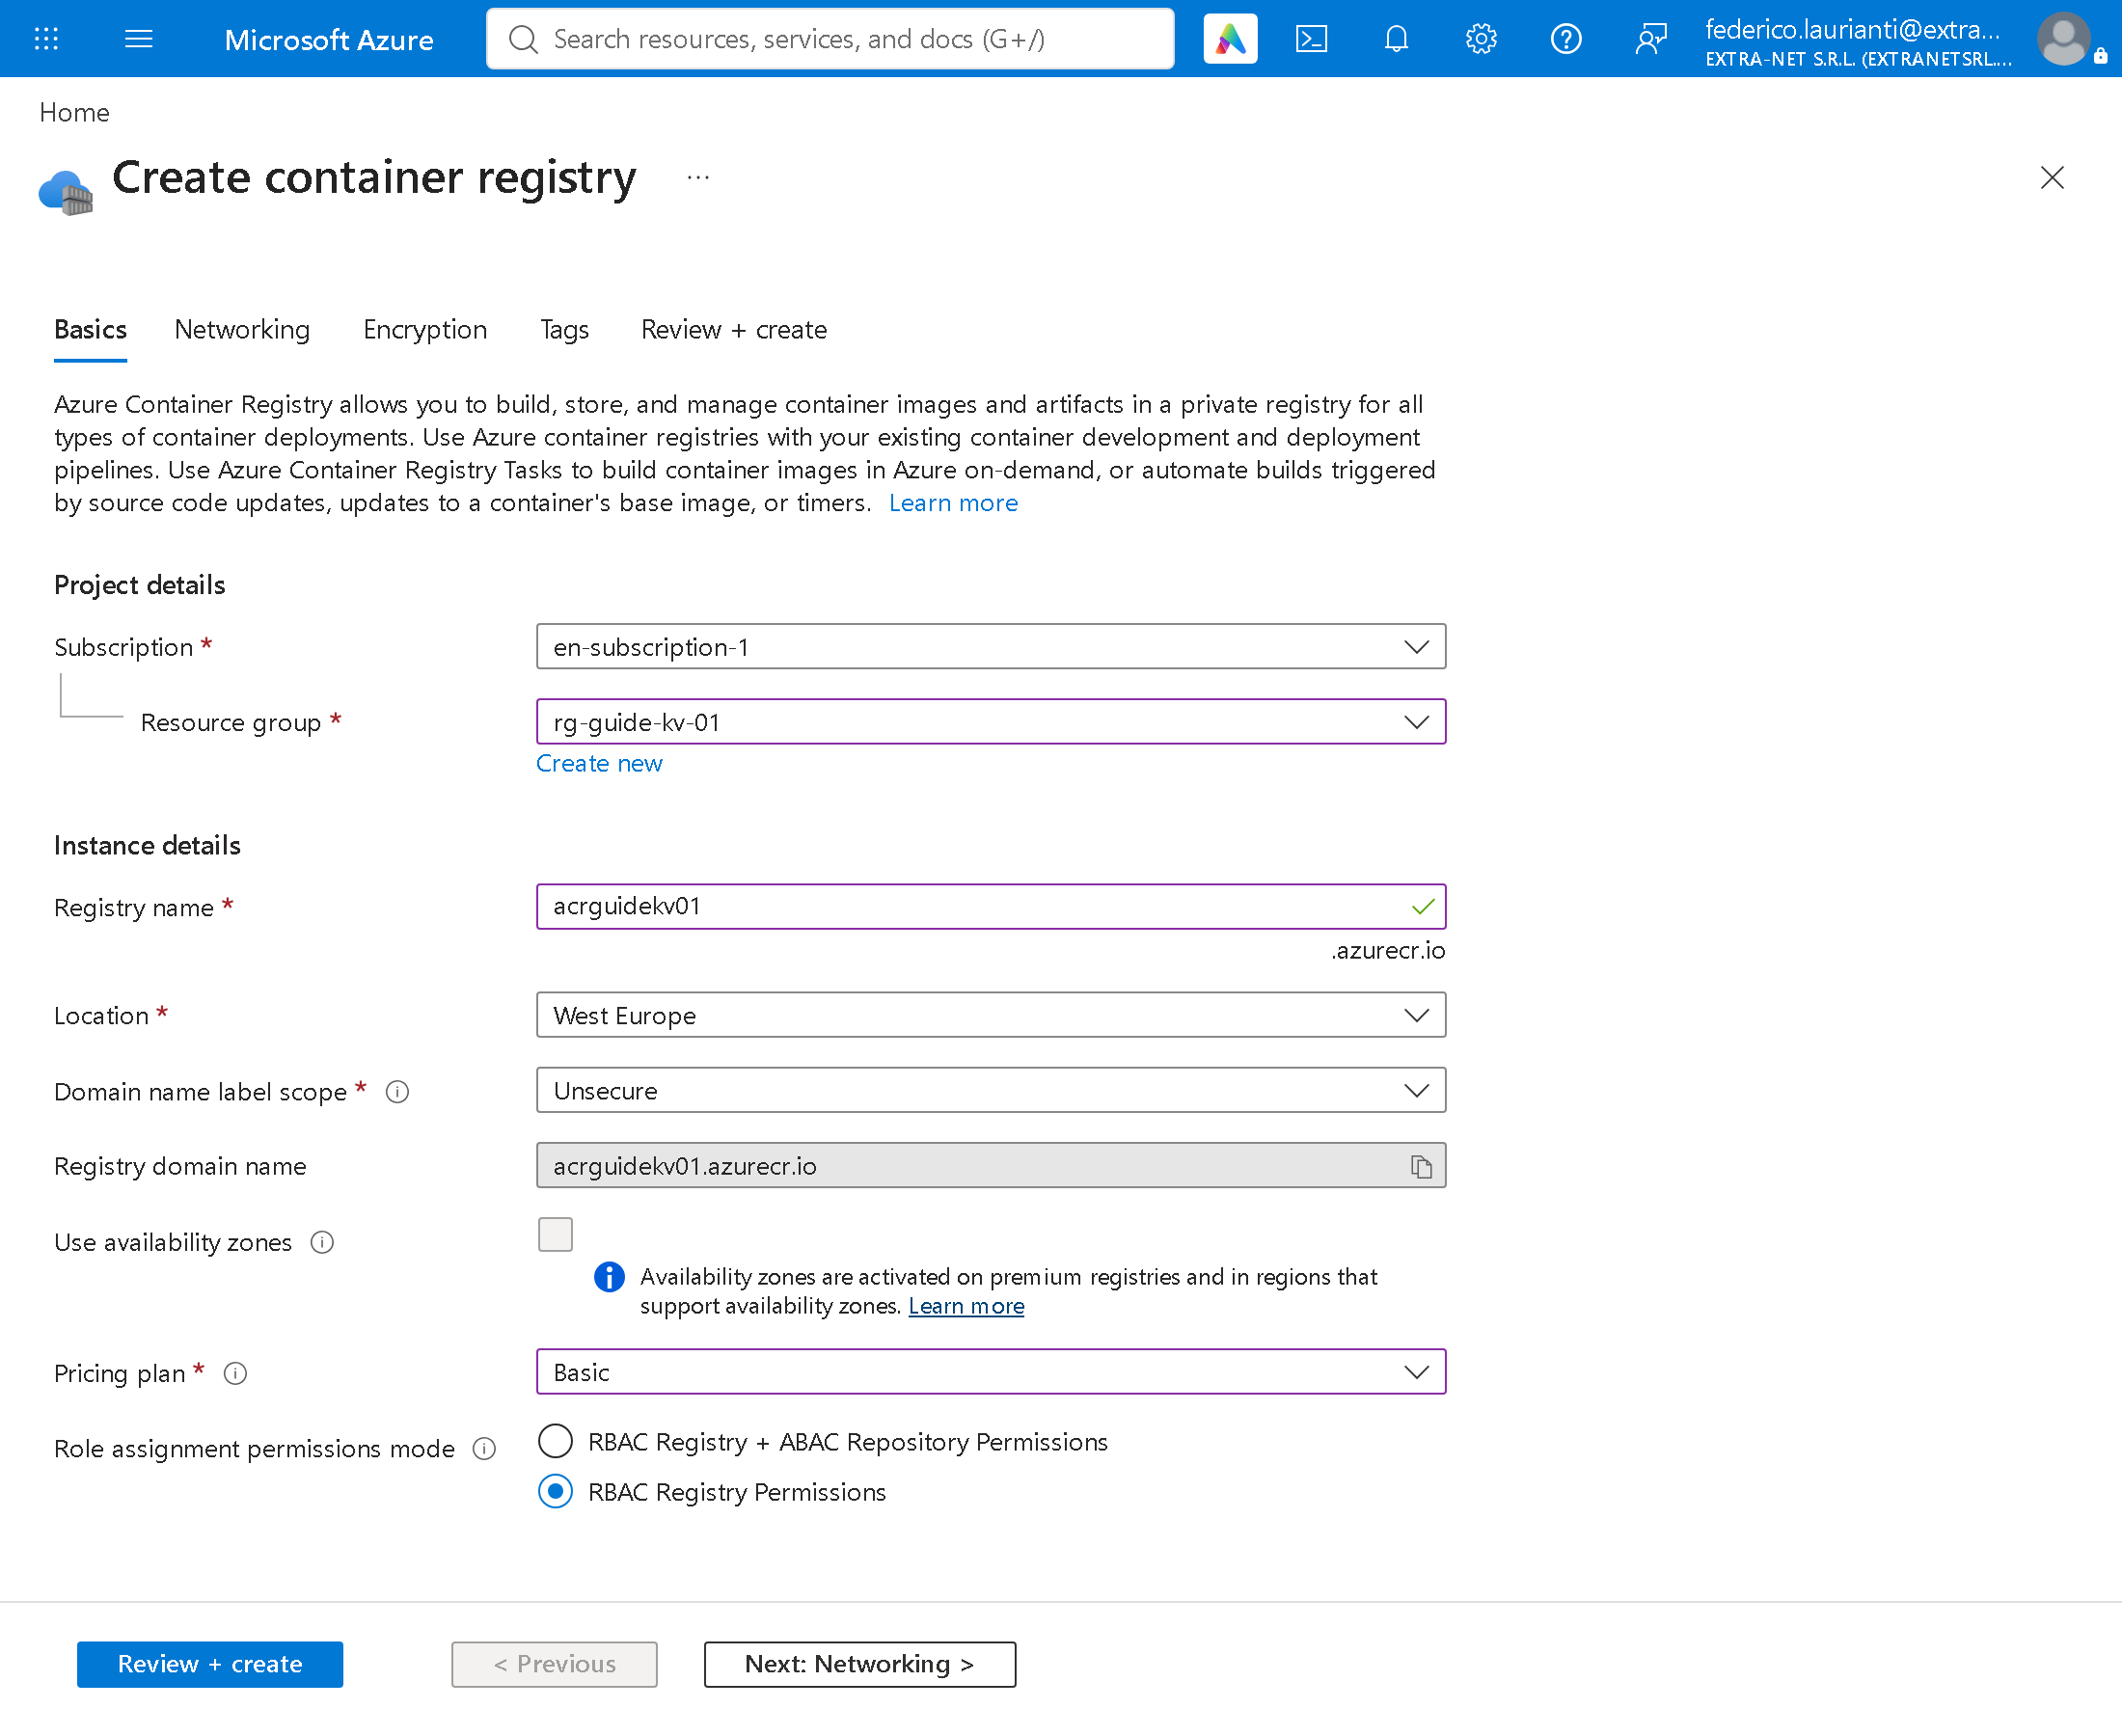
Open https://portal.azure.com/#create/Microsoft.ContainerRegistry. Under Resource group choose rg-guide-kv-01, under Registry name write a name of your own, unique across Azure, here acrguidekv01, and under Pricing plan choose Basic. Press Review + create, then Create.
8. Build the image
In the project folder create the Dockerfile:
FROM mcr.microsoft.com/dotnet/sdk:10.0 AS build
WORKDIR /src
COPY vault-demo.csproj .
RUN dotnet restore
COPY . .
RUN dotnet publish -c Release -o /app
FROM mcr.microsoft.com/dotnet/aspnet:10.0
WORKDIR /app
COPY /app .
EXPOSE 8080
ENTRYPOINT ["dotnet", "vault-demo.dll"]and a .dockerignore with two lines, bin/ and obj/. Then:
az acr build --registry acrguidekv01 --image vault-demo:1.0 .9. Create the application
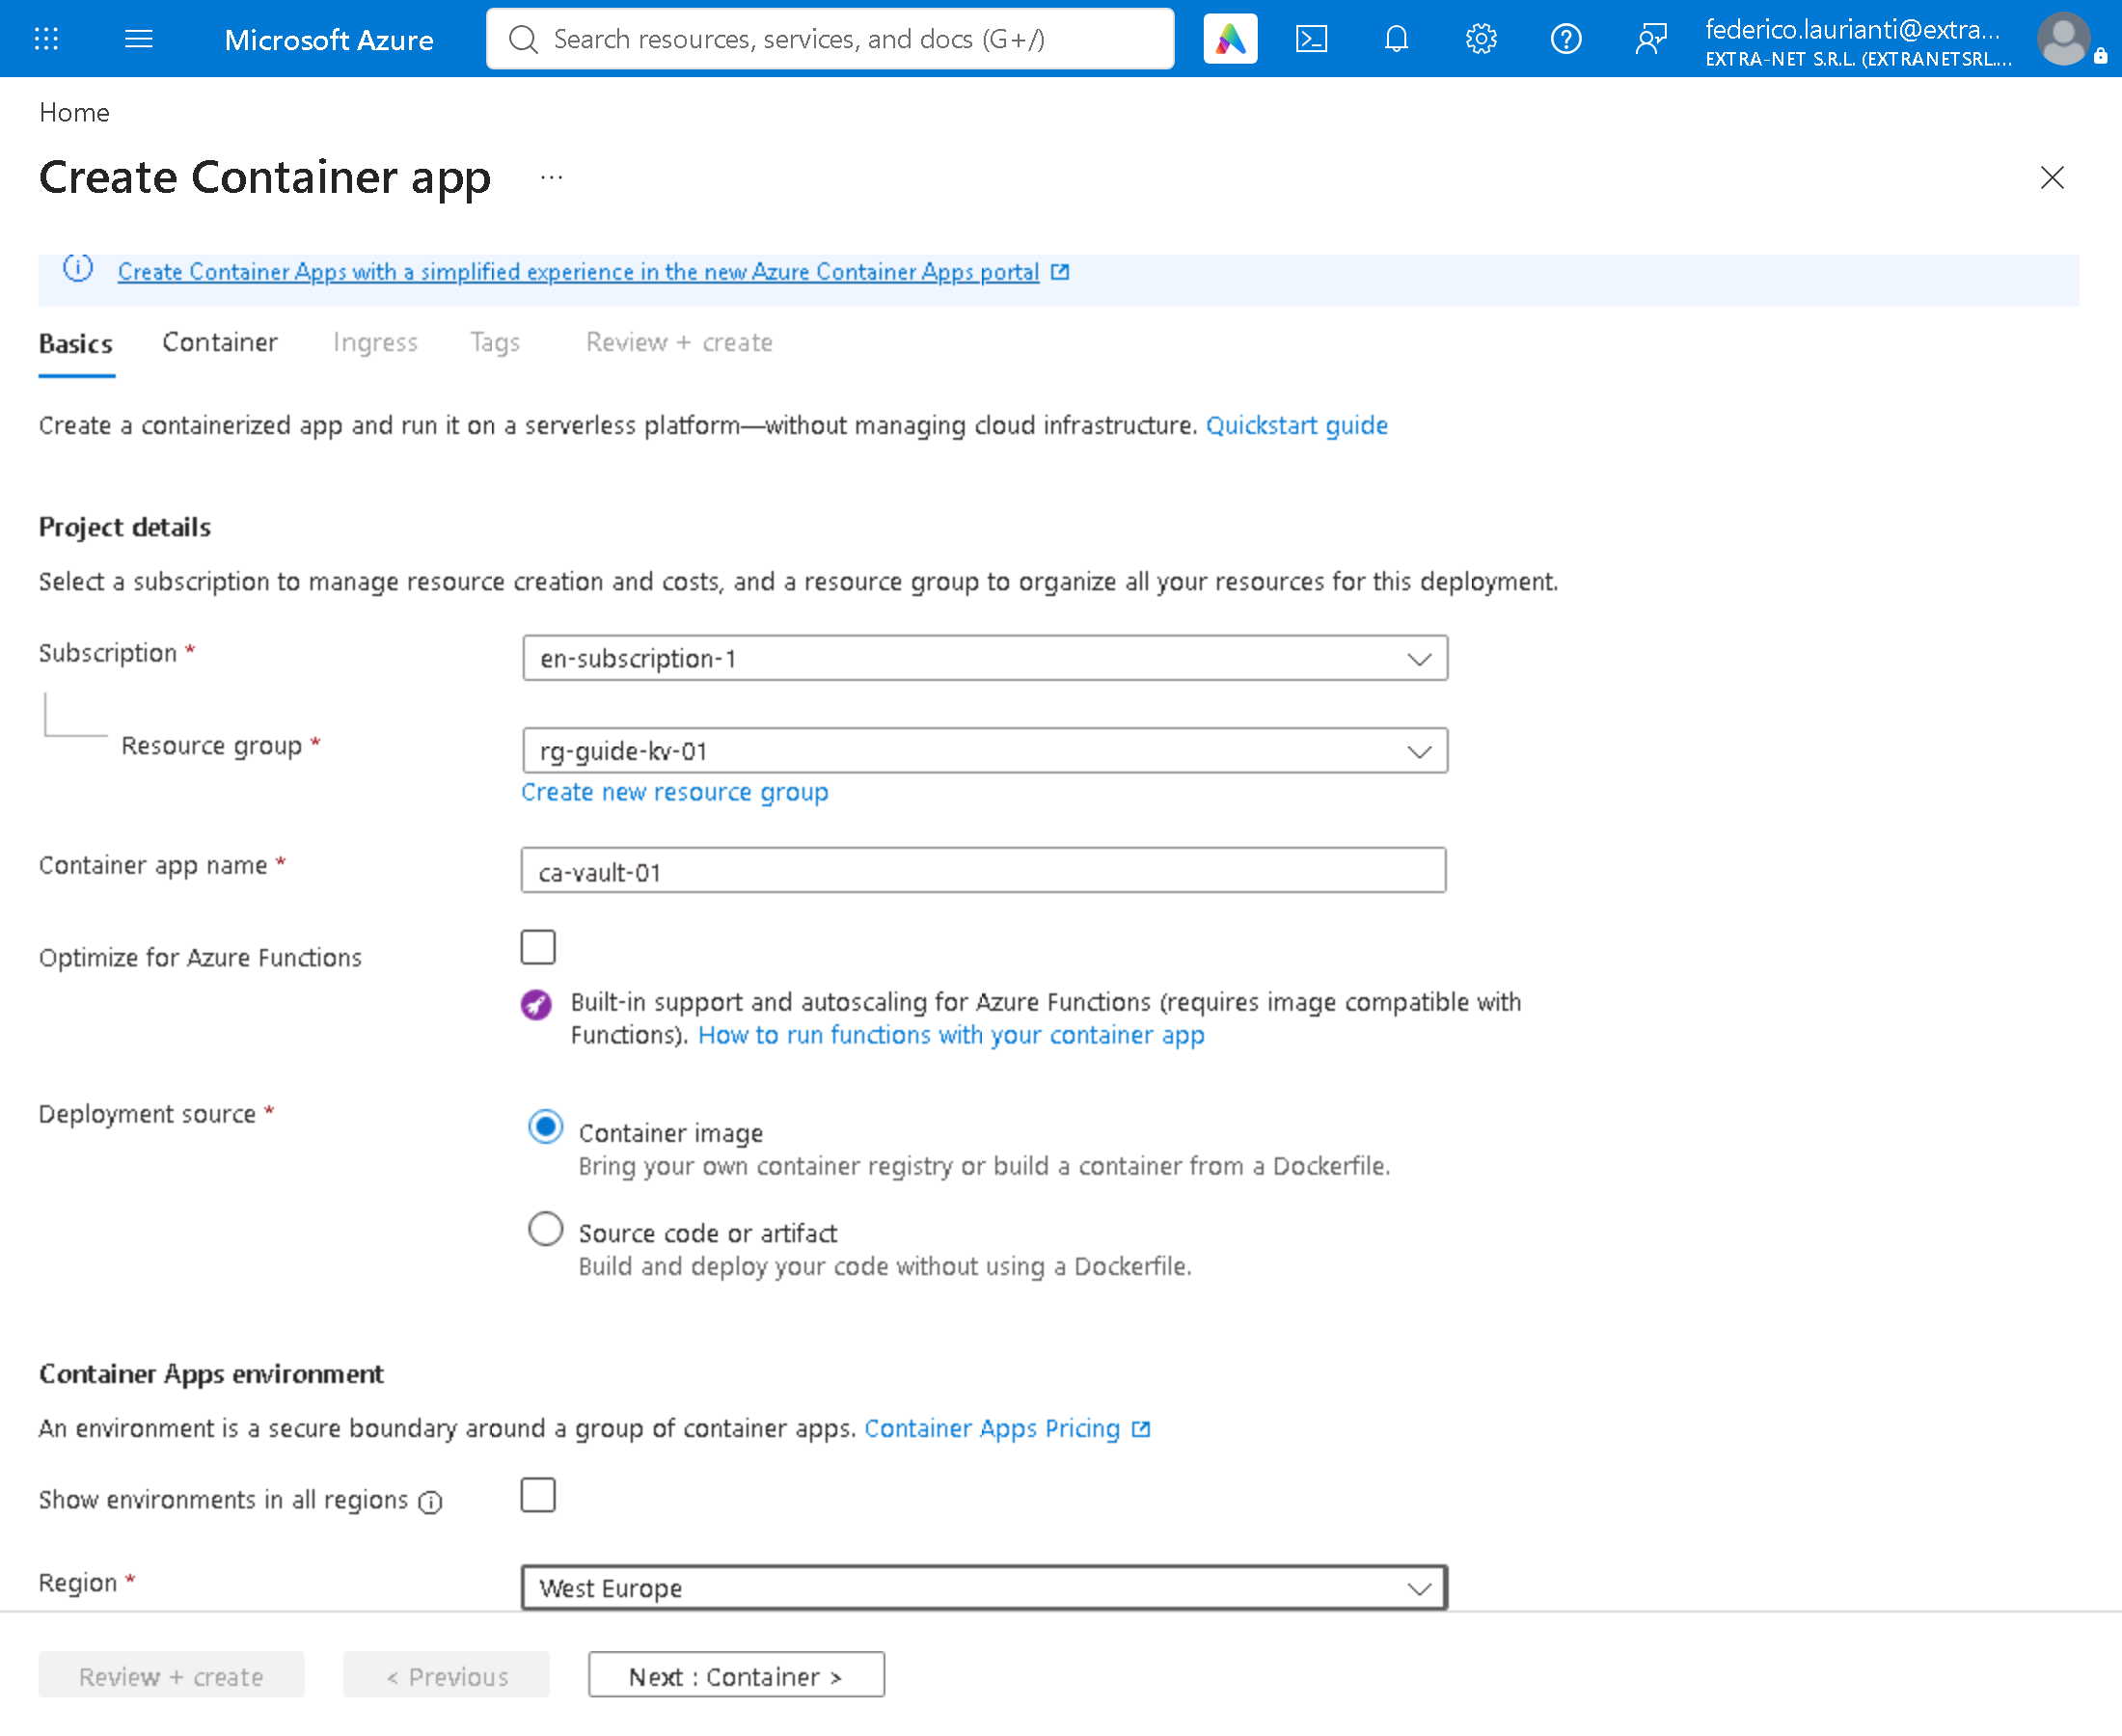
Open https://portal.azure.com/#create/Microsoft.ContainerApp. On the Basics tab set Resource group to rg-guide-kv-01, Container app name to ca-vault-01, Deployment source to Container image and Region to West Europe. The portal proposes a new environment.
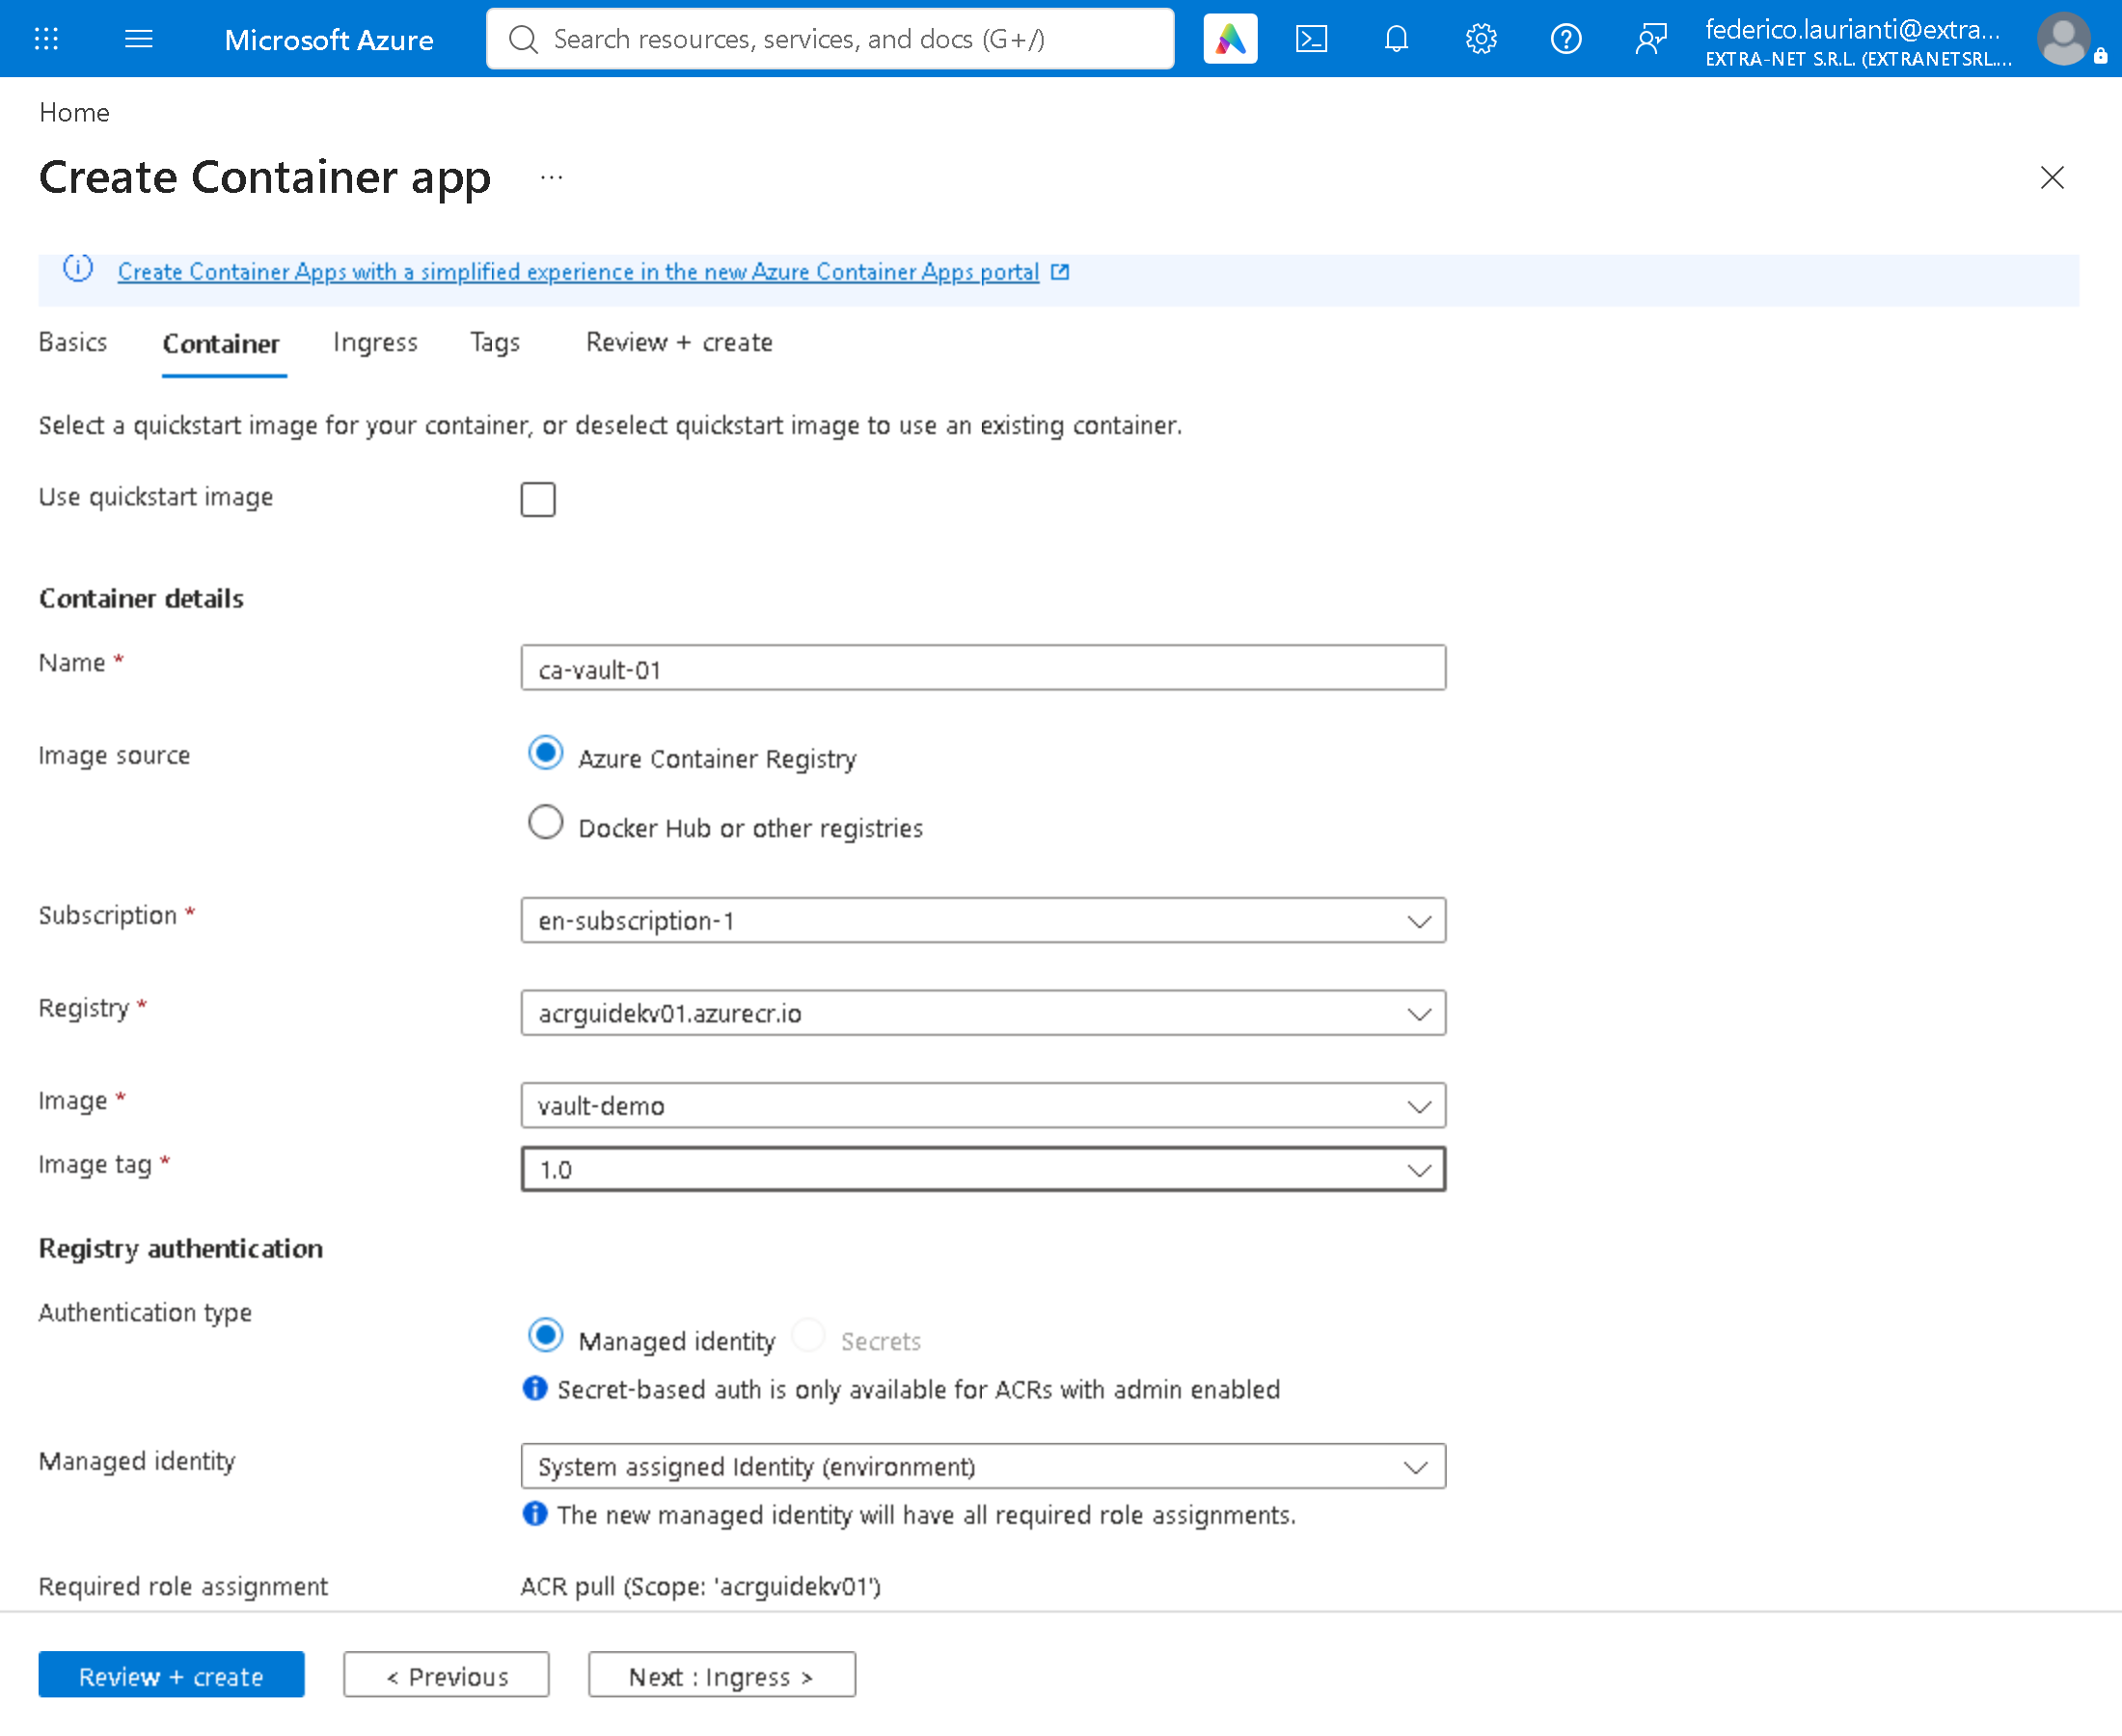
Press Next : Container >, clear Use quickstart image and choose the registry, the vault-demo image and the 1.0 tag. With Authentication type on Managed identity, the portal grants the permission to pull the image.
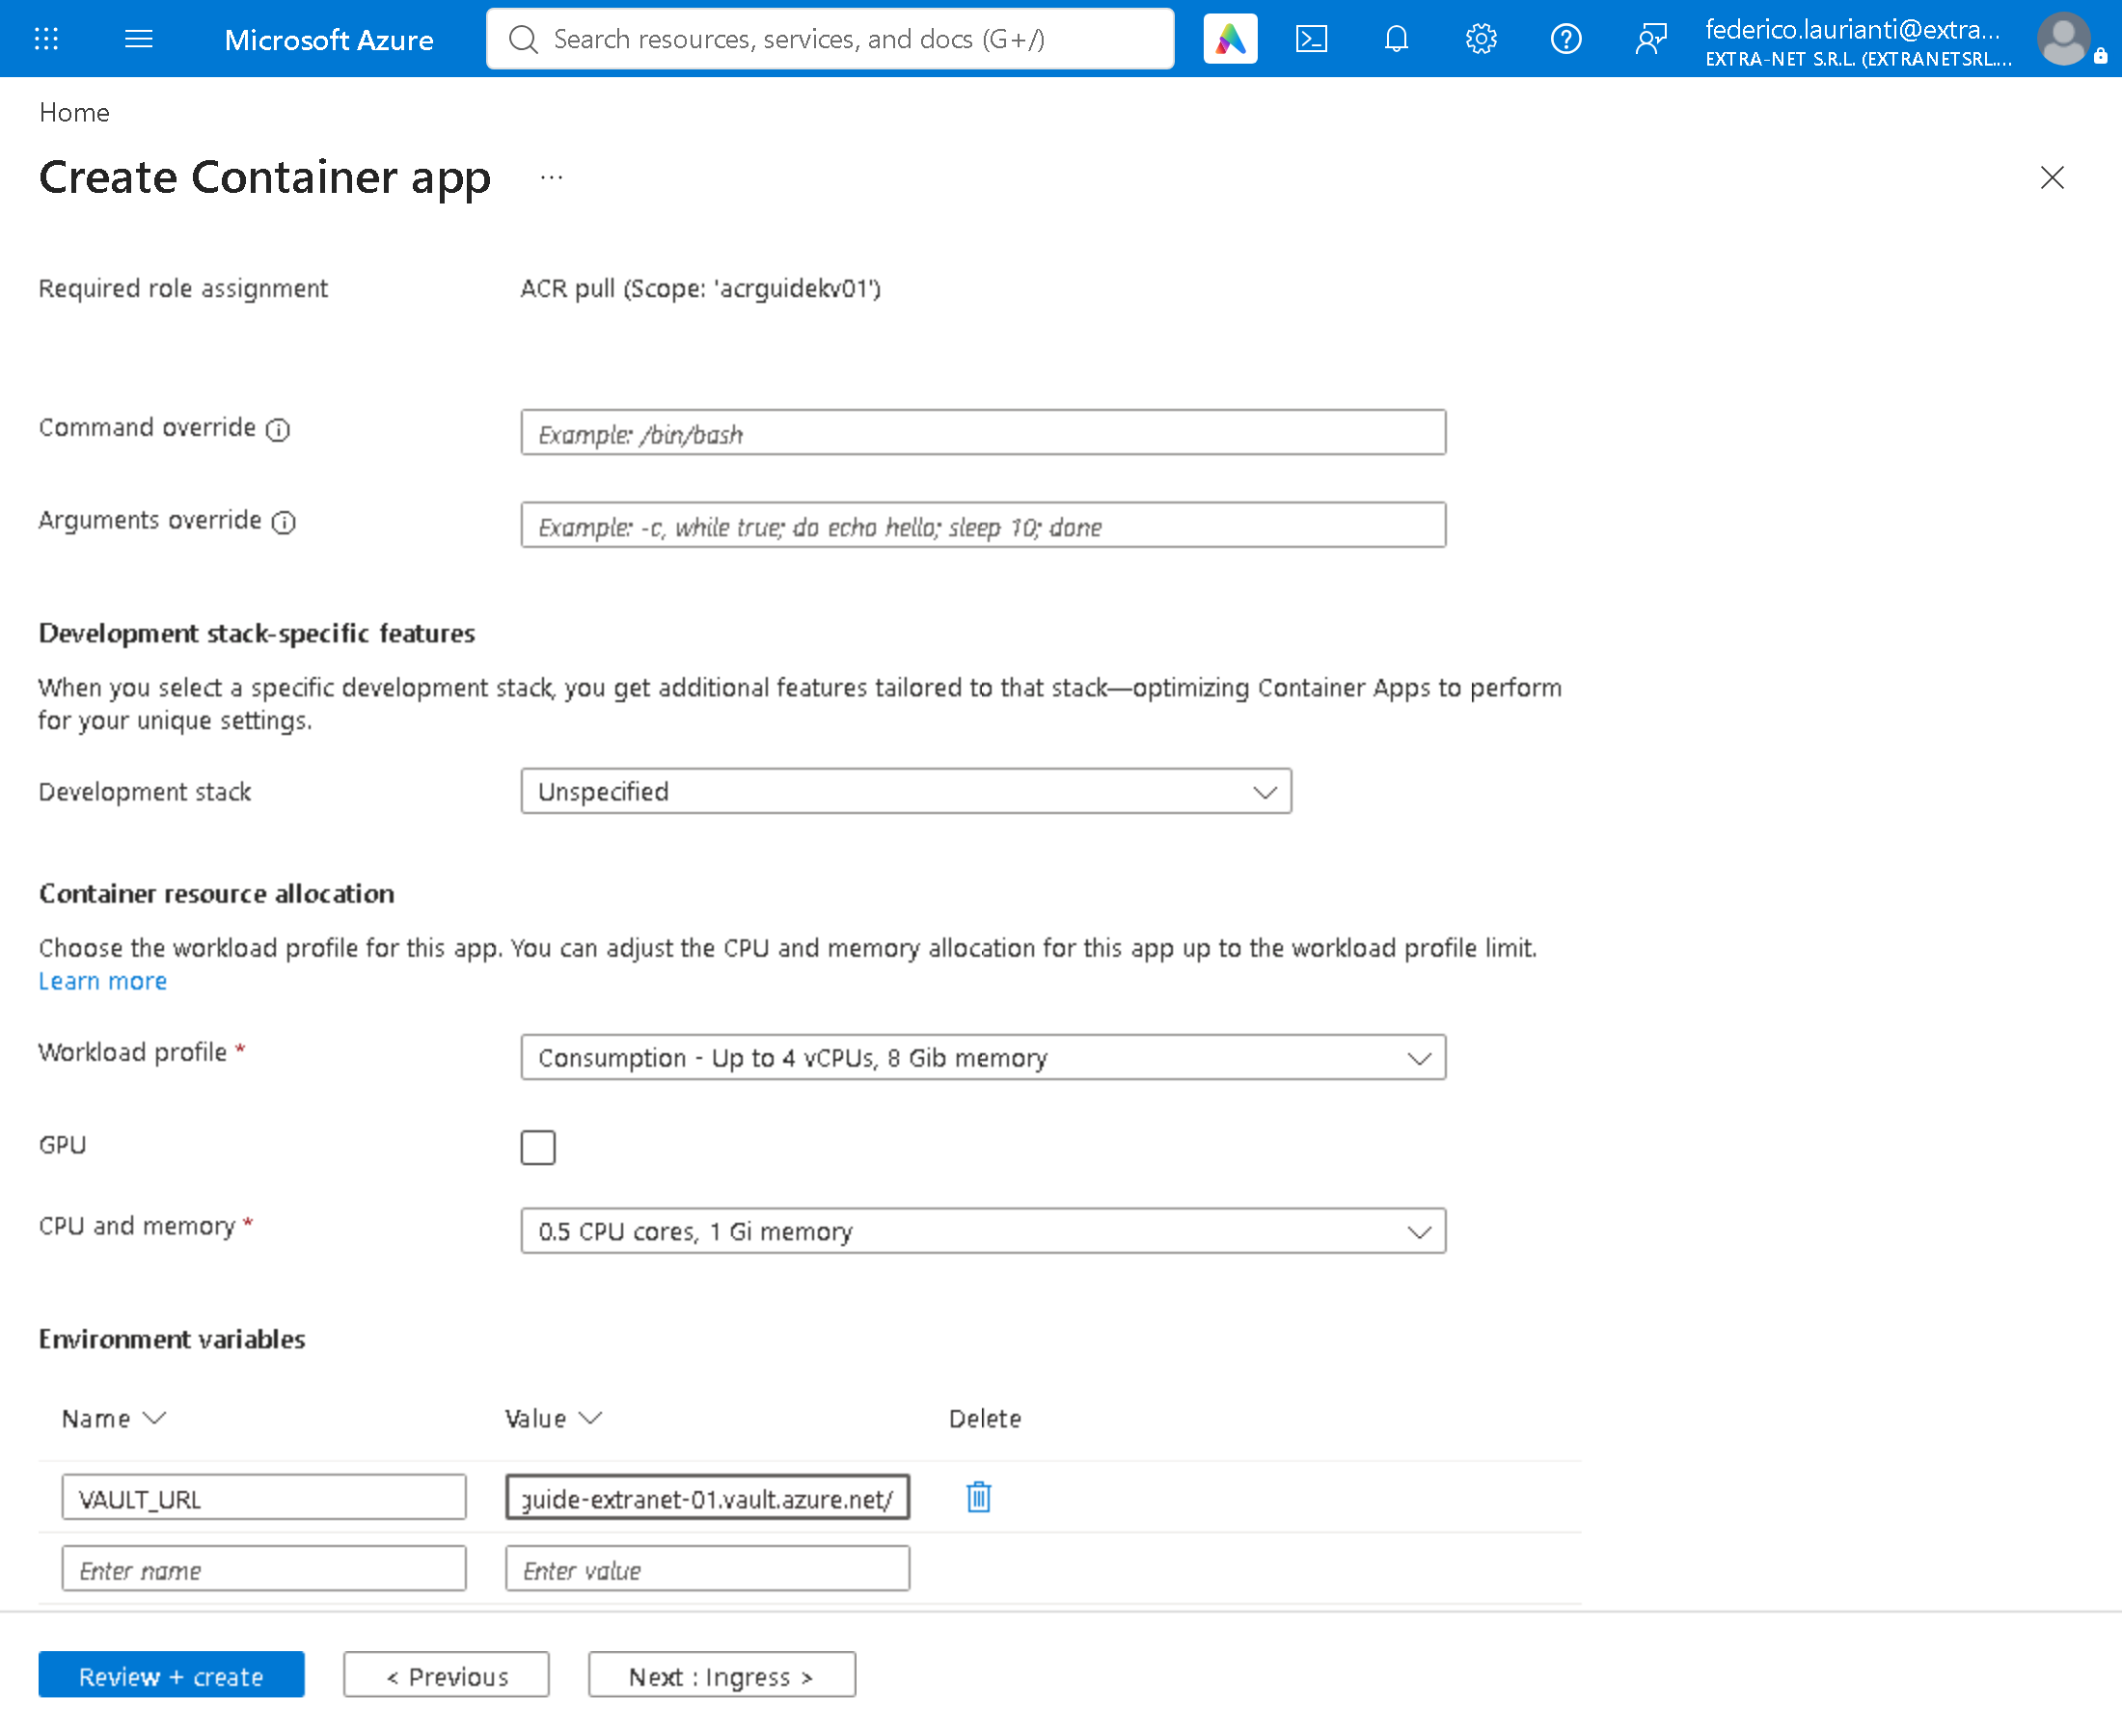
Further down, under Environment variables, write Name VAULT_URL and Value https://kv-guide-extranet-01.vault.azure.net/.
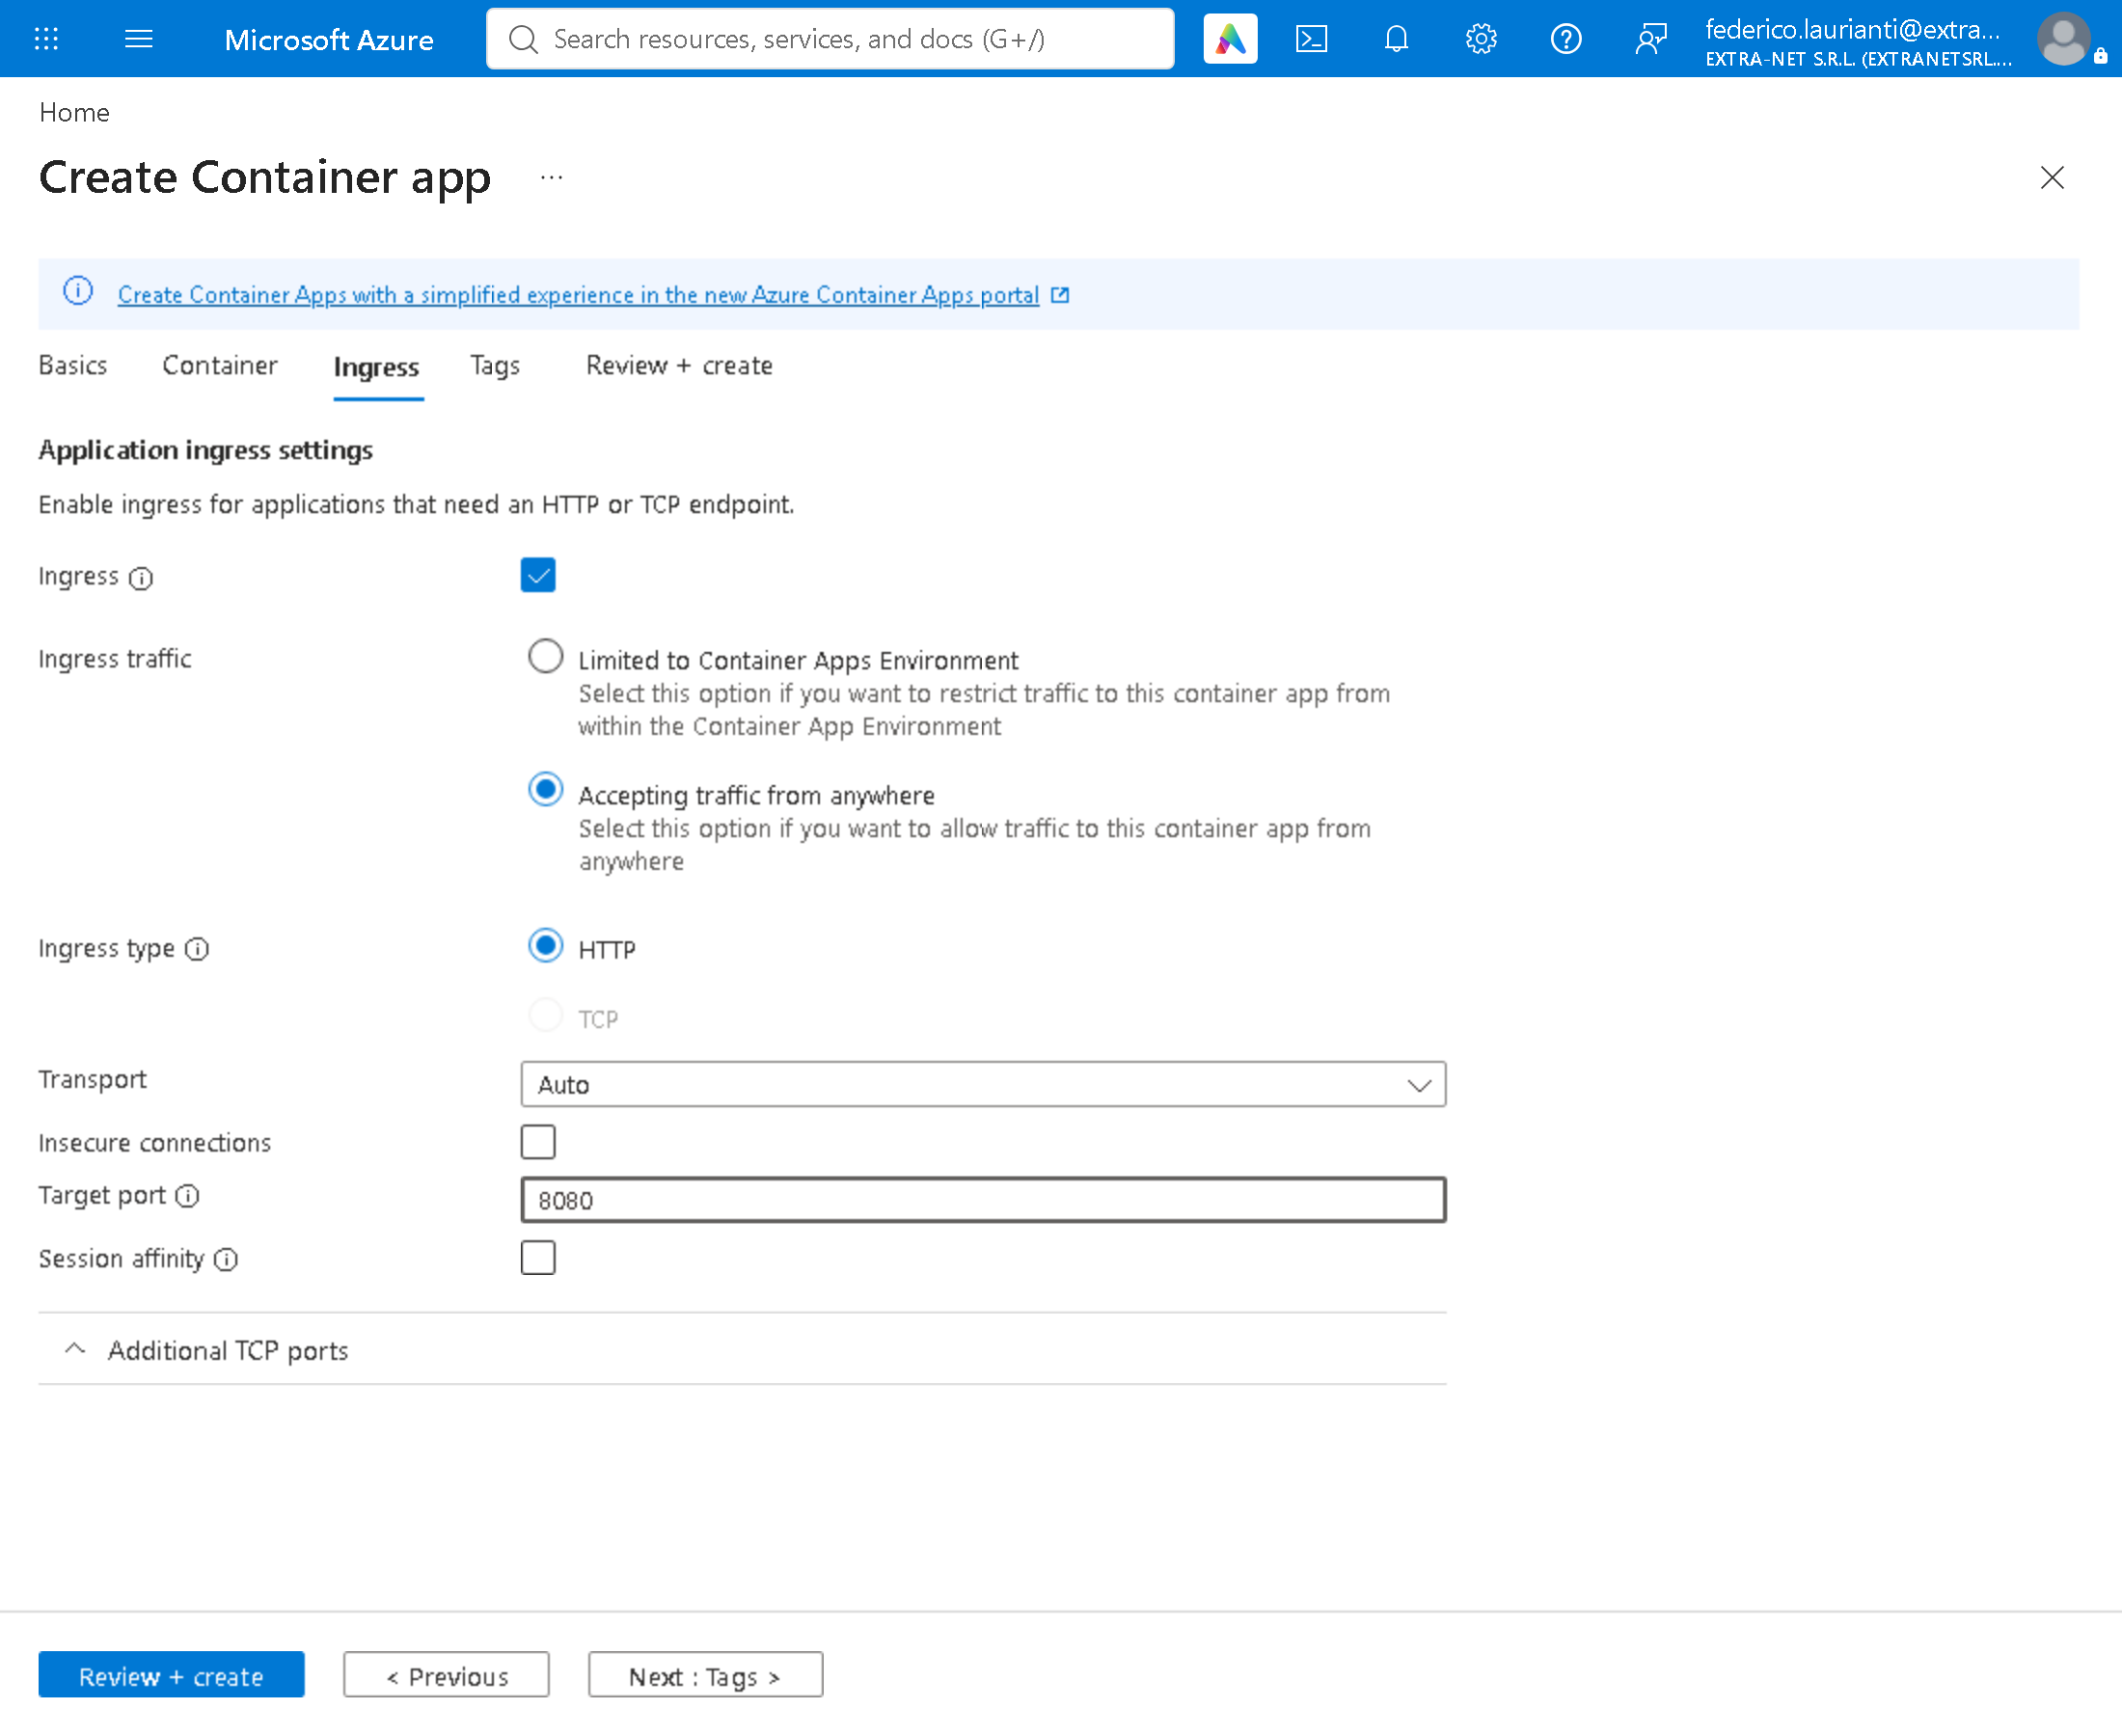
Press Next : Ingress >, enable Ingress, choose Accepting traffic from anywhere and write 8080 in Target port.
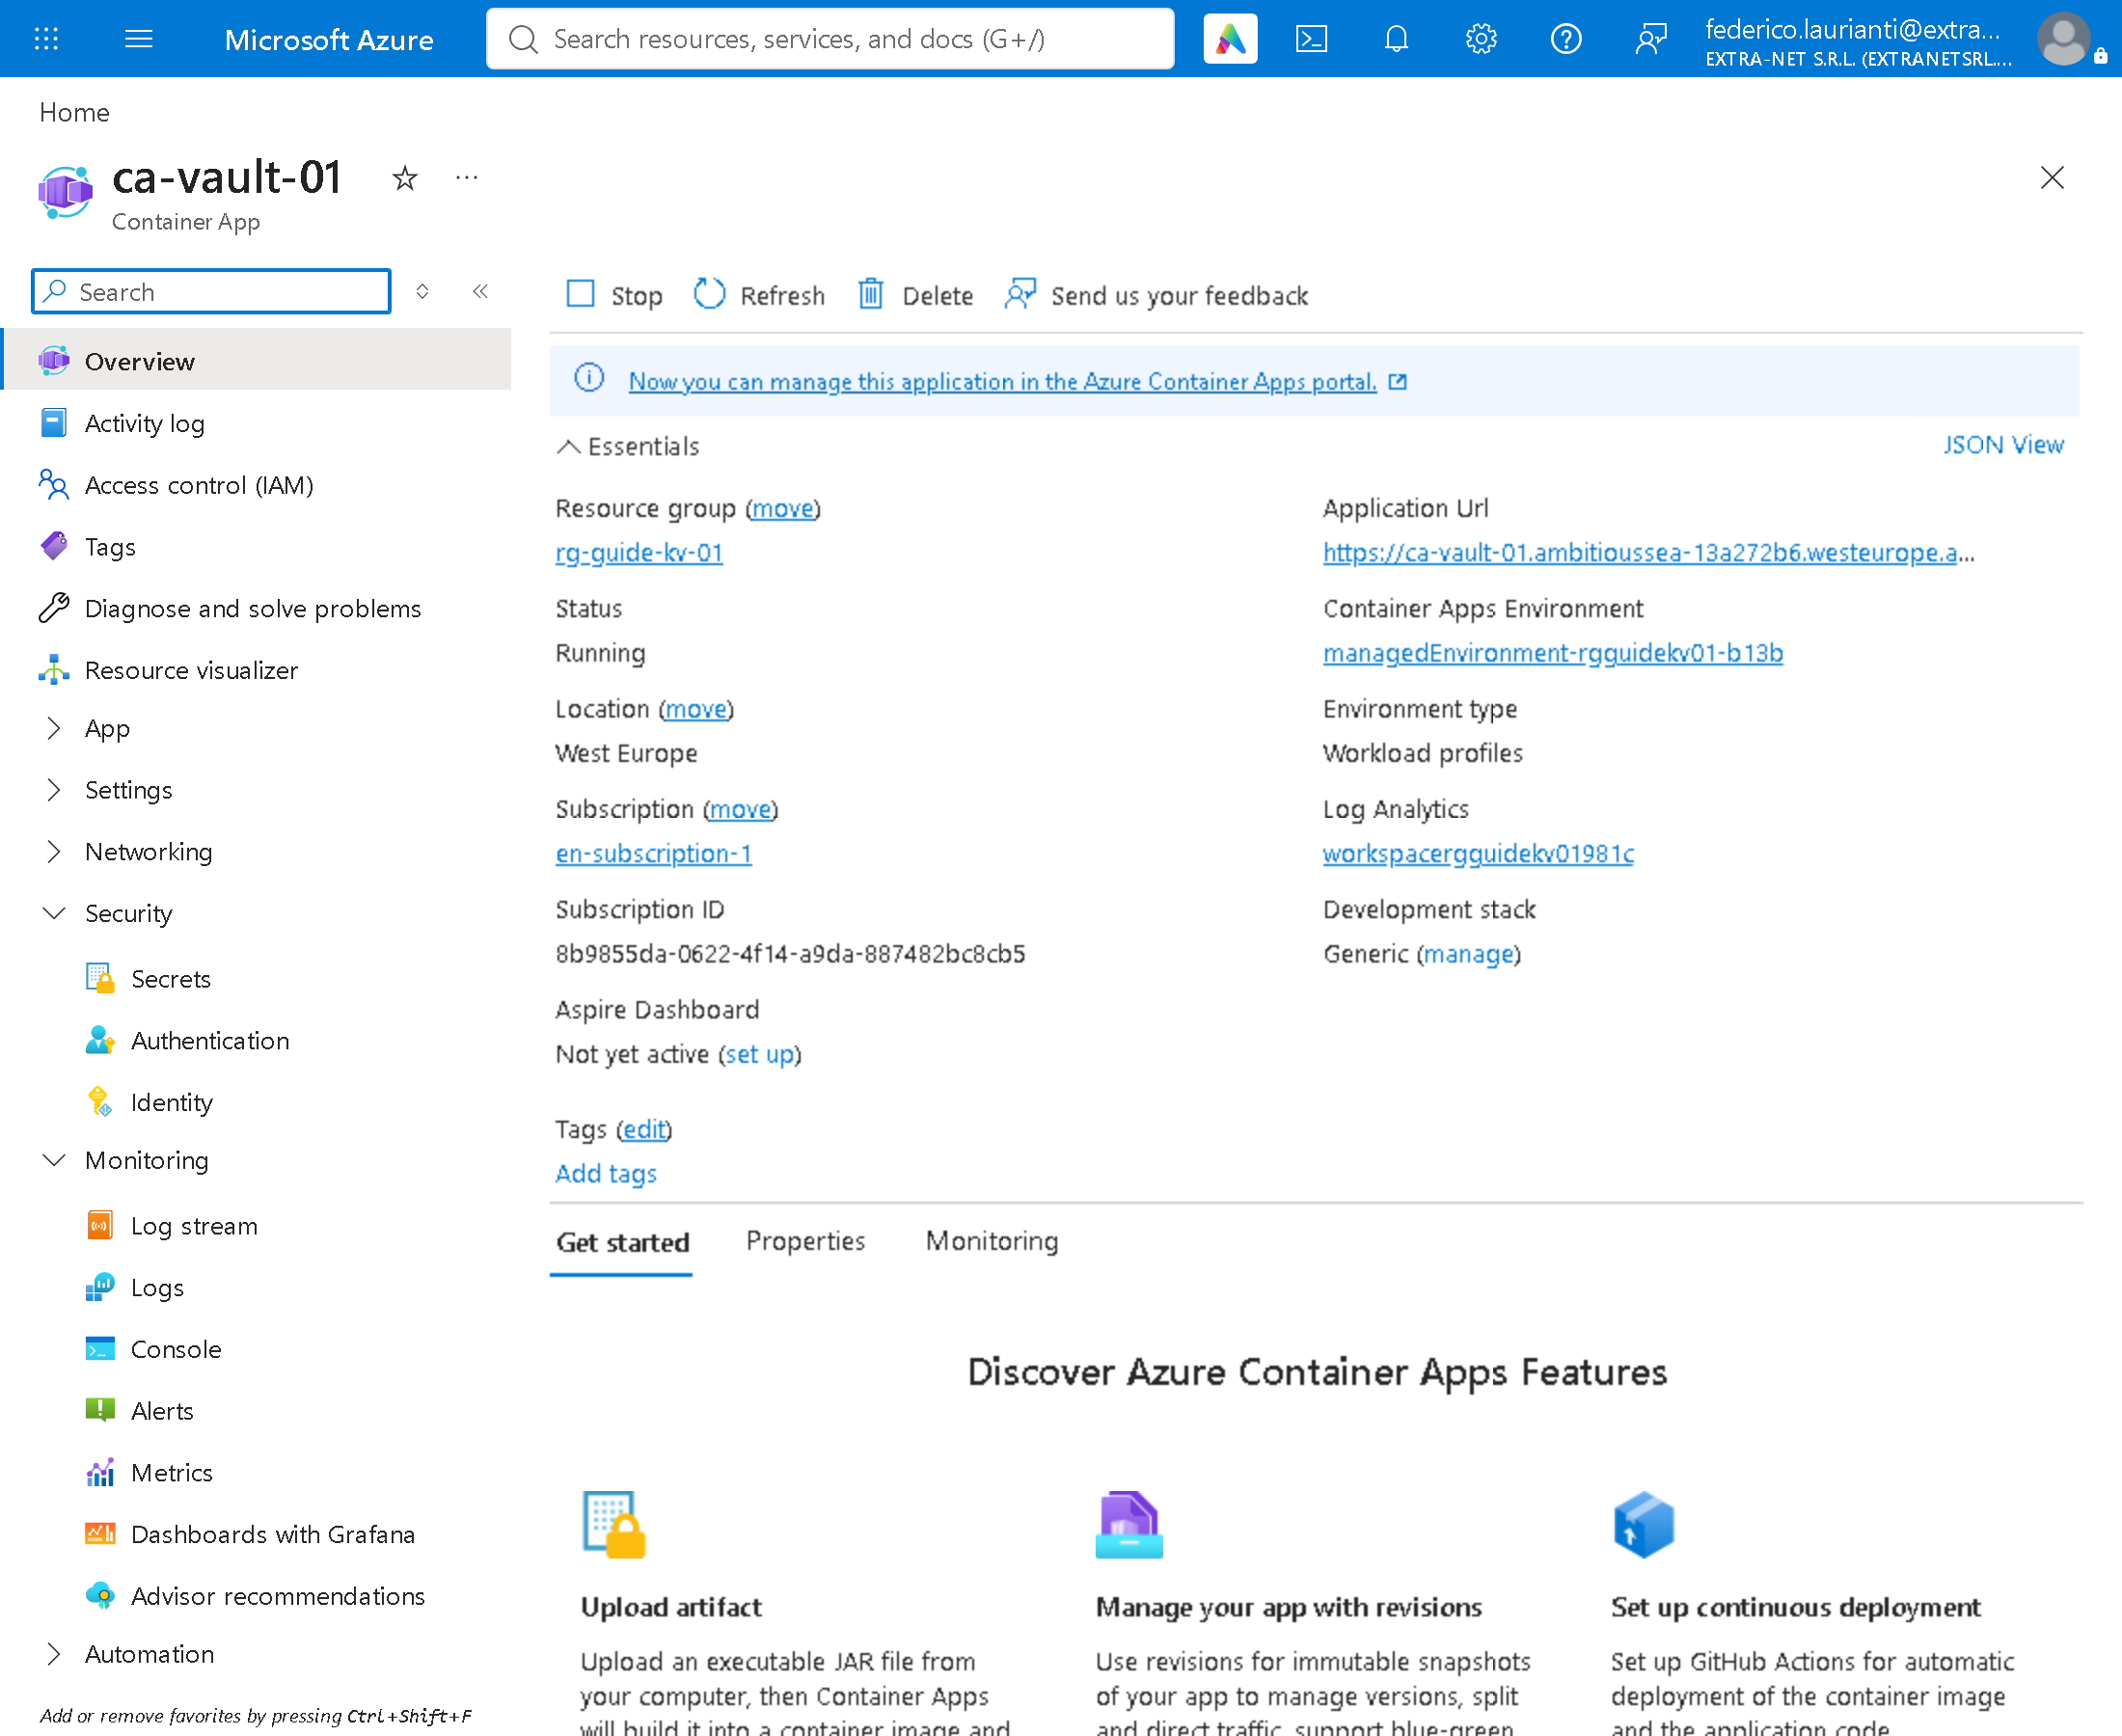
Press Review + create, then Create. In this run creating the environment took more than twenty minutes. When it finishes, Application Url under Overview holds the application's address.
10. Switch on the managed identity
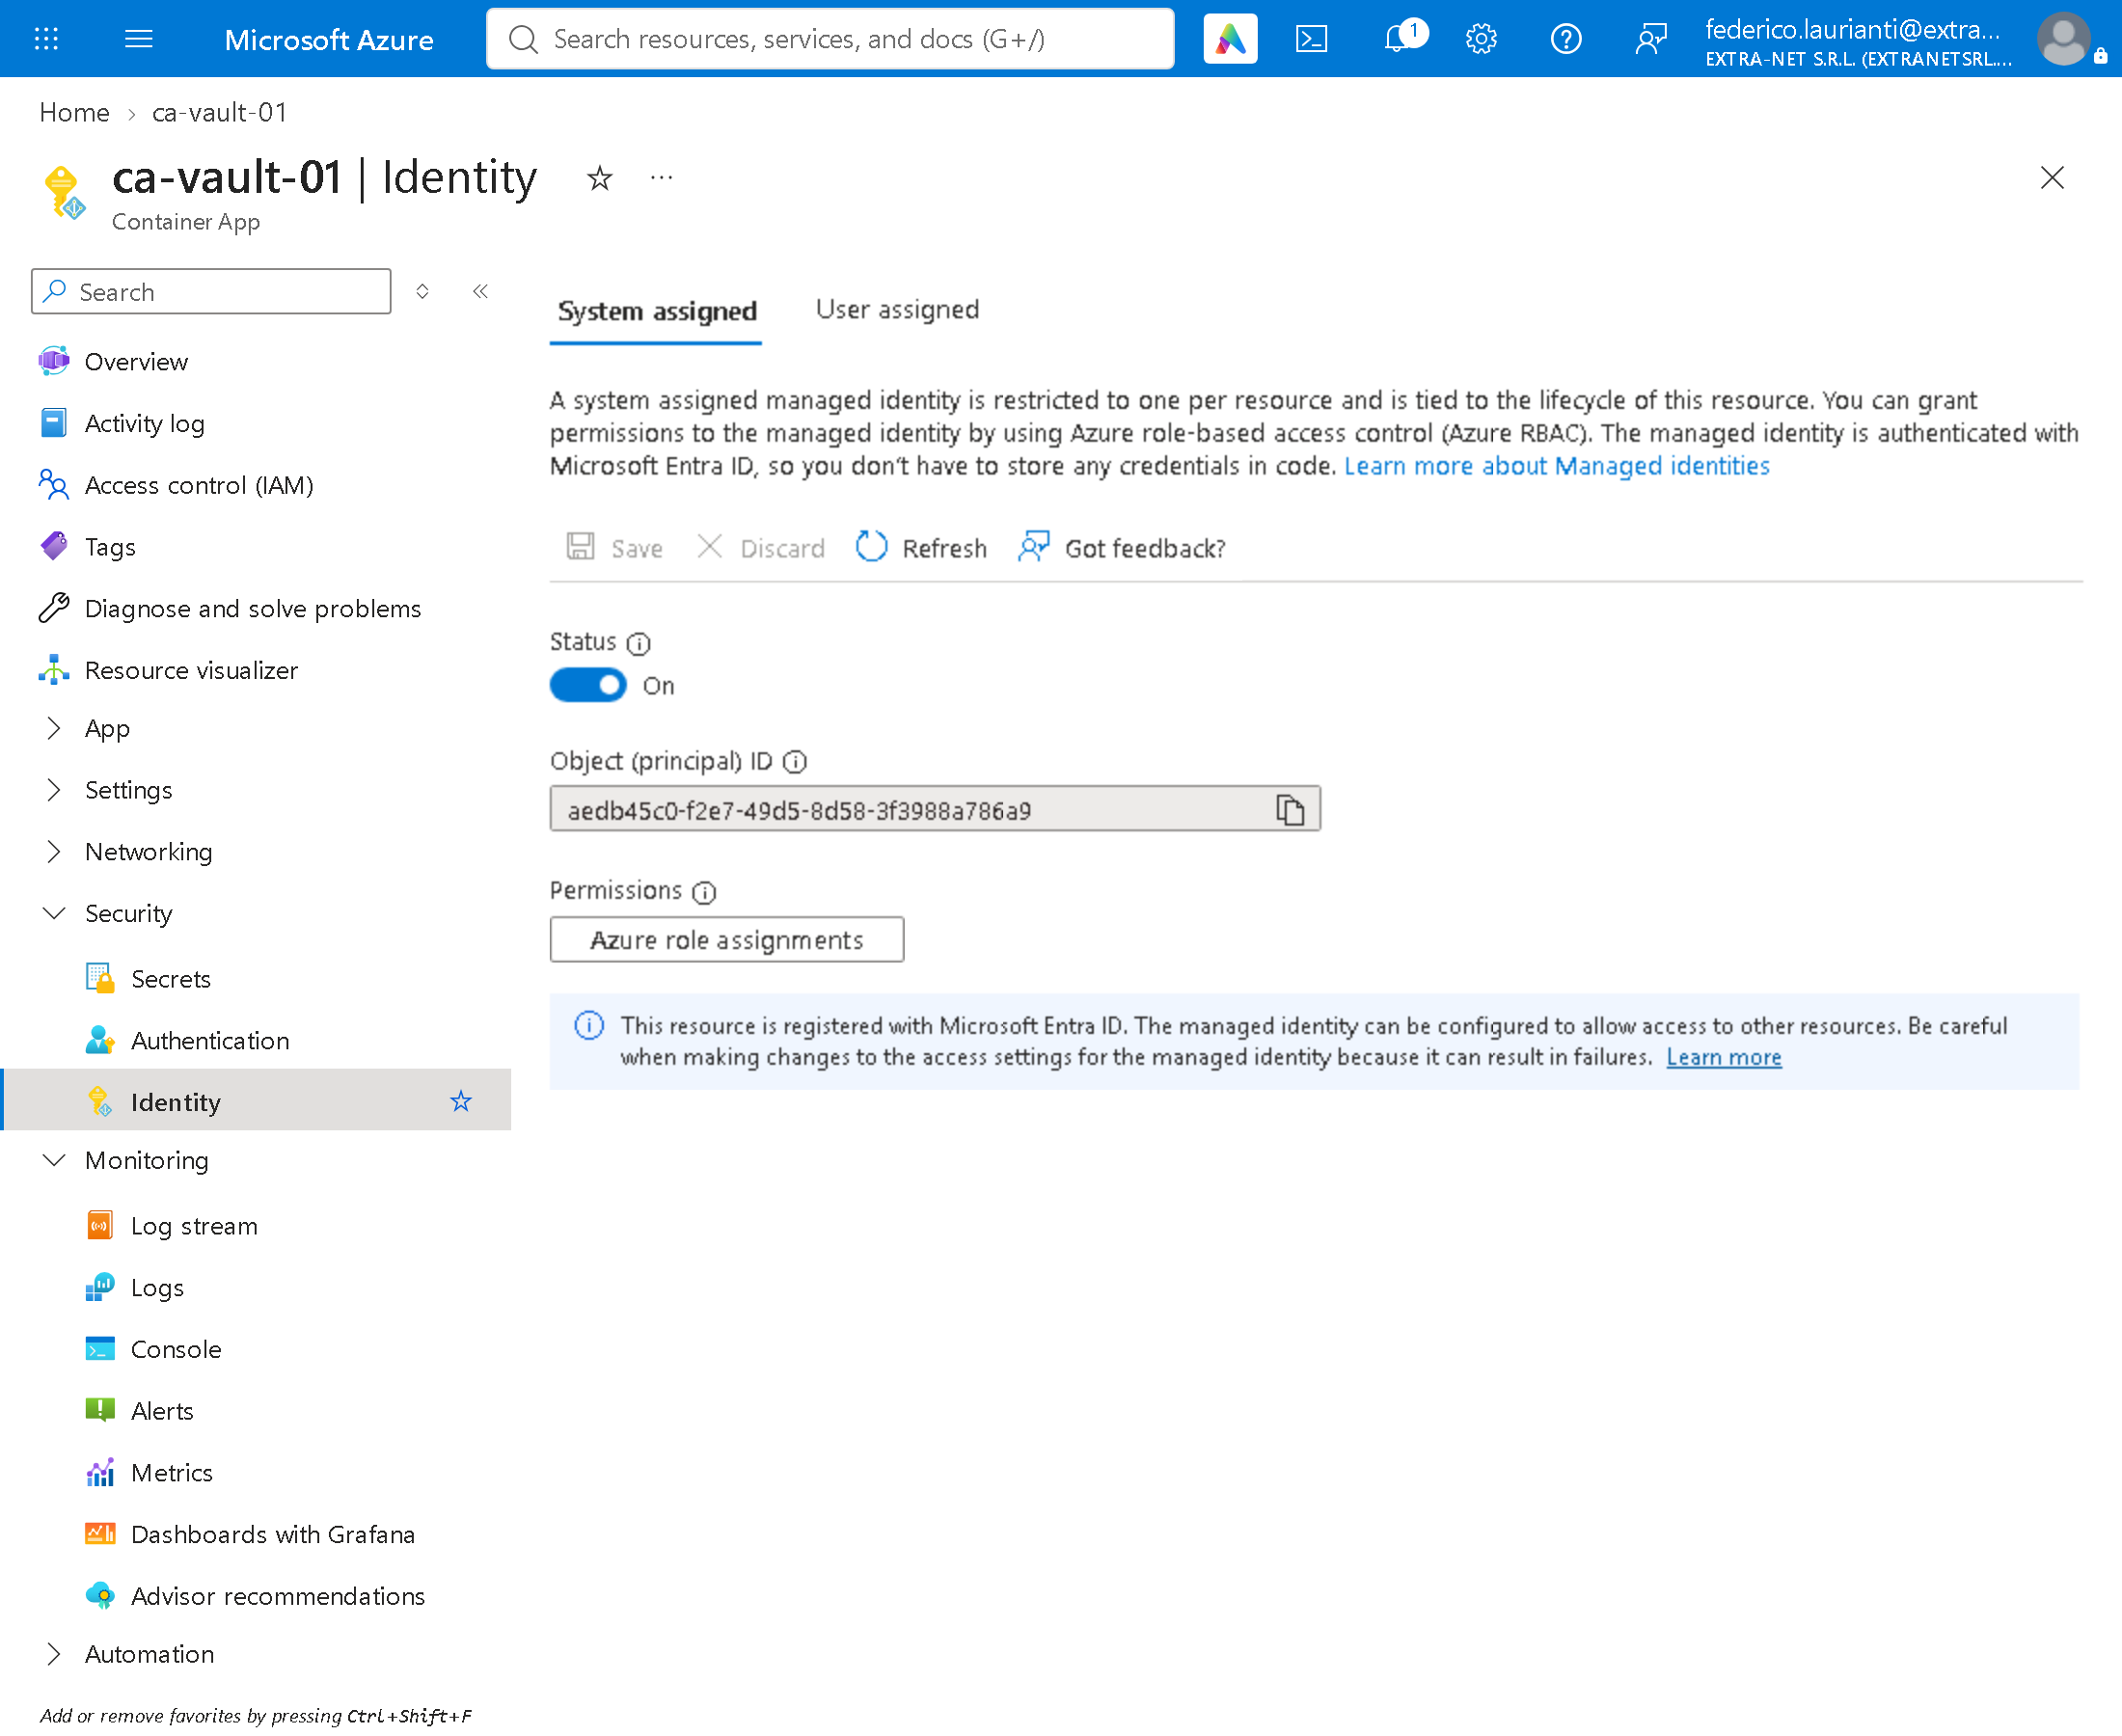
Adding /secret to the address, the application answers 500: it has no identity to present yet. In the application open Security > Identity, System assigned tab, set Status to On, press Save and confirm with Yes. Azure manages the identity: no password to keep.
11. Try without a role
Open the address with /secret again:
"Refused: HTTP 403, Forbidden"The identity exists and Azure knows who it is, but it has no permission on the Key Vault. That is the right behaviour.
12. Give the application the role
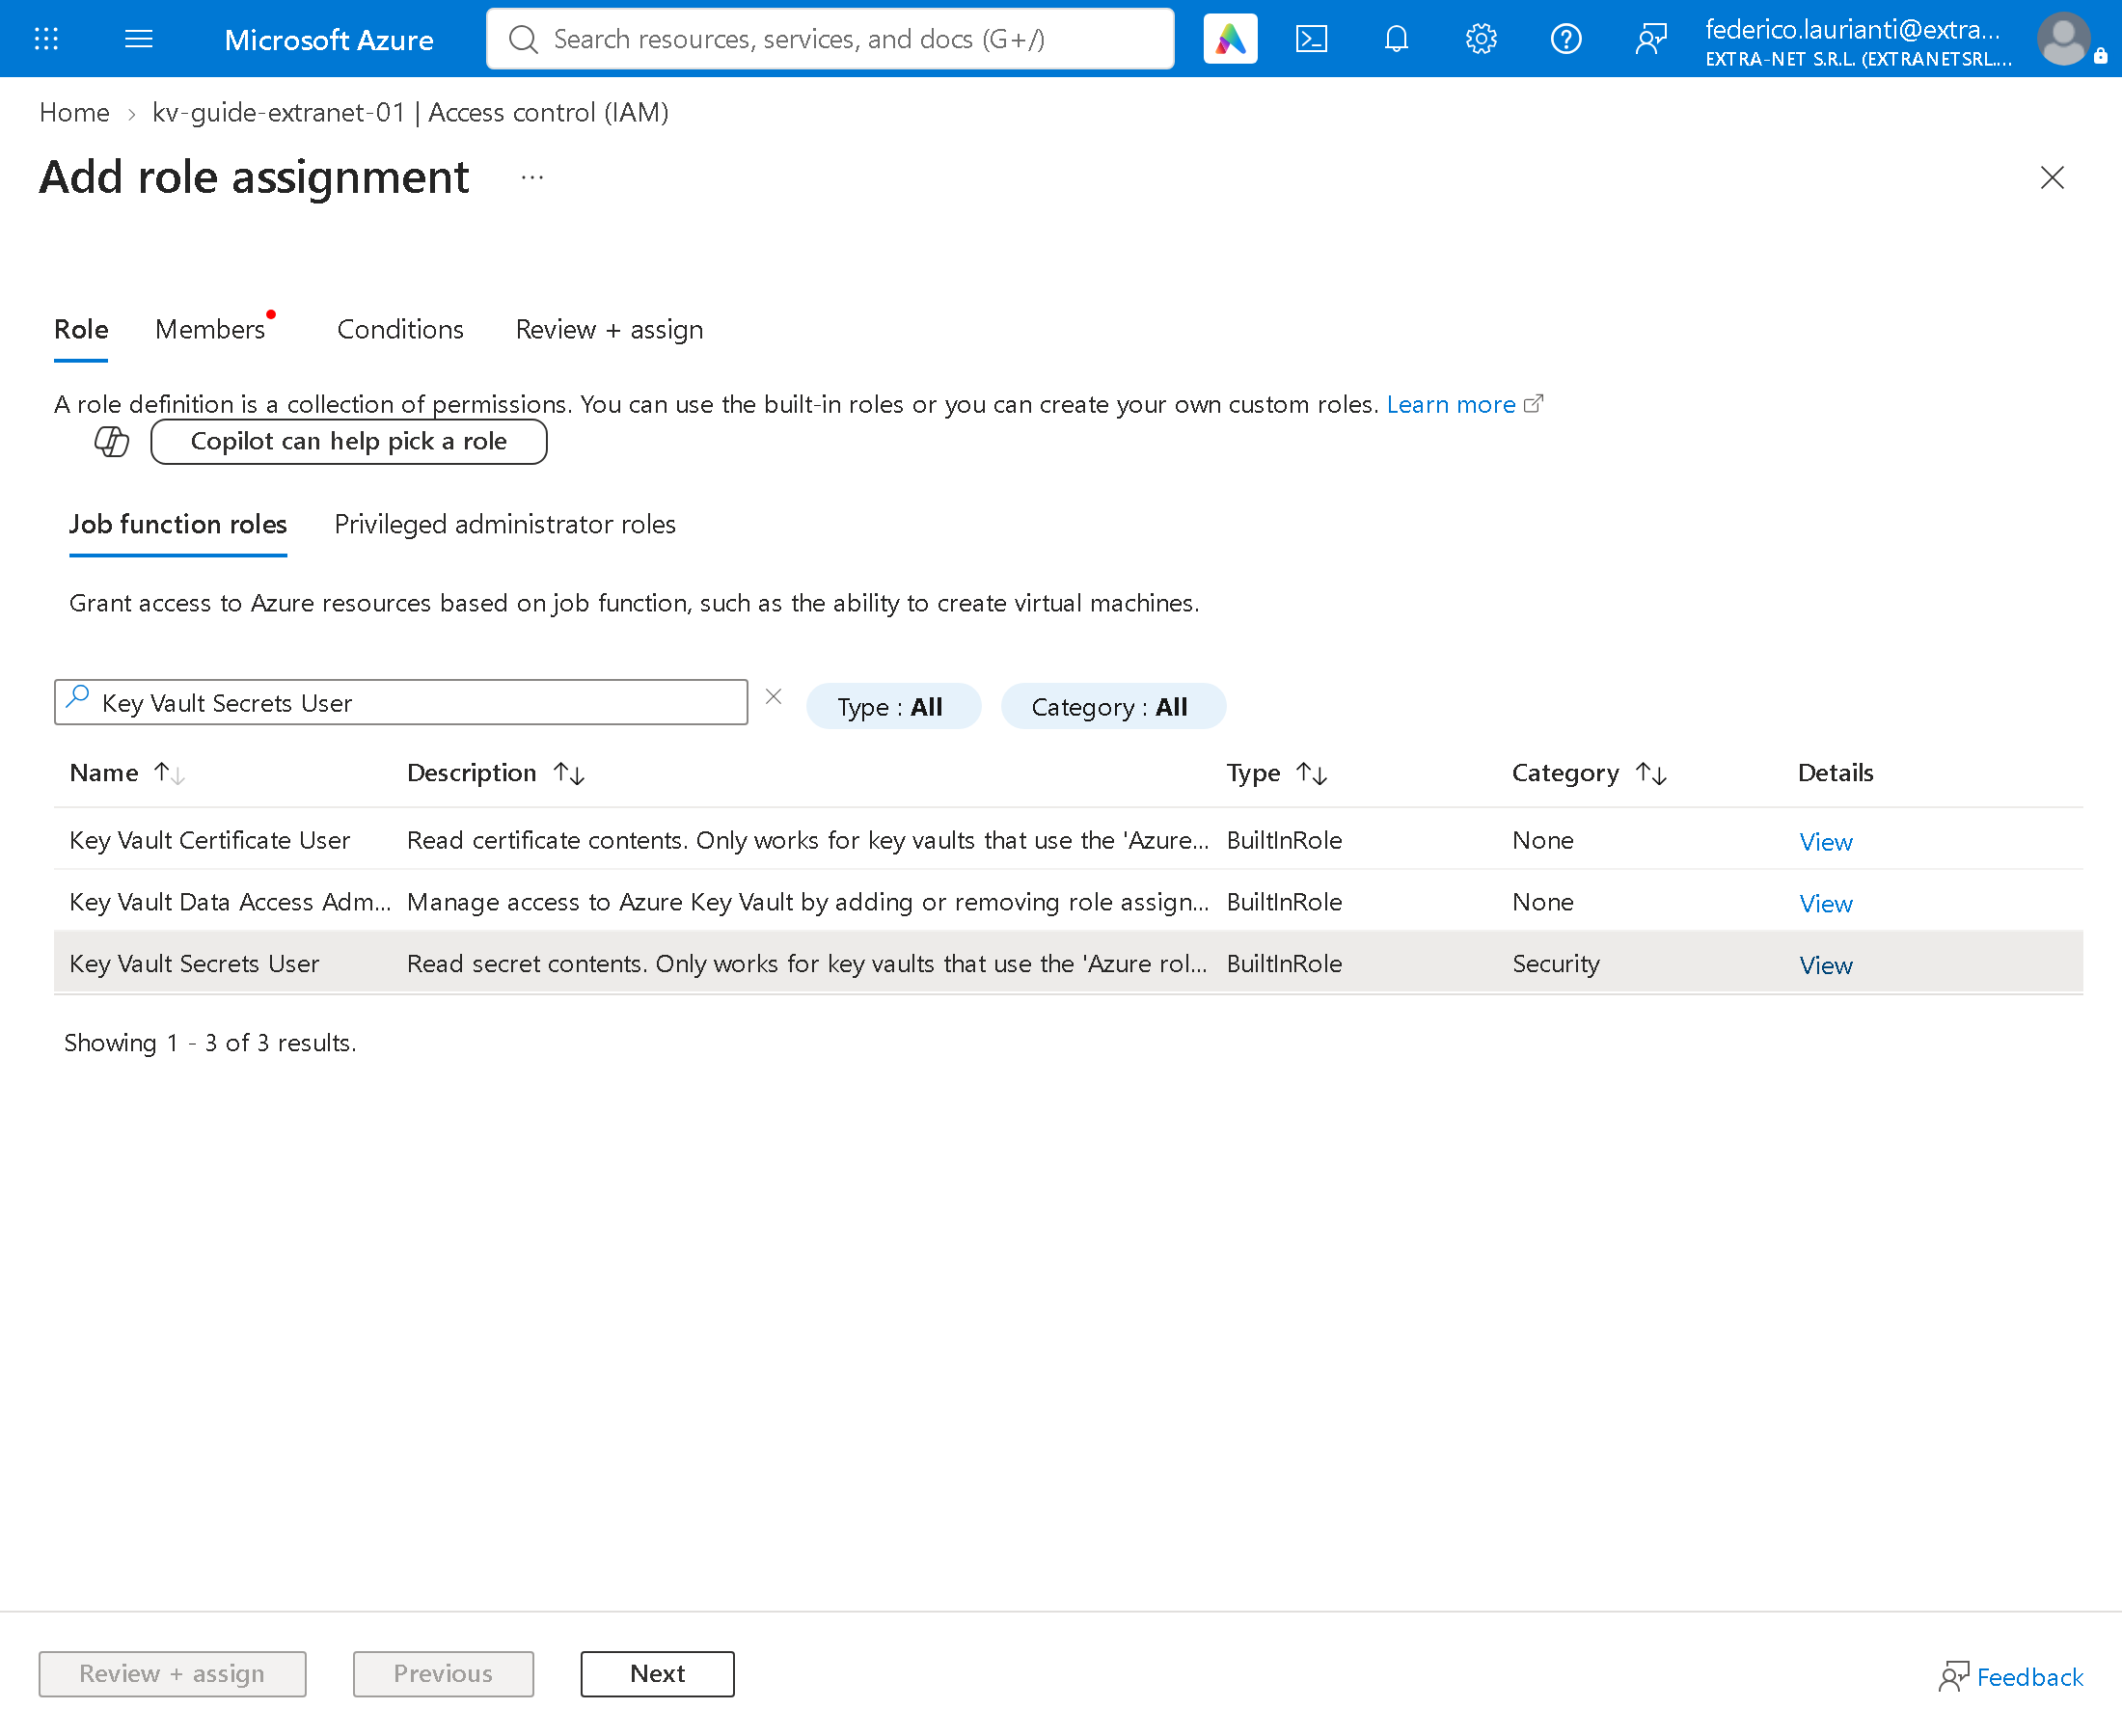
In the Key Vault open Access control (IAM), Add > Add role assignment, search for Key Vault Secrets User, select it and press Next. It allows reading secrets and nothing else.
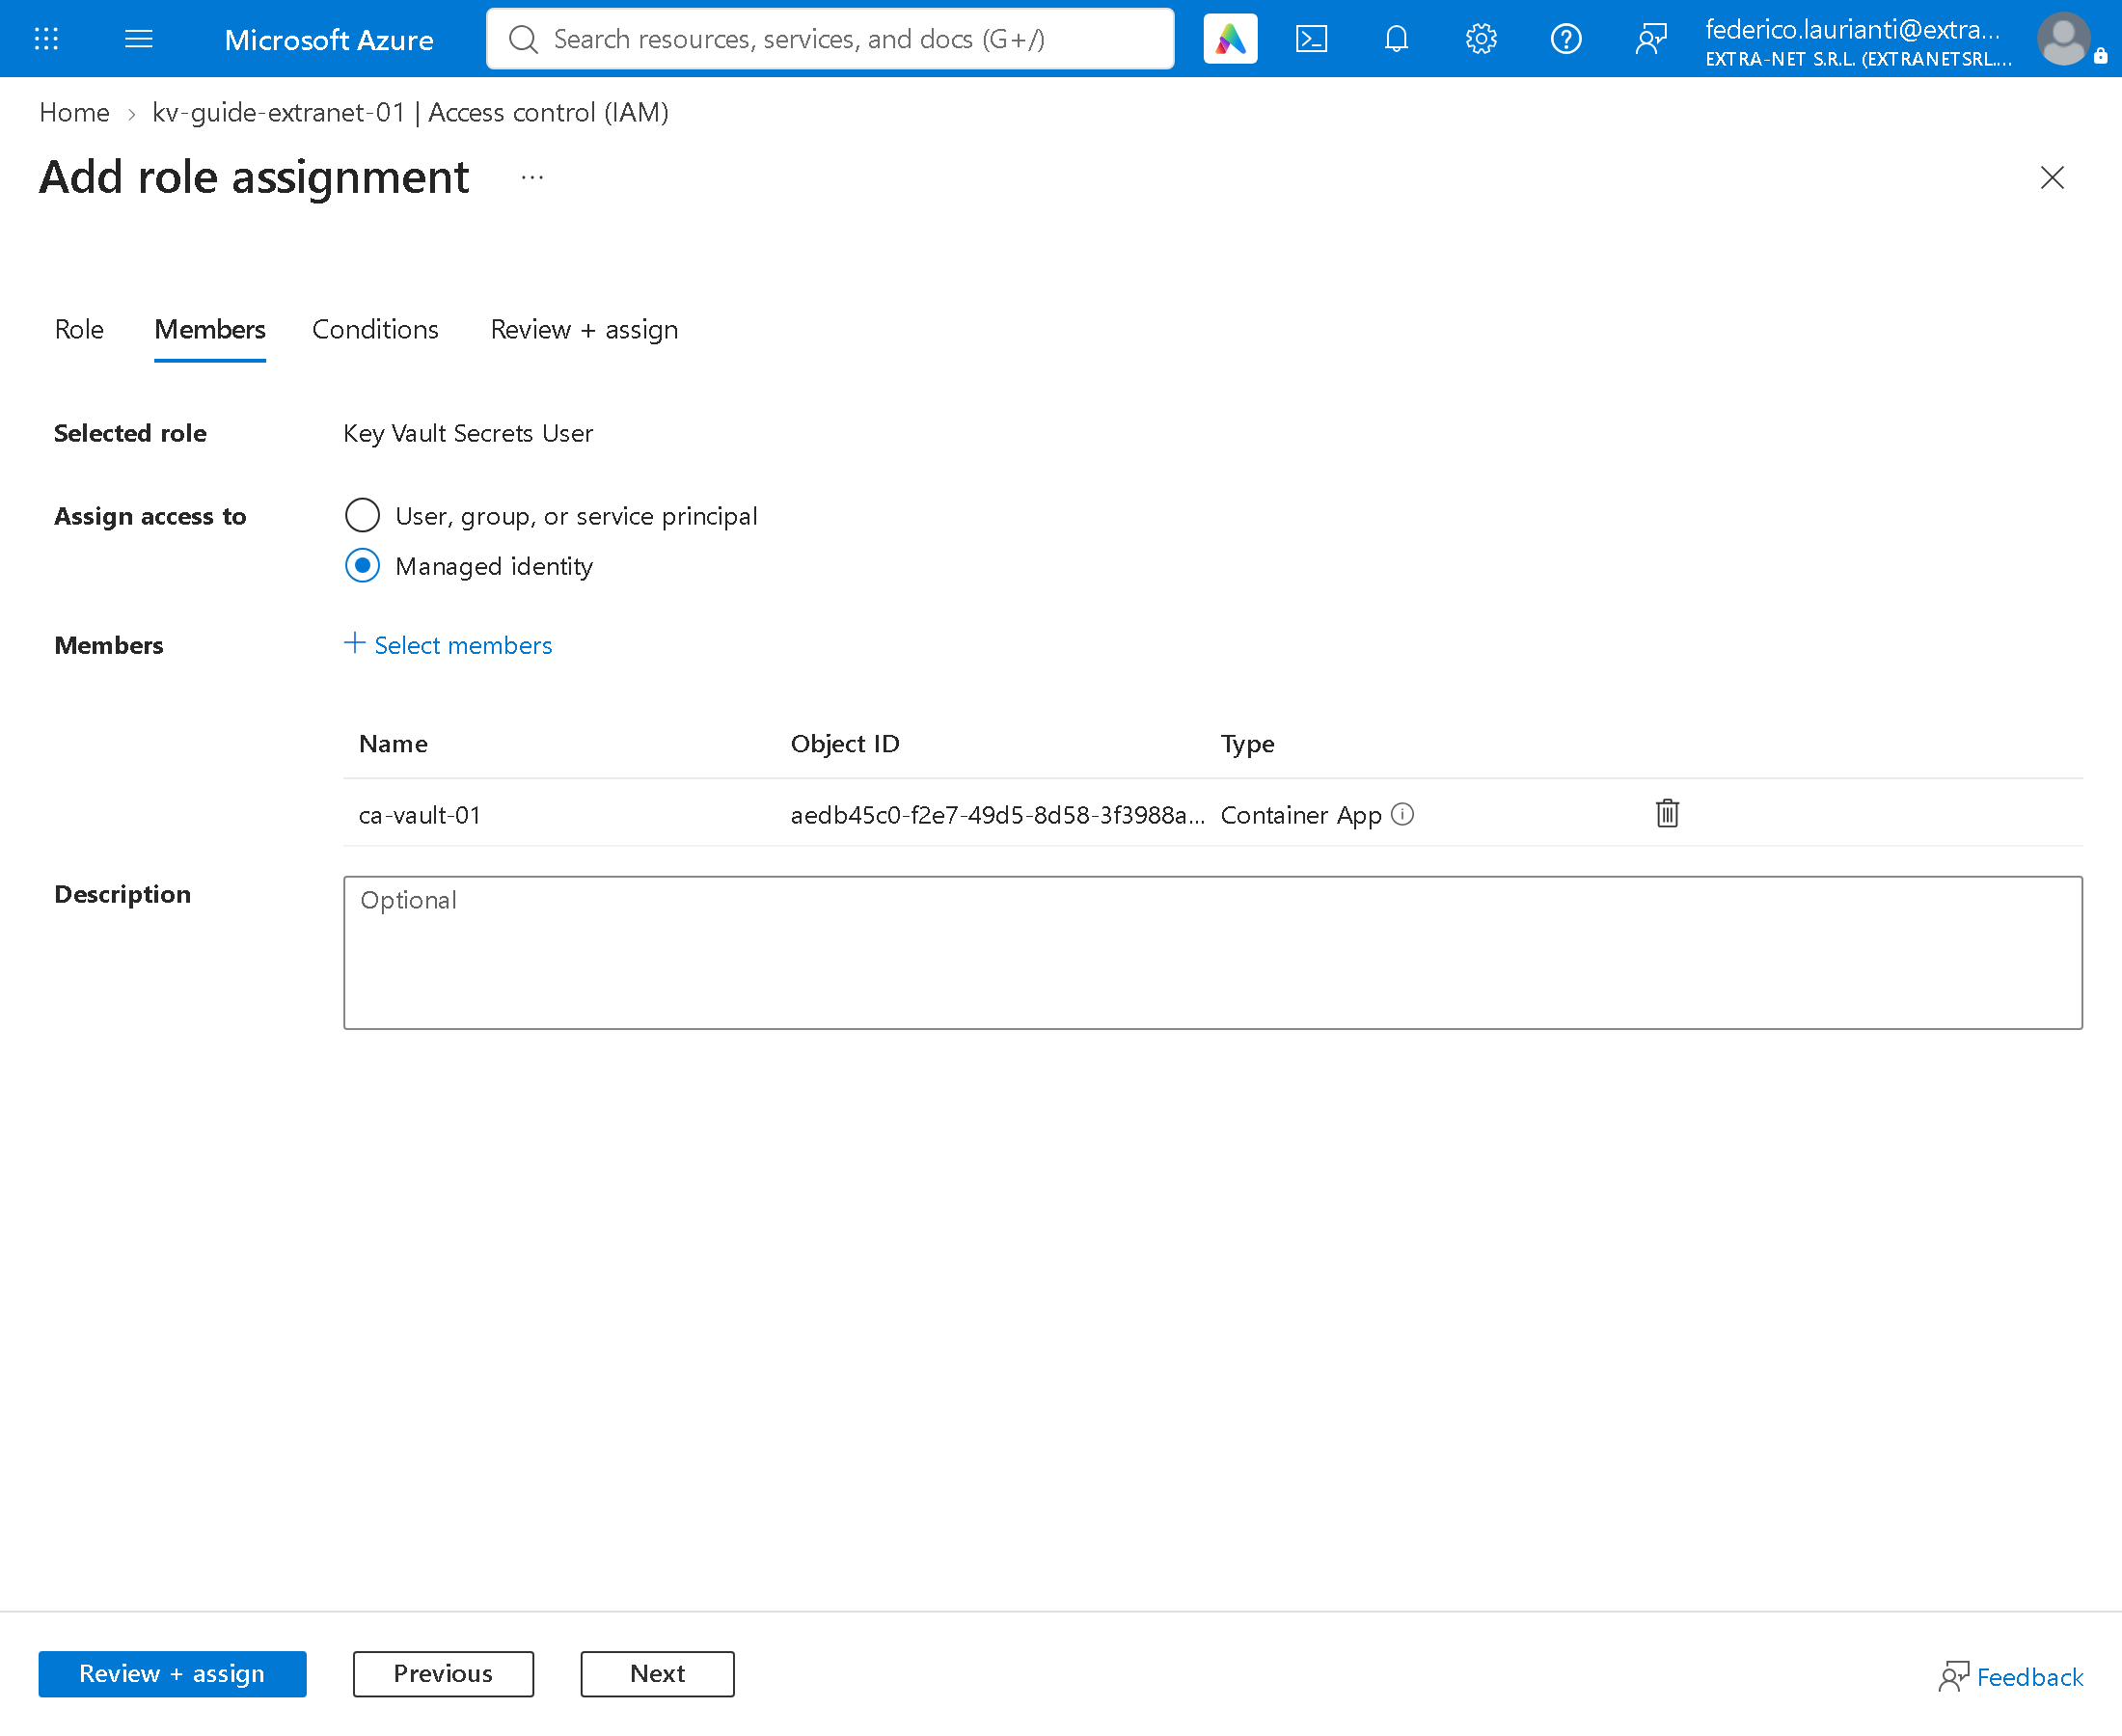
Choose Managed identity, press Select members, under Managed identity choose Container App, select ca-vault-01 and press Select. Then press Review + assign twice.
The same program, with no change and no restart, was already answering after 10 seconds in this run:
"Secret read: 19 characters."13. Check the role
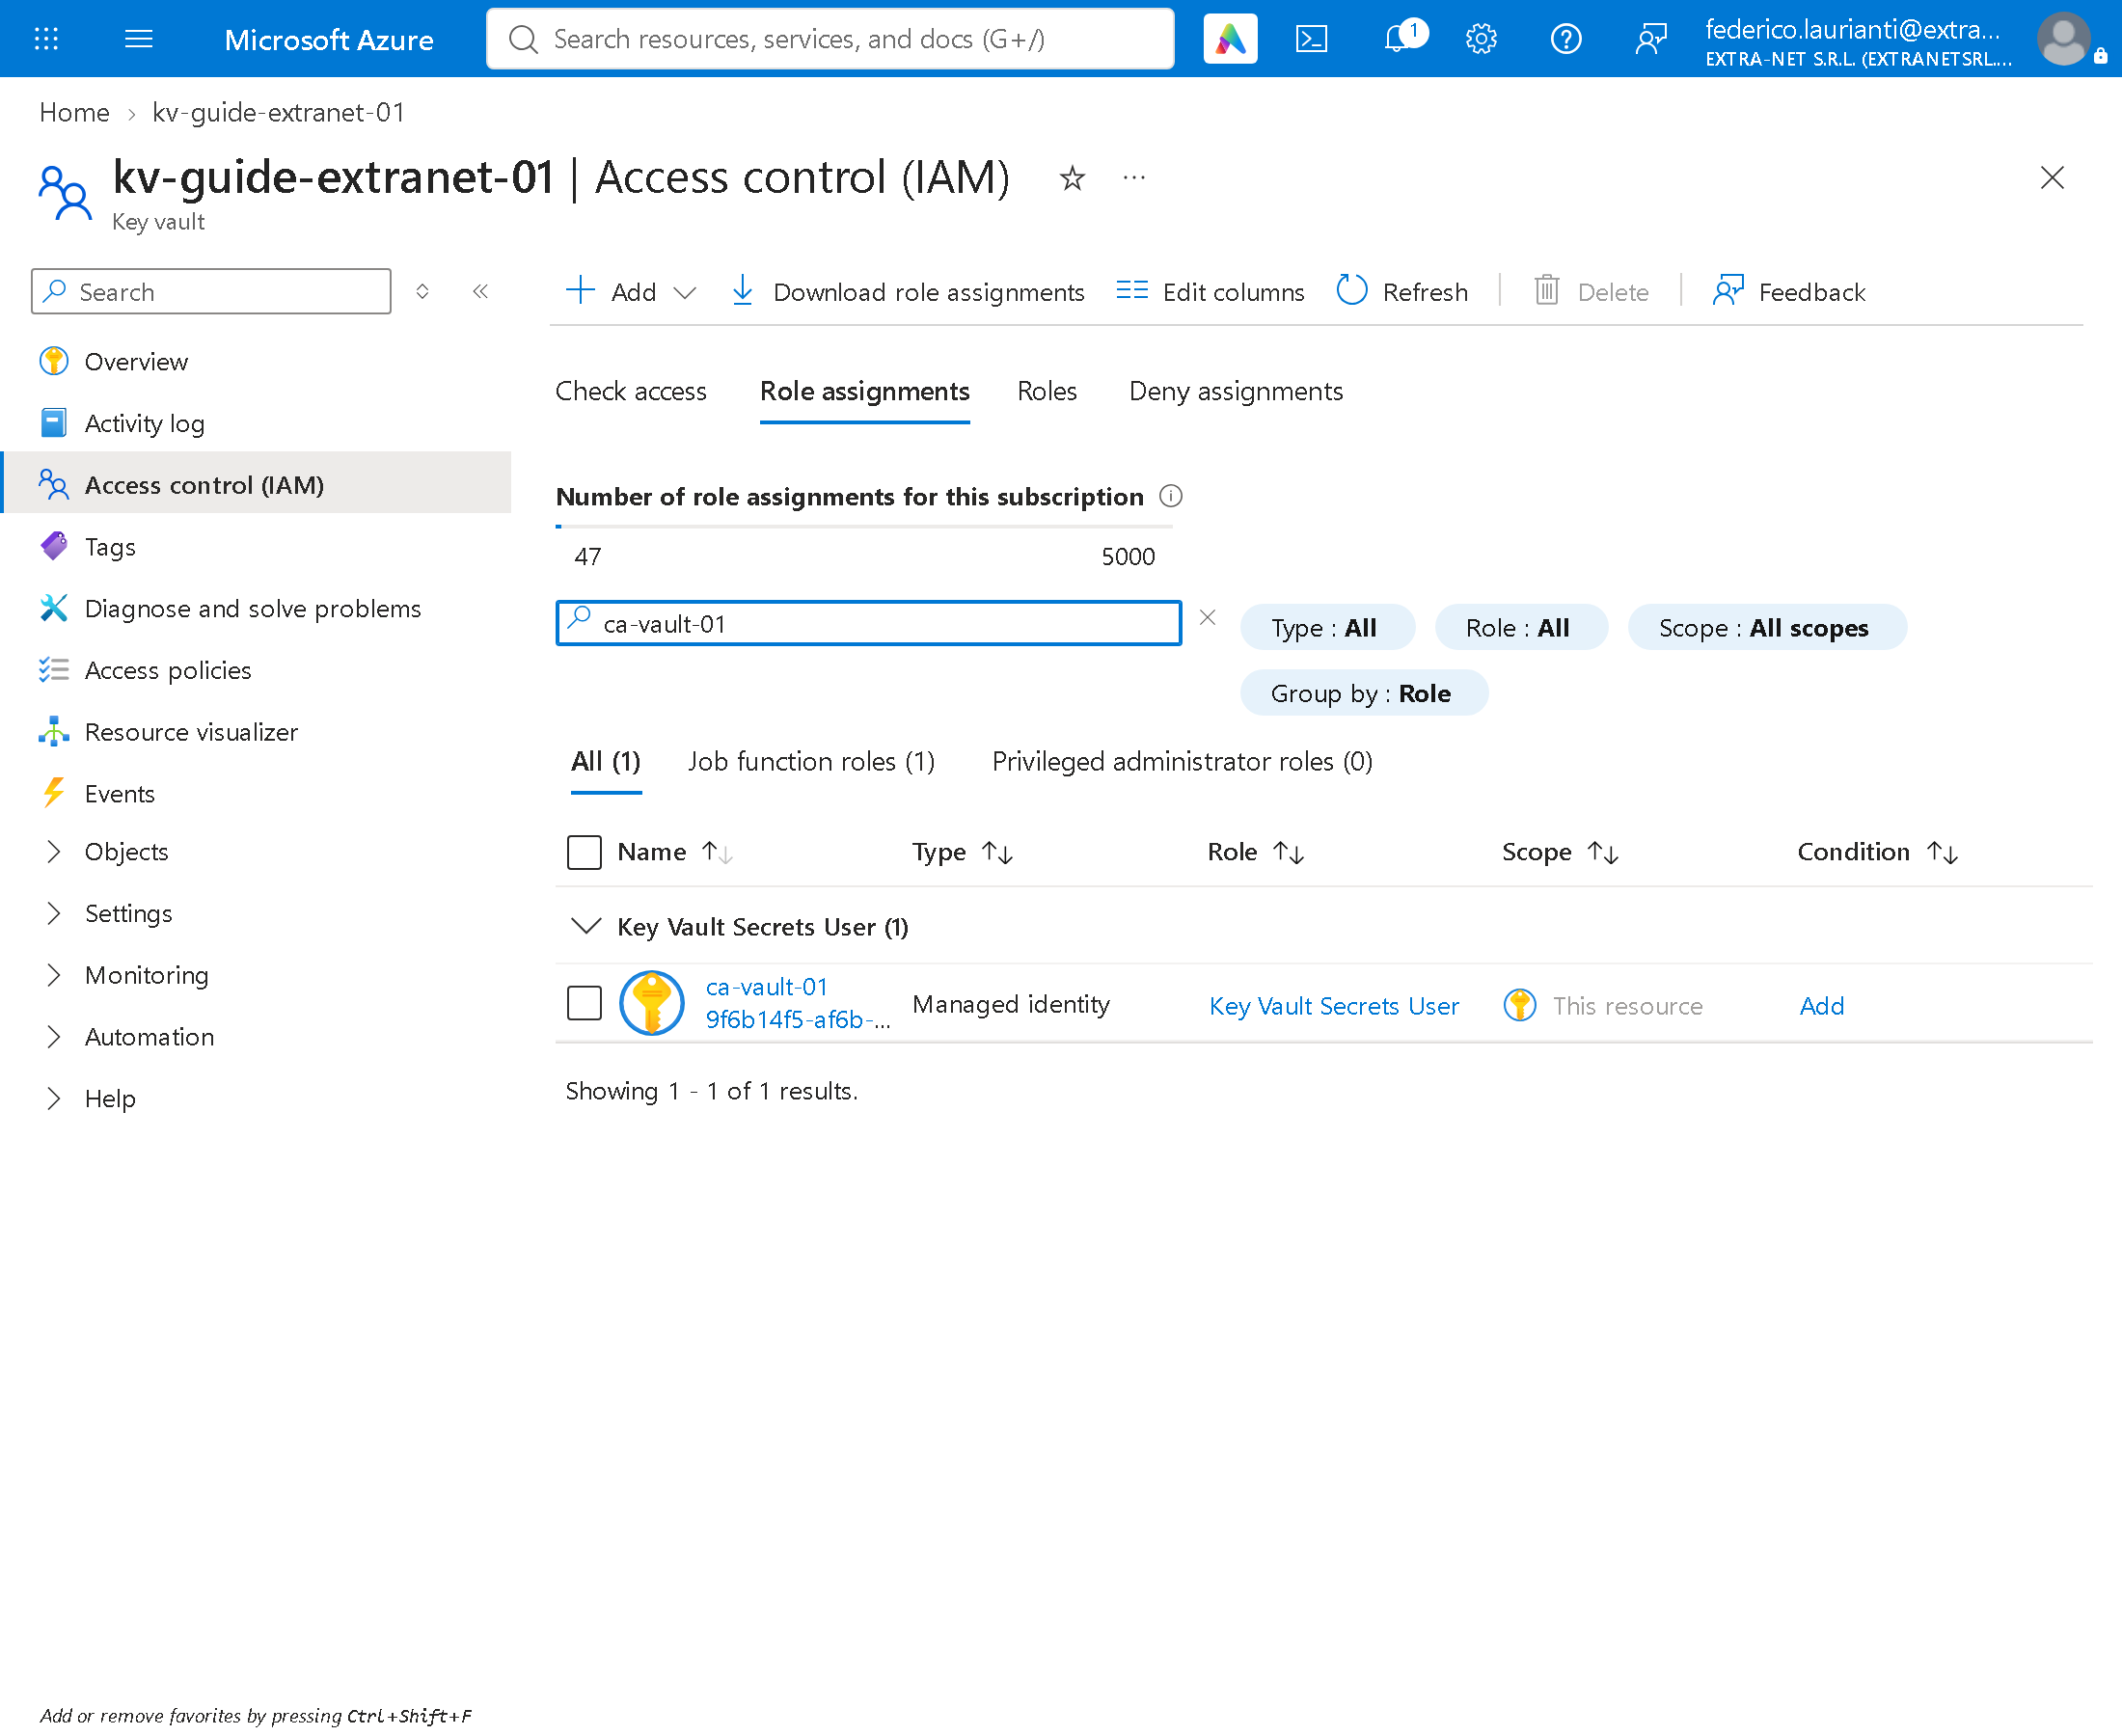
Under Access control (IAM) > Role assignments, search for ca-vault-01: a single row, with scope This resource.
Delete the resources
14. Delete the group
Open the rg-guide-kv-01 group.
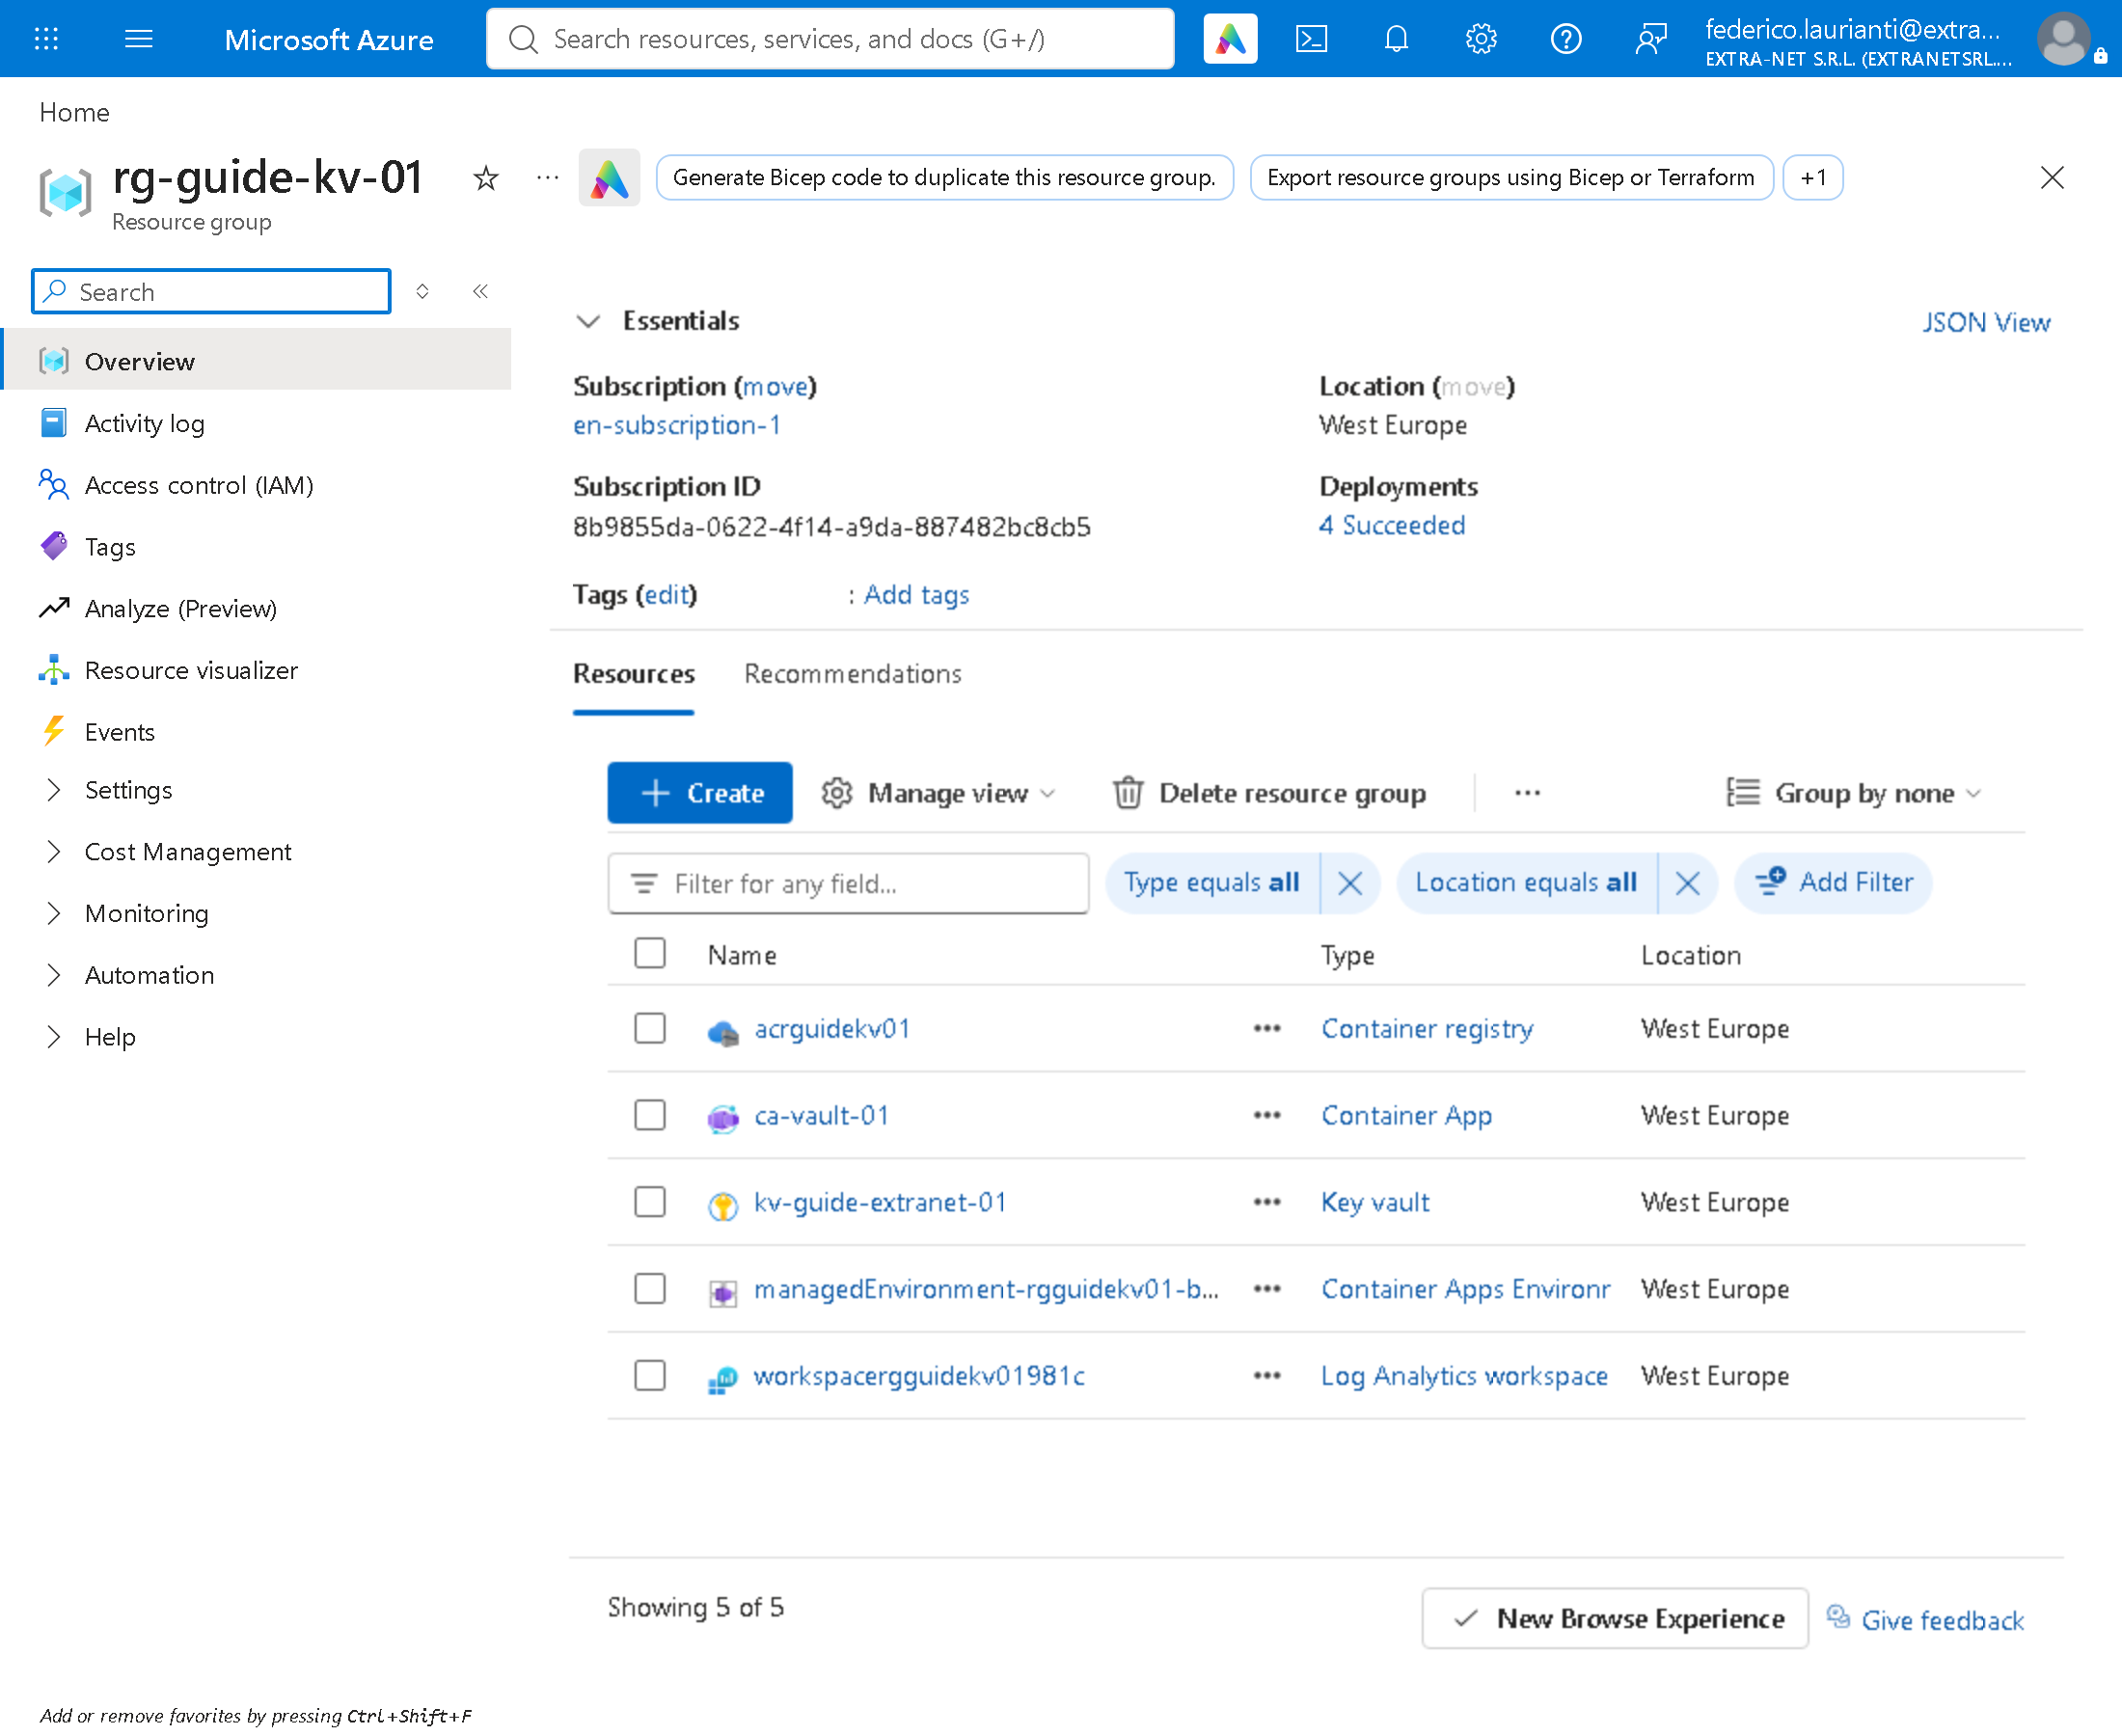
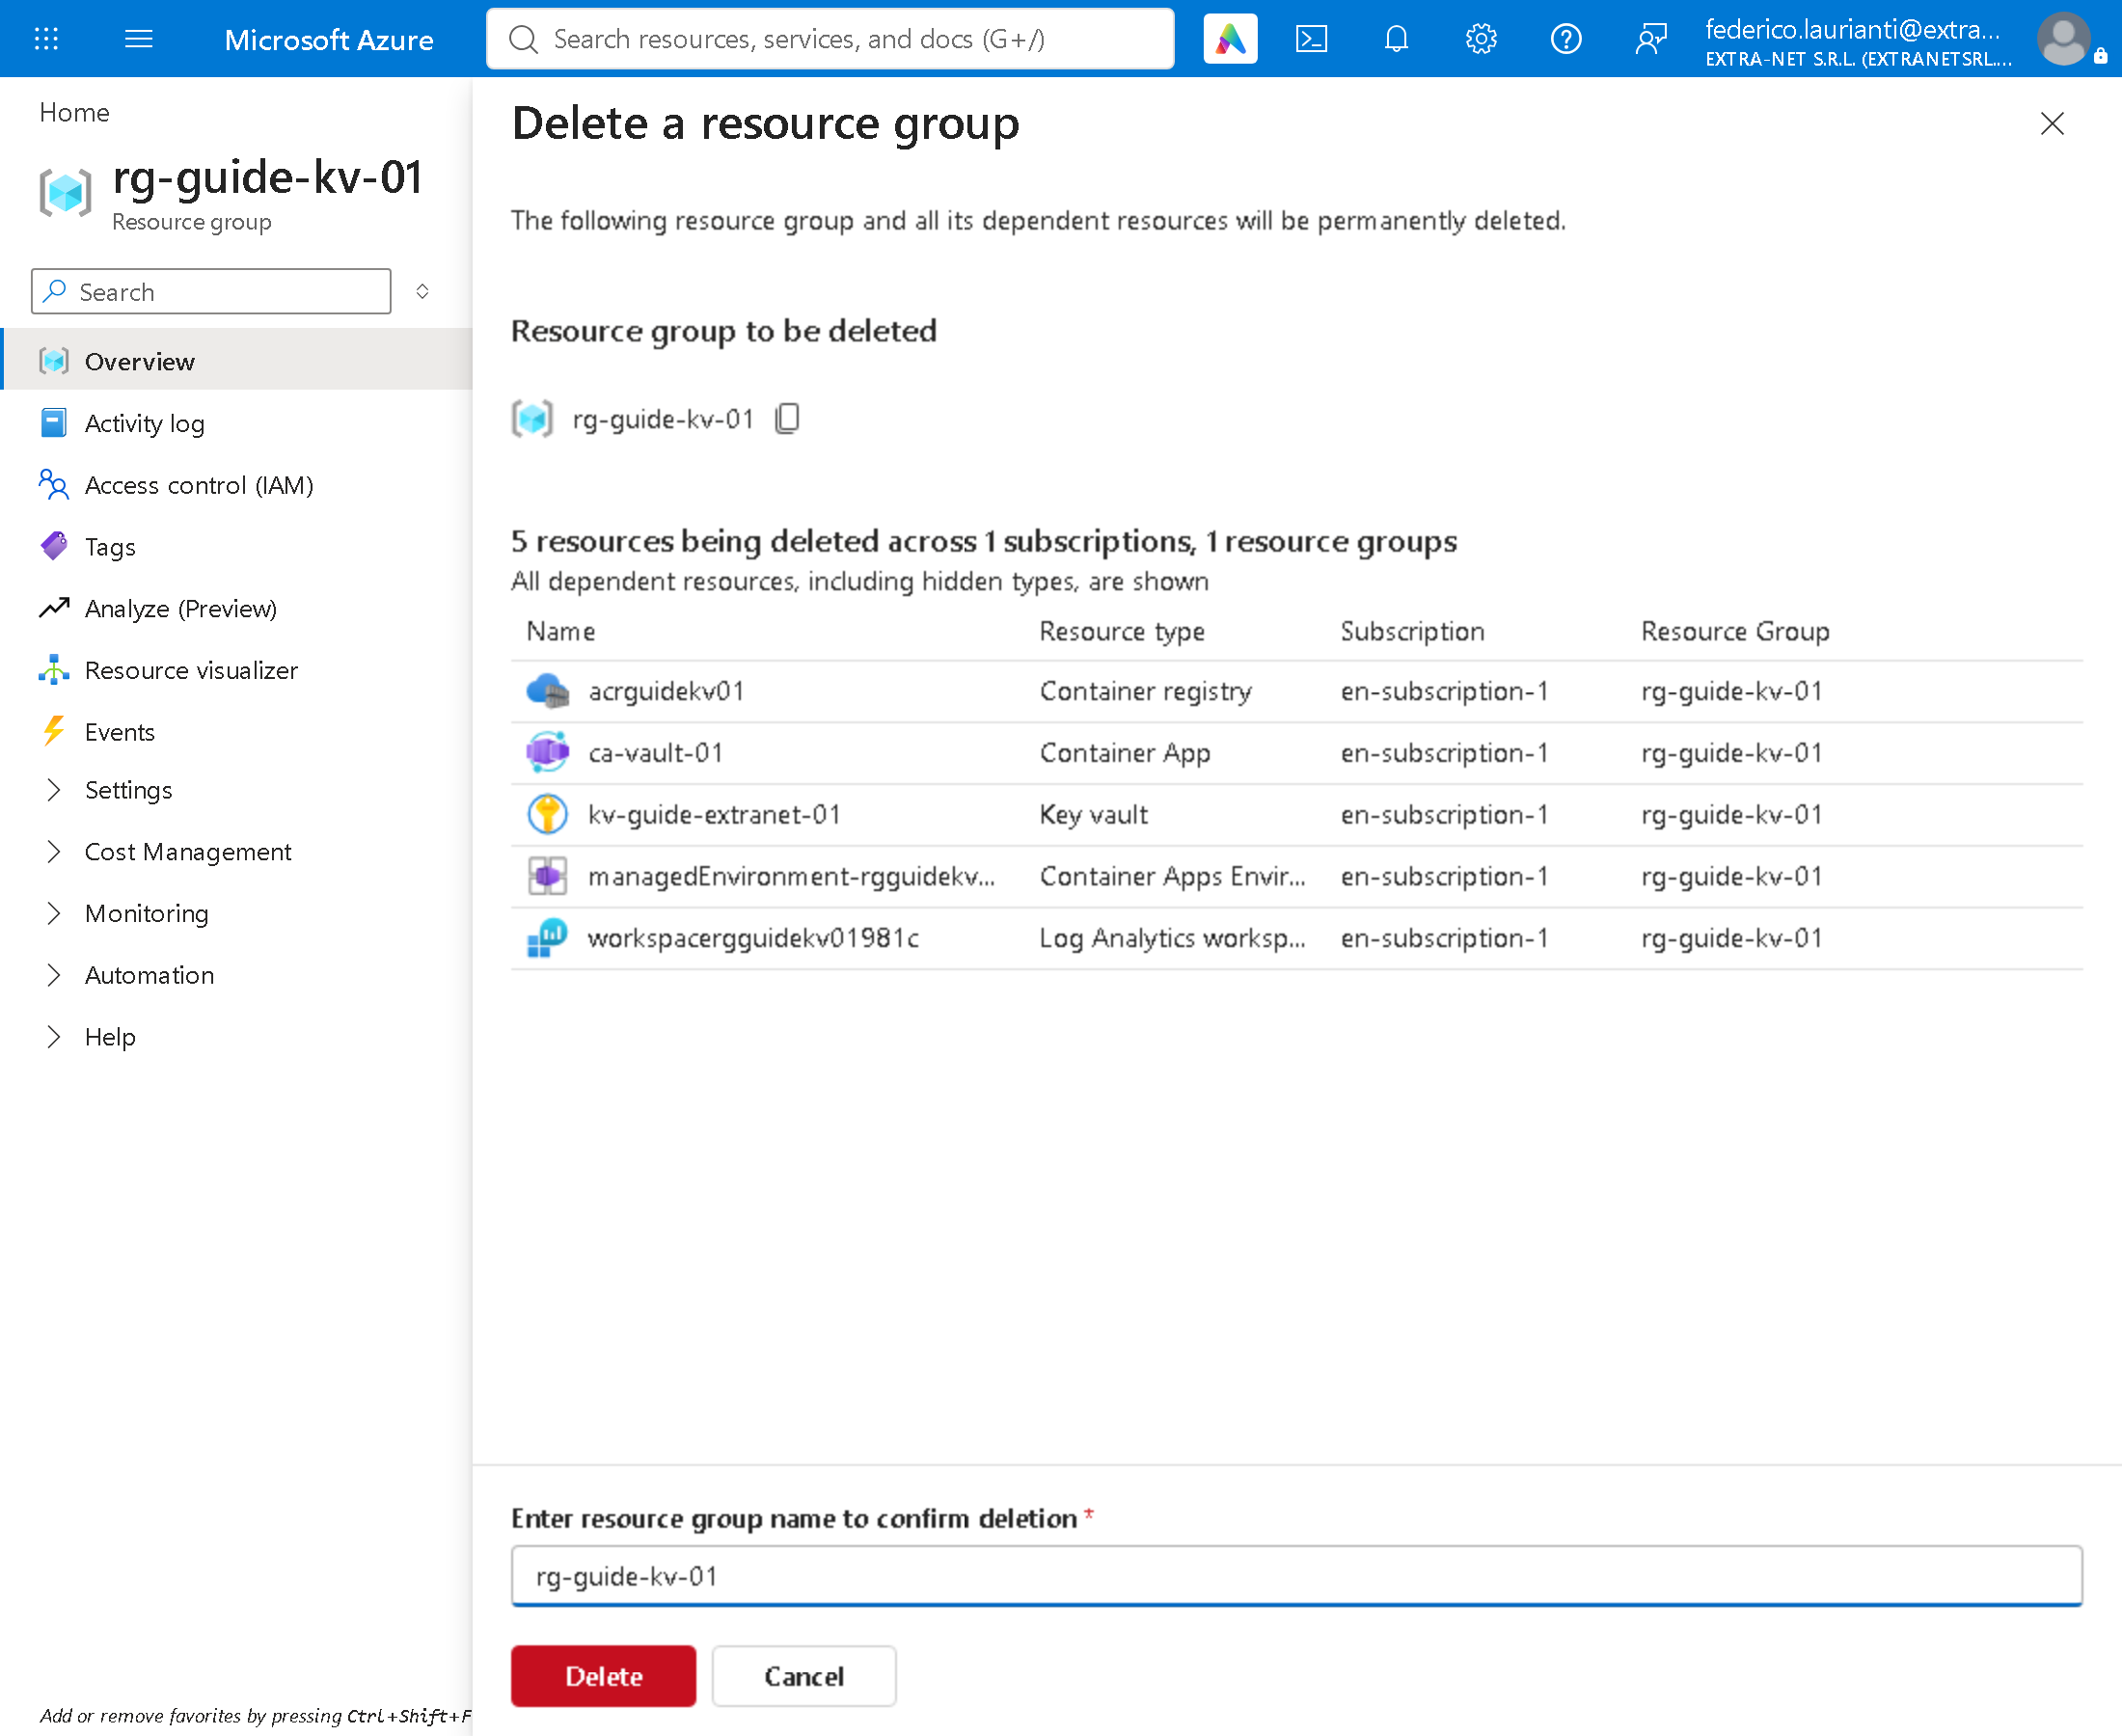
Press Delete resource group, type the group name to confirm, press Delete and, in the window that follows, Delete again.
15. Free the Key Vault name
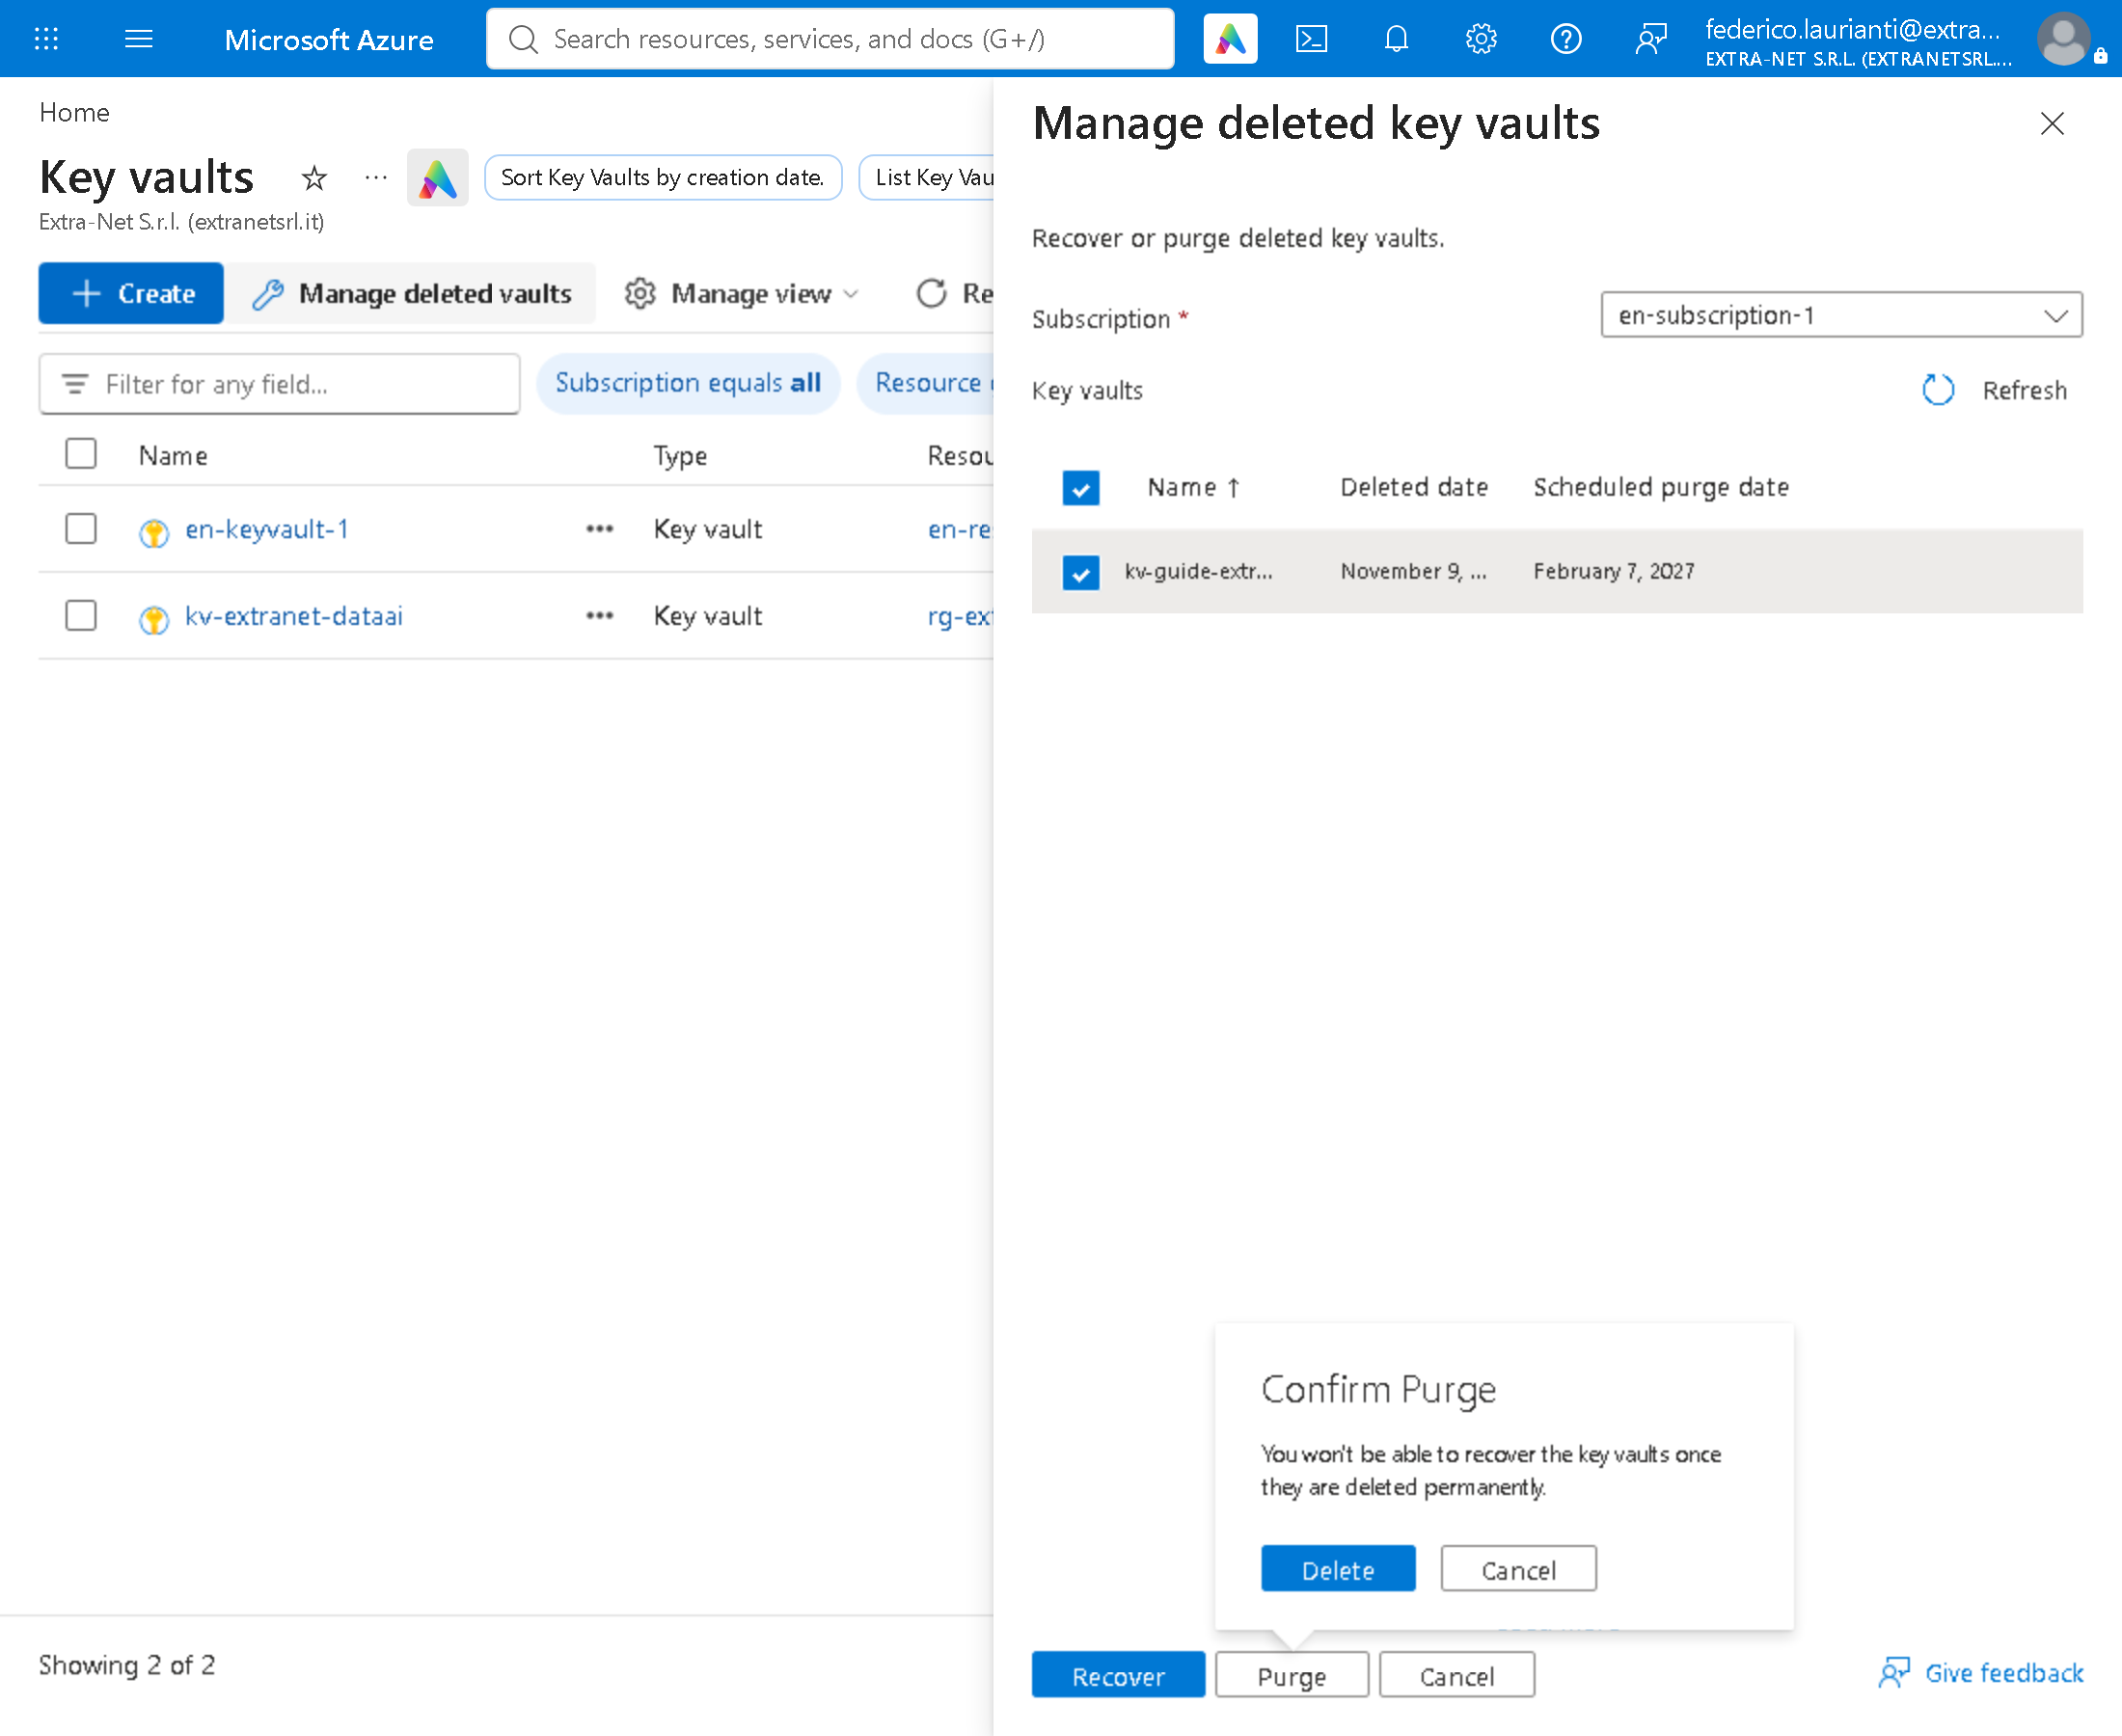
A deleted Key Vault stays recoverable for 90 days and its name stays taken. Open https://portal.azure.com/#browse/Microsoft.KeyVault%2Fvaults, press Manage deleted vaults, choose the subscription and select your Key Vault.
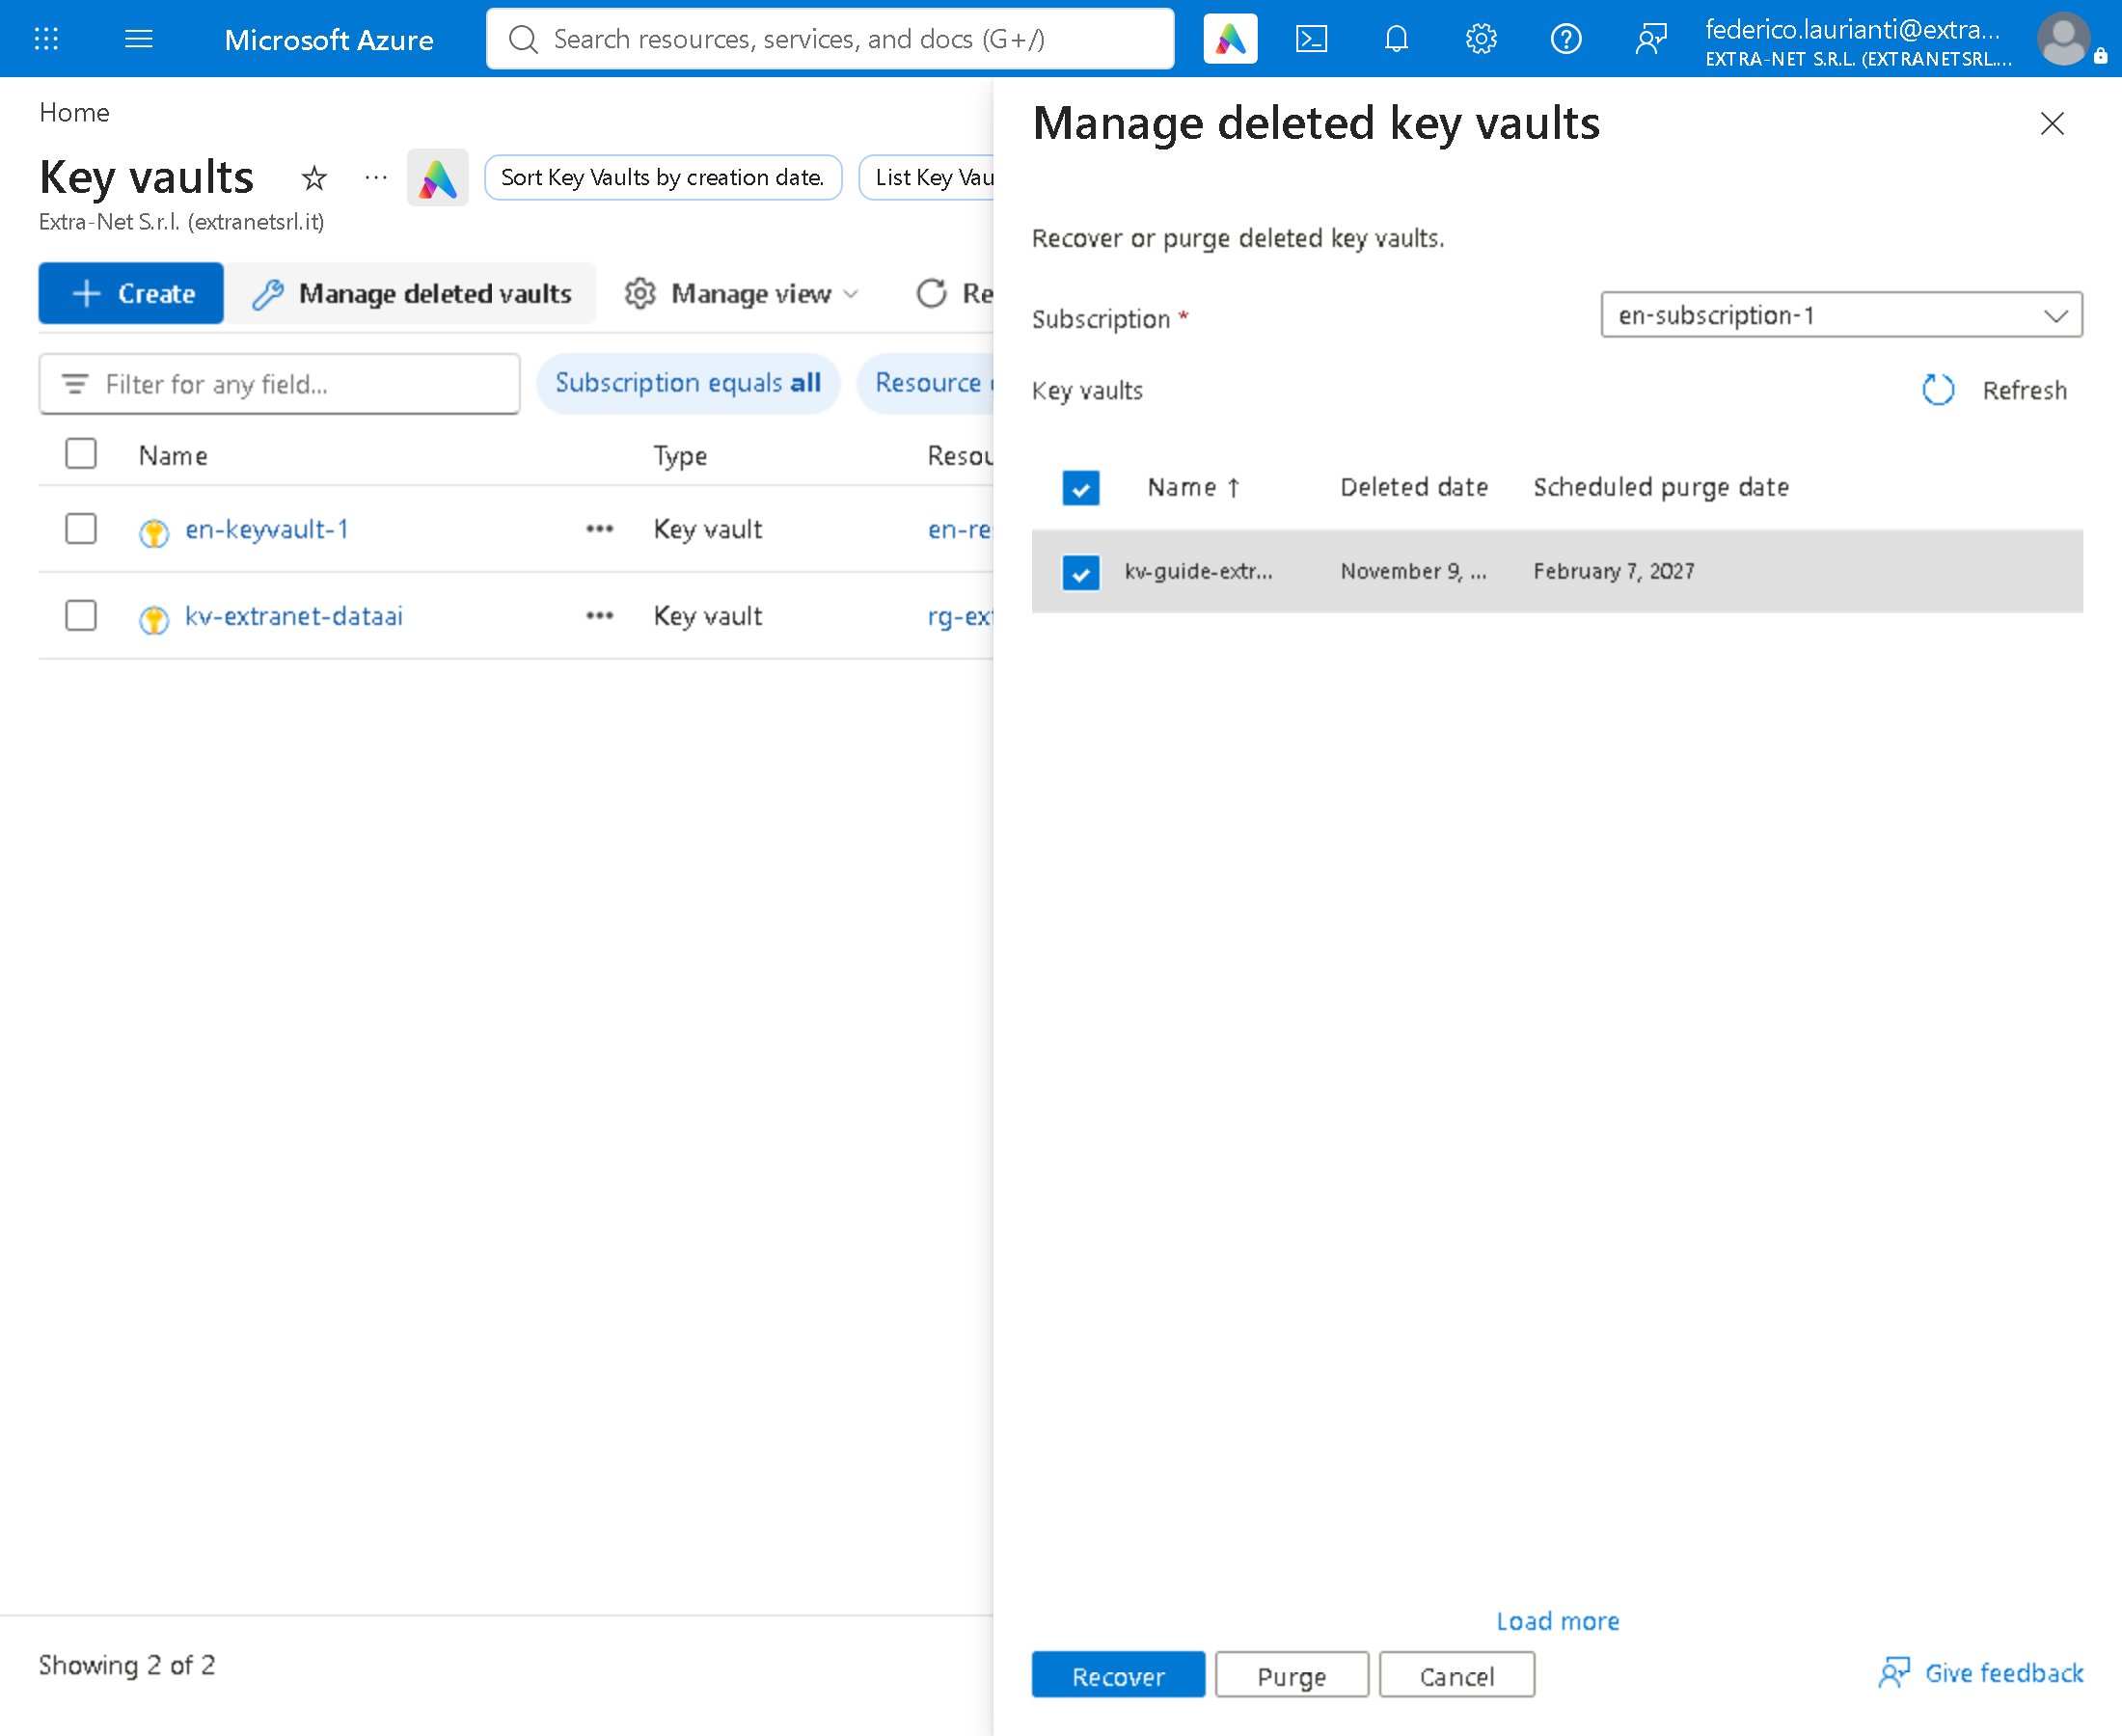
Press Purge and confirm with Delete: it can no longer be recovered.
Command names, screenshots and answers recorded on 9 November 2026, West Europe region, with .NET 10.0.401, Azure.Security.KeyVault.Secrets 4.12.0 and the Azure command-line interface 2.91.0.